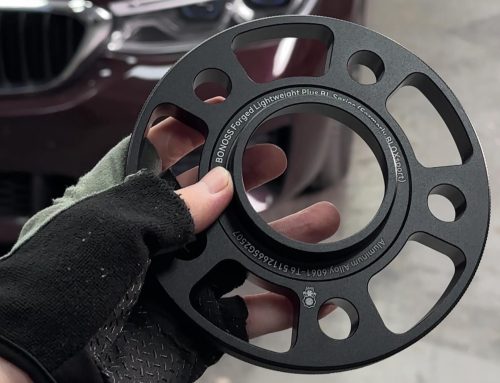
Range Rover Velar wheel spacers are devices that fit over the hub of a vehicle and increase the distance between the wheel and the hub in your Land Rover. They are used to improve the look, performance, and handling of a vehicle by widening the track width and reducing the offset of the wheels. Wheel spacers can also allow you to install larger or wider tires on your vehicle without any rubbing or interference.
If you own a Land Rover Range Rover Velar, you may want to install wheel spacers to enhance its appearance and performance. However, installing wheel spacers requires some knowledge and skills, as well as the right tools and equipment. In this post, we will teach you how to install Range Rover Velar wheel spacers safely and correctly.
Step 1: Choose the right Range Rover Velar wheel spacers for your Land Rover
Before you install wheel spacers, you need to ensure that they are suitable for your vehicle and your wheels. There are various types and sizes of wheel spacers on the market, so you need to do some homework and measurements before you purchase them.
The first thing you need to verify is the bolt pattern of your vehicle and your wheels. The bolt pattern is the number and layout of the lug nuts or bolts that secure the wheel to the hub. The Range Rover Velar has a bolt pattern of 5×108 mm, which means it has five lug nuts in a circle with a diameter of 108 mm. You need to look for wheel spacers that have the same bolt pattern, otherwise they will not work.
The second thing you need to verify is the center bore of your vehicle and your wheels. The center bore is the hole in the middle of the wheel that goes over the hub. The Range Rover Velar has a center bore of 63.3 mm, which means it has a hub diameter of 63.3 mm. You need to look for wheel spacers that have a center bore that matches or is slightly larger than this measurement, otherwise they will not work or cause vibration.
The third thing you need to verify is the thickness of the wheel spacers. The thickness determines how much more space you will create between the wheel and the hub. The thickness also affects the offset of the wheels, which is the distance from the centerline of the wheel to the mounting surface of the hub.
A positive offset means that the wheel is closer to the inside of the vehicle, while a negative offset means that the wheel is closer to the outside of the vehicle. A lower offset can improve the stability and cornering of the vehicle, but it can also cause rubbing or interference with other components.
The thickness of the wheel spacers depends on your personal preference and your vehicle specifications. You need to measure how much space you have between your wheels and your fenders, brakes, suspension, and other parts. You also need to consider how much offset change you want for your wheels. Generally speaking, you should not exceed a 10 mm offset change for safety reasons. There are different methods to measure the thickness of the wheel spacers you need, such as using a ruler, a caliper, or a test fit method. You can also consult online guides or calculators that can help you determine the best thickness for your vehicle and your wheels.
Some common sizes for Range Rover Velar wheel spacers are 2-inch (50 mm), 1-inch (25 mm), or 1.5-inch (38 mm) thicknesses. However, these are not standard values and may differ depending on your specific situation.
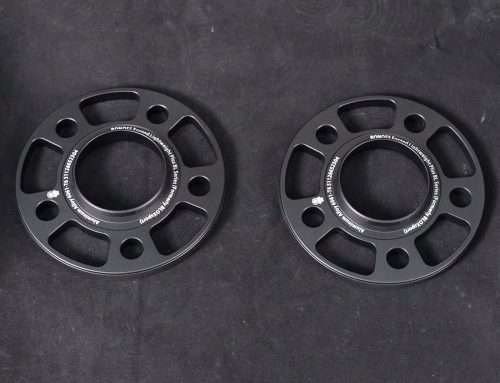
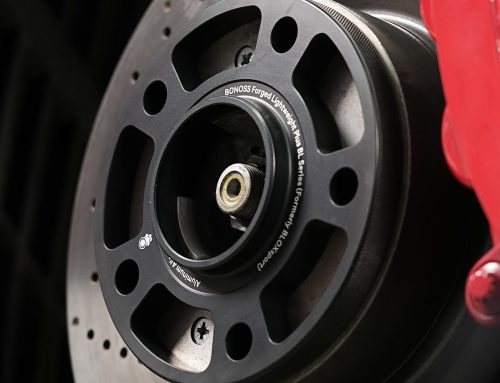
One example of a trustworthy brand that offers high-quality wheel spacers for Range Rover Velar is BONOSS. BONOSS wheel spacers are made of forged 7075-T6 aluminum alloy, which is stronger and lighter than ordinary materials. They also feature an active cooling design that helps dissipate heat and prevent corrosion. BONOSS wheel spacers are hub-centric, which means they fit snugly over the hub and eliminate any gap or vibration. BONOSS wheel spacers are available in various thicknesses from 15 mm to 50 mm, and they come with extended lug bolts or studs for easy installation.
Step 2: Gather the necessary tools and equipment for installing Range Rover Velar wheel spacers
After you have chosen the right wheel spacers for your Range Rover Velar, you need to gather some tools and equipment for installing them. Here is what you will need:
- A jack and jack stands or a lift
- A lug wrench or a socket wrench with an appropriate socket size
- A torque wrench
- A breaker bar
- A wire brush
- A thread locker
- A grease
- A rubber mallet
- A tape measure
- A level
- A marker
Step 3: Install the Range Rover Velar wheel spacers on your Land Rover
Now you are ready to install the wheel spacers on your vehicle. Here are the steps to follow:
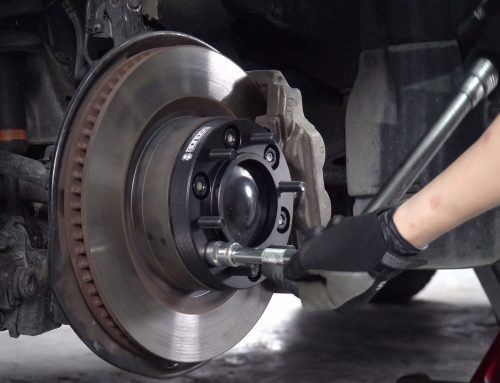
- Align the wheel spacers with the hub and the lug bolts or studs. Make sure the center bore of the wheel spacers matches the center bore of the hub, and the bolt pattern of the wheel spacers matches the bolt pattern of the hub.
- Push the wheel spacers onto the hub and make sure they are flush and snug. You may need to use a rubber mallet to tap them gently into place.
- Tighten the lug bolts or nuts that came with the wheel spacers by hand. Make sure they are evenly and securely fastened.
- Use a torque wrench to tighten the lug bolts or nuts to the recommended torque specification. You can find the torque specification in your vehicle owner’s manual or online. Do not over-tighten or under-tighten them, as this may cause damage or safety issues.
- Repeat the same process for the other wheels that you want to install the wheel spacers on.
Step 4: Reinstall the wheels and check the fitment of Range Rover Velar wheel spacers
After you have installed the wheel spacers on your vehicle, you need to reinstall the wheels and check the fitment of the wheel spacers. Here are the steps to follow:
- Align the wheels with the wheel spacers and the lug bolts or studs. Make sure the center bore of the wheels matches the center bore of the wheel spacers, and the bolt pattern of the wheels matches the bolt pattern of the wheel spacers.
- Push the wheels onto the wheel spacers and make sure they are flush and snug. You may need to use a rubber mallet to tap them gently into place.
- Tighten the lug nuts or bolts that came with your wheels by hand. Make sure they are evenly and securely fastened.
- Use a torque wrench to tighten the lug nuts or bolts to the recommended torque specification. You can find the torque specification in your vehicle owner’s manual or online. Do not over-tighten or under-tighten them, as this may cause damage or safety issues.
- Lower your vehicle from the jack stands or lift and remove them. Make sure your vehicle is stable and level on the ground.
- Check the fitment of the wheel spacers by measuring how much space you have between your wheels and your fenders, brakes, suspension, and other parts. You can use a tape measure, a level, and a marker to do this. Make sure there is no rubbing or interference with any components, and that there is enough clearance for steering and suspension travel.
- If you notice any rubbing or interference, you may need to adjust your wheel spacers by changing their thickness, trimming your fenders, or modifying other parts. If you are not sure how to do this, you may want to consult a professional mechanic or a wheel spacer expert.
Step 5: Test drive your vehicle and enjoy your new look and performance
After you have installed and checked your wheel spacers, you need to test drive your vehicle and enjoy your new look and performance. Here are some tips to follow:
- Drive slowly and carefully at first, and pay attention to any unusual noises, vibrations, or handling issues. If you notice any problems, stop immediately and check your wheel spacers for any loose or damaged parts. If you cannot fix them yourself, seek professional help as soon as possible.
- Check your lug nuts or bolts periodically for any signs of loosening or wear. You can use a torque wrench to check their tightness and adjust them if needed. You should also check them after every 100 miles (160 km) of driving for the first few times, and then every 3000 miles (4800 km) thereafter.
- Enjoy your new look and performance! Wheel spacers can make your Range Rover Velar look more aggressive and sporty, as well as improve its stability and cornering. You may also notice improved traction, braking, and acceleration with wider tires.

Where to buy quality Range Rover Velar wheel spacers?
If you want to buy wheel spacers for your Range Rover Velar, you need to be careful about the brand and model you choose. Some wheel spacers on the market may not fit your car well, or may have low quality and performance. They may cause safety and satisfaction issues for you. That’s why I suggest you go for BONOSS Range Rover Velar wheel spacers. They have excellent performance, fitment and design.
Performance: BONOSS Range Rover Velar wheel spacers are made of one-piece forged billet aluminum, which is very strong and durable. The spacer body uses aerospace grade 7075-T6 or 6061-T6; the wheel studs are ISO grade 12.9. SGS and TUV, two authoritative certification institutions in this field, have fully verified the performances of BONOSS Range Rover Velar wheel spacers. You can trust that they will not bend or break.
Fitment: BONOSS Range Rover Velar wheel spacers can match the hub better than other wheel spacers. They are processed based on the accurate measurements of the hub bore and bolt pattern. They can fit the hub snugly.
Design: BONOSS Range Rover Velar wheel spacers have several global patented designs. One famous is active cooling structure, which can enhance the cooling efficiency and reduce brake thermal decay by creating heat dissipation grooves behind the spacers. You can get quality wheel spacers with more functions at a reasonable price.


