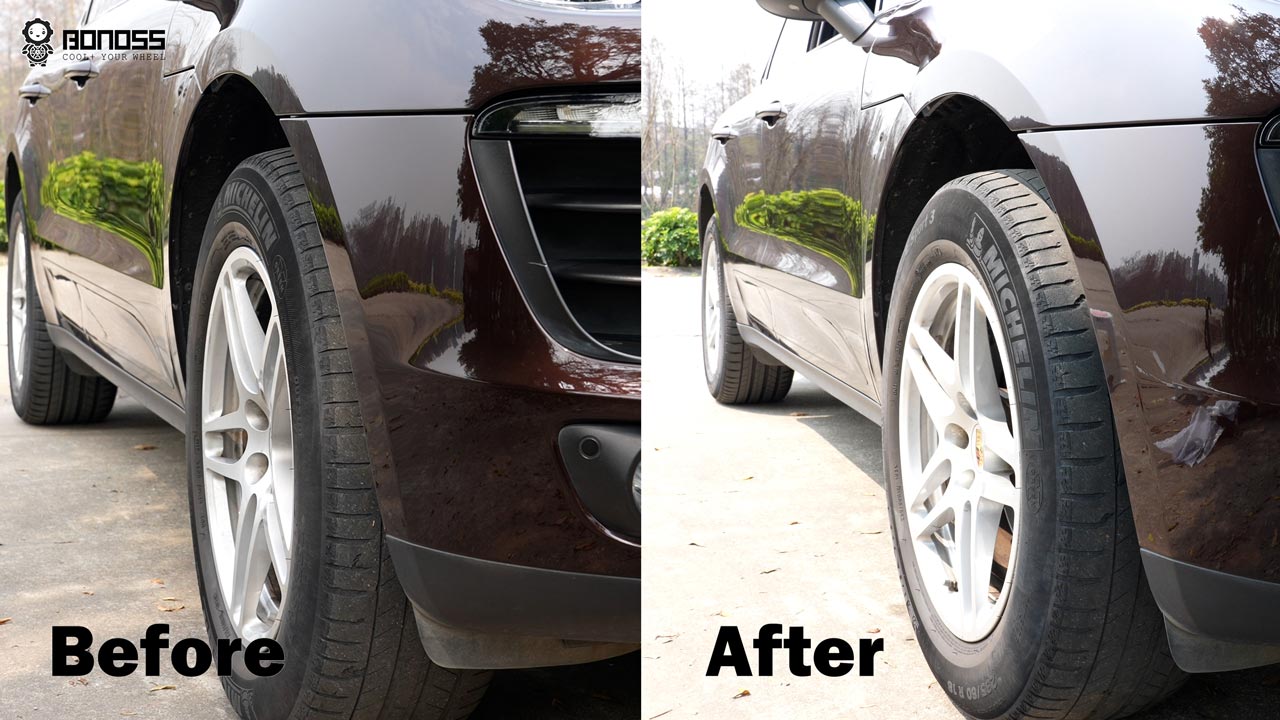
12mm wheel spacers are small things but make a big difference. Spacing out the wheels would really enhance the appearance and handling. While the installation process is simple and most knowledgeable customers can install themselves, we recommend installing in a professional tire shop especially if it’s your first time installing these parts. If you would like a DIY, the installation reference below may help you go through every step. Firstly, prepare some hand tools and a place to lift your car.
Items you’ll need: Floor jack, Jack stands, Lug wrench, Lug socket, Torque wrench, Degreaser (Optional), Emery cloth (Optional)
1. Lift Your Car Safely
Pack your car on a level surface, apply the parking brake and then remove the key. Then loosen all the lug bolts in a “Star” shape pattern but do not fully remove them. Then lift the car with a floor jack until the wheel is in the air. Remember to place jack stands to support each end of the car.
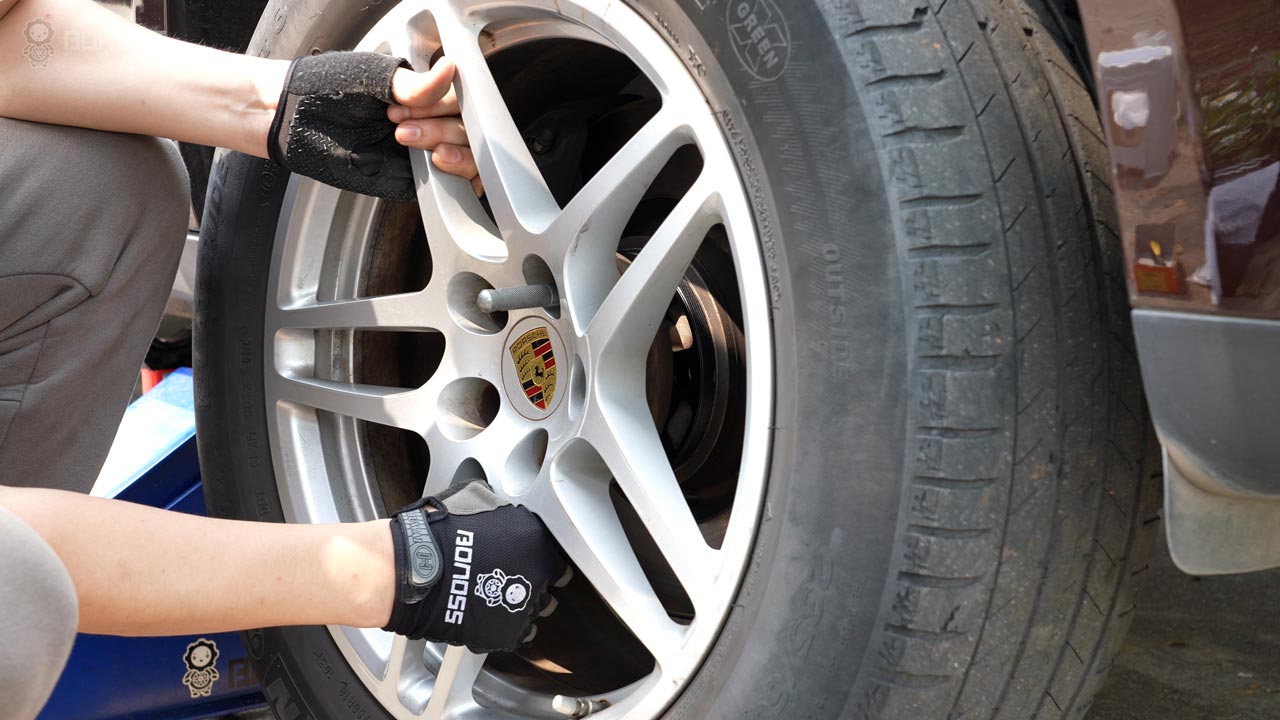
2. Remove the Wheel
Finish removing all the lug bolts on the raised wheel. Hold the wheel with your hands to prevent a sudden drop and slowly slide it off the hub and set it to the side for a short while.
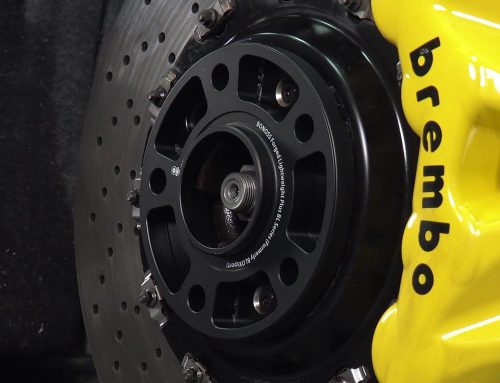
3. Clean the Vehicle Hub
Spray degreaser on the brake rotor. If the hub is dirty, rusted, or pitted use the emery cloth to clean up the surface. Wipe down the entire hub surface, ensuring it is clean and smooth. This needs to be done thoroughly. Any rust that exists will cause the spacer to be installed not completely parallel to the hub.
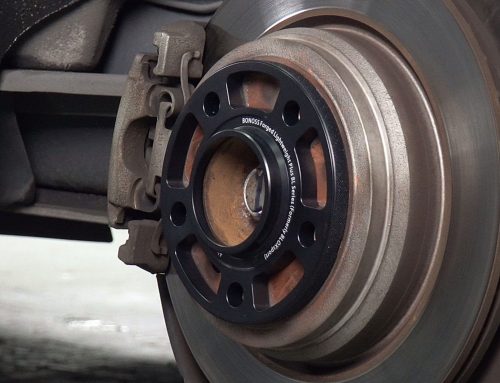
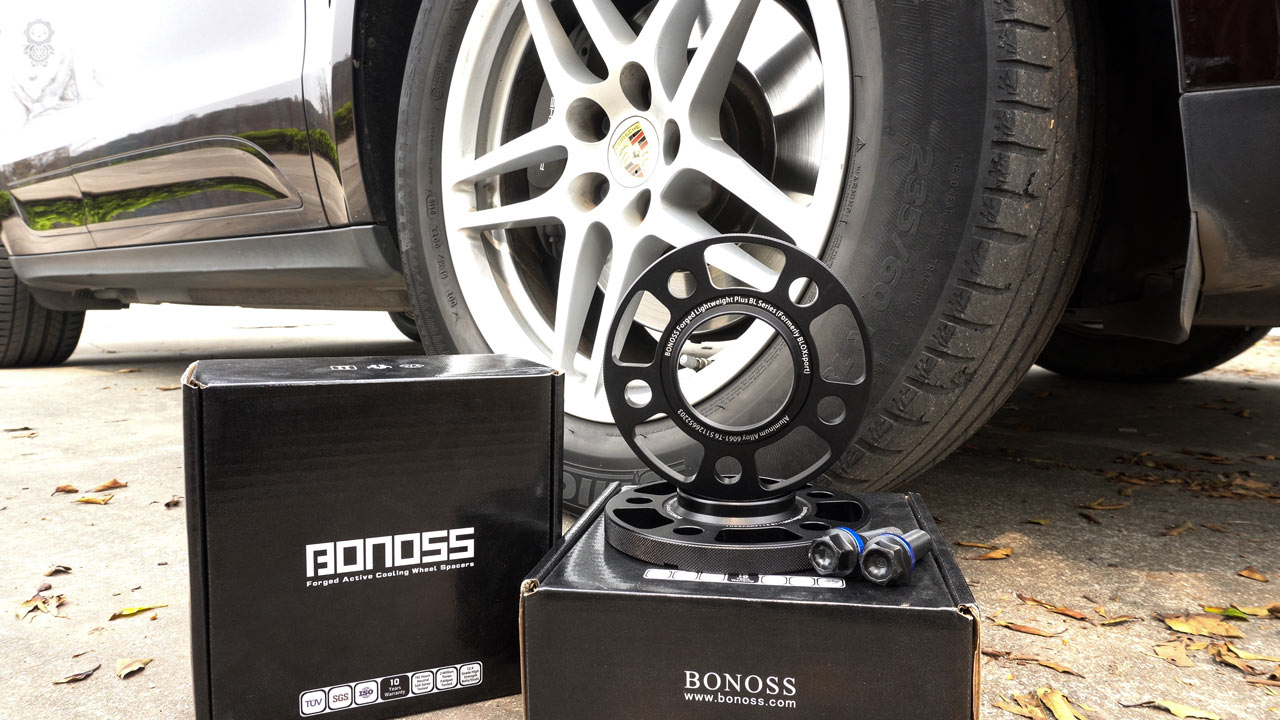
4. Install the 12mm Wheel Spacers
Place the wheel spacer on the hub and align the lug holes. A wheel hanger will be very useful at that time. Test if the spacer fits your vehicle hub and all the lug holes are aligned. You can slightly shake the spacer to check if it is firmly seated and flush against the hub.
5. Properly Mount the Wheel
Install the wheel onto the spacer and ensure all the lug holes are aligned. Secure the wheel with extended wheel bolts by hand, but do not torque the extended bolts fully. Just put them in place and fasten them a bit. Repeat this step with the rest of the extended lug bolts.
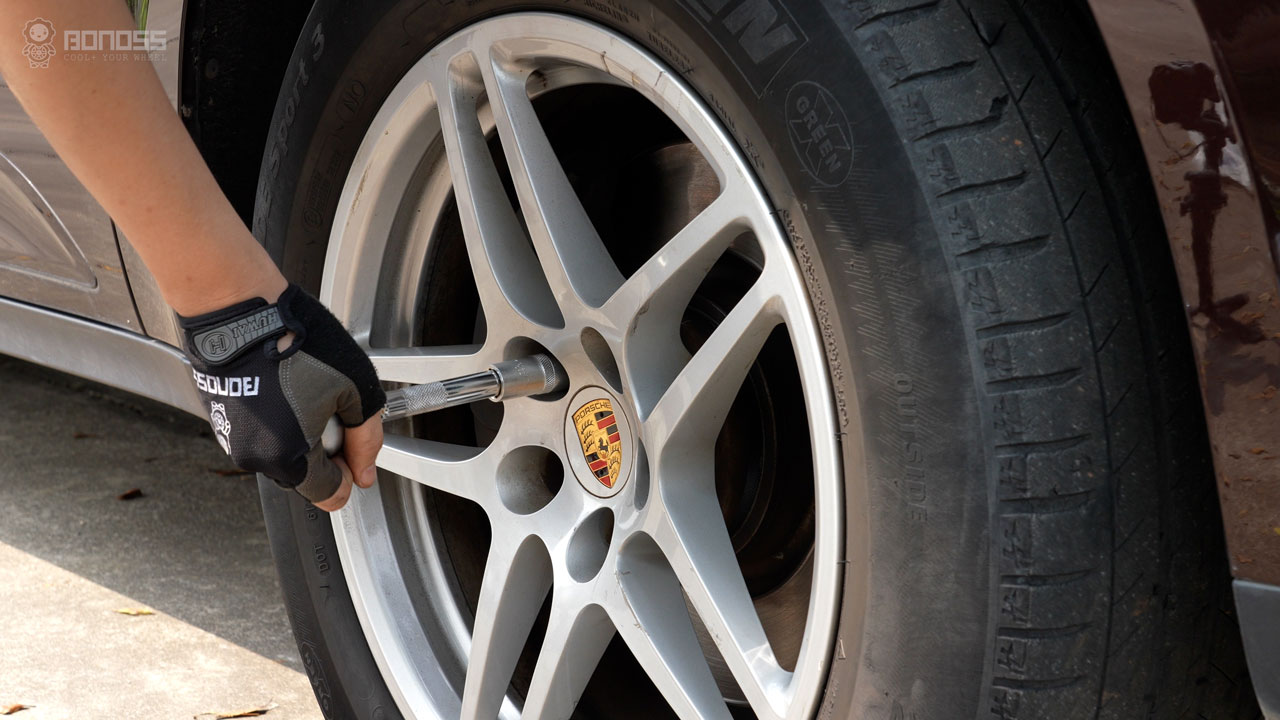
6. Torque the Wheel Bolts Correctly
Remove the jack stands. Lower the car slowly until the wheel is in full contact with the ground, and then remove the jack. Use a torque wrench with the manufacturer-recommended torque specification to snug up the wheel bolts in a star pattern to ensure that the load is applied evenly. But do not overtighten the bolts.
7. Repeat 1 – 6 Steps
Then you successfully finish installing a 12mm wheel spacer for one wheel. Now repeat 1 – 6 steps for the rest wheels.
8. Regularly Check the Wheel Bolts
It is highly recommended that get your new wheel bolts re-torqued to the manufacturer’s recommended values after driving approximately 50 to 100 miles. This usually applies after you’ve had fully disassembled the wheels recently. If there is a lug bolt loose, you will notice something unusual at that time (like a vibration or noise). Retighten them immediately.