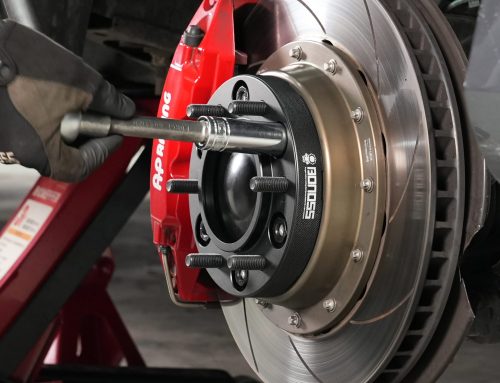
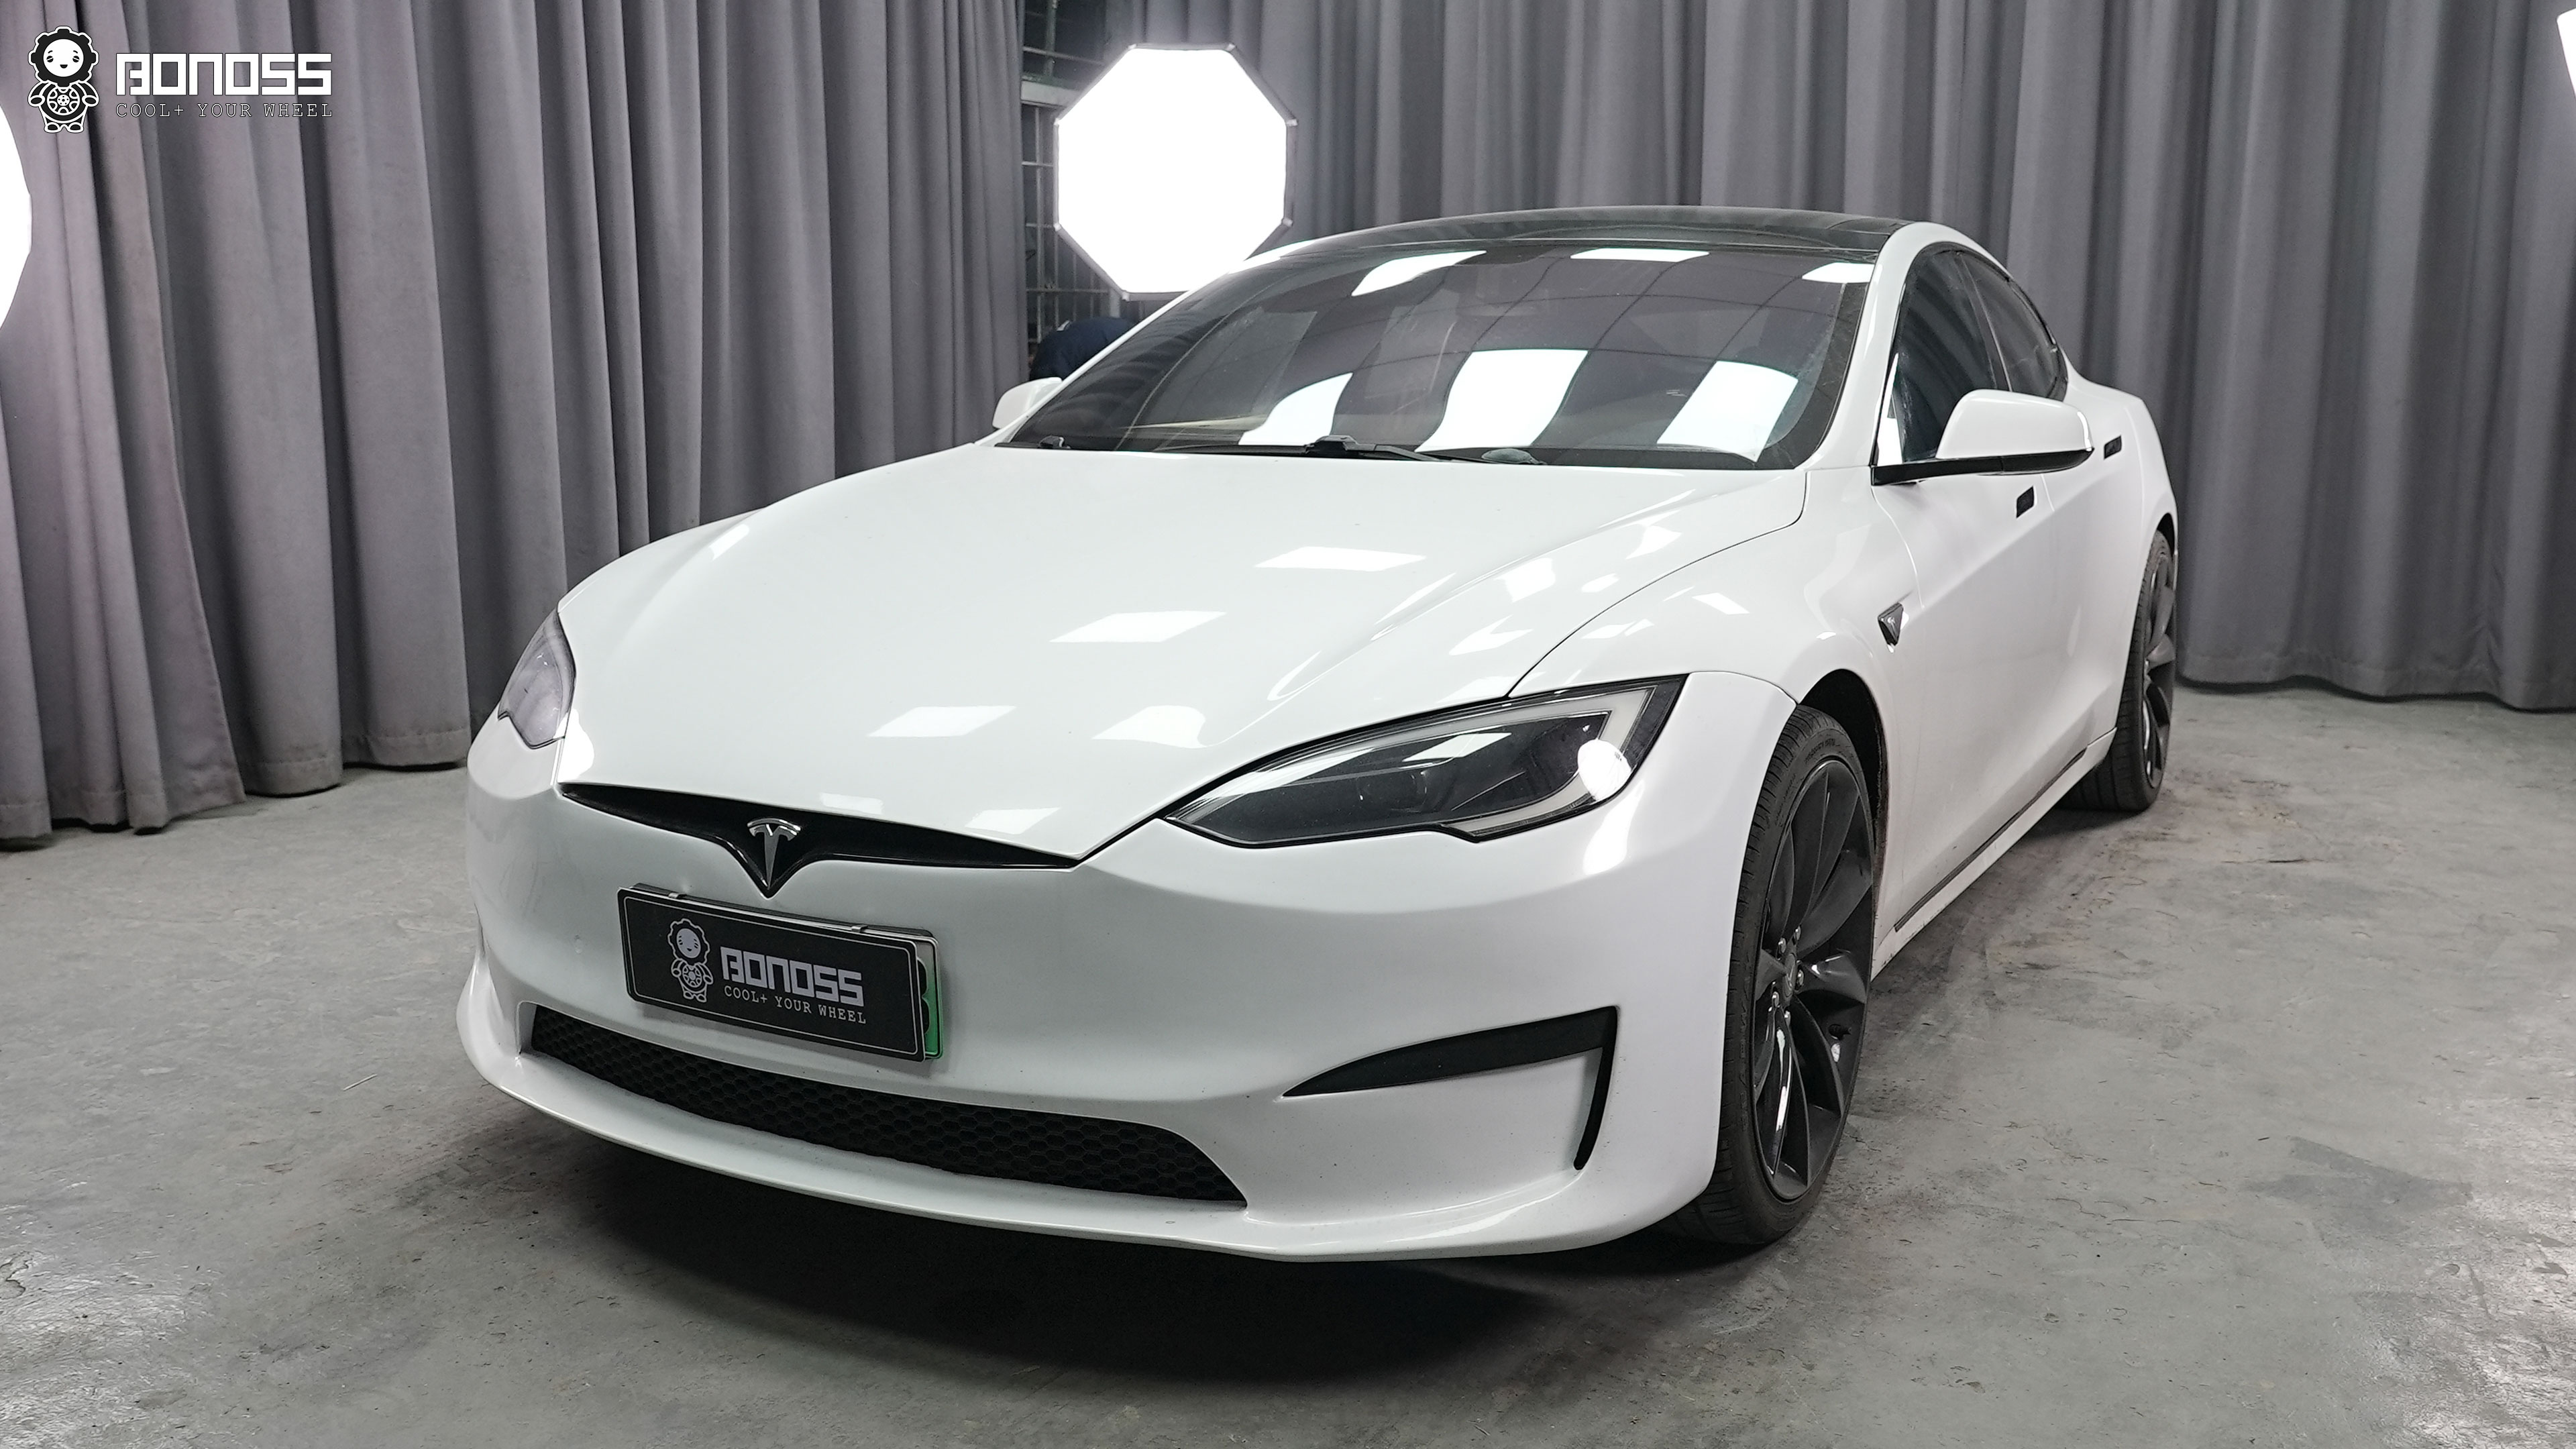
Daniel Green did not want a new set of wheels for his 2014 Tesla Model S P85. He wanted the original 21-inch wheels to sit flush with the fenders, without turning an otherwise stock car into a suspension project. The answer was a measured split setup: 2014 Tesla Model S 20mm spacers in front and 30mm spacers at the rear. Installed on March 6, 2024, they changed the effective offset from ET40 to ET20 up front and ET10 at the rear.
The more useful result came later. After 23,846 miles, Daniel reported no steering-wheel shake, no tire scrubbing, no unusual noises, and no visible cracking. That does not turn one car into a universal safety guarantee. It does show how the right measurements, clean mounting faces, correct fasteners, and separate torque procedures come together on a real daily-driven P85.
Spec Quick Reference
| Item | This 2014 Tesla Model S P85 |
|---|---|
| Vehicle condition | Stock, with OEM wheels retained |
| OEM wheel and tire configuration | 245/35ZR21, ET40 stock offset |
| Bolt pattern | 5x120mm |
| Nominal hub bore | 64.1mm |
| Thread and seat | M14x1.5, conical seat |
| Spacer thickness | Front 20mm; rear 30mm |
| Effective offset after installation | Front ET20; rear ET10 |
| Spacer material | Forged 6061-T6 aluminum |
| Spacer fasteners | ISO Grade 12.9 studs and ISO Grade 10 nuts |
| Spacer-to-hub torque | 140 Nm (103.5 ft-lb) with BONOSS-supplied nuts, per BONOSS installation instructions |
| Wheel-to-spacer torque | 175 Nm (129 ft-lb) with factory wheel nuts, per the owner’s manual |
| Installation date | March 6, 2024 |
| Owner-reported distance since installation | 23,846 miles |
These are two fastening operations, not two optional settings for one nut. Use one torque value for each complete operation: 140 Nm for the BONOSS nuts that secure each spacer to the vehicle, and 175 Nm for the factory nuts that secure each wheel to the spacer. Never blend, average, or interchange those values.
For readers still sorting out offset, bore, and thickness terminology, the Tesla Model S wheel spacer fitment and value guide covers the broader parameter questions. This case stays with what was measured and installed on Daniel’s car.
The Stance Goal: Keep the P85 Stock, Remove the Inset
The P85 badge identifies this early performance version of the first-generation Model S. Daniel’s car remained mechanically stock. There were no lowering springs, coilovers, aftermarket wheels, or tire-size changes hiding behind the result. That makes the photographic comparison unusually clean: the spacer thickness is the only fitment variable.
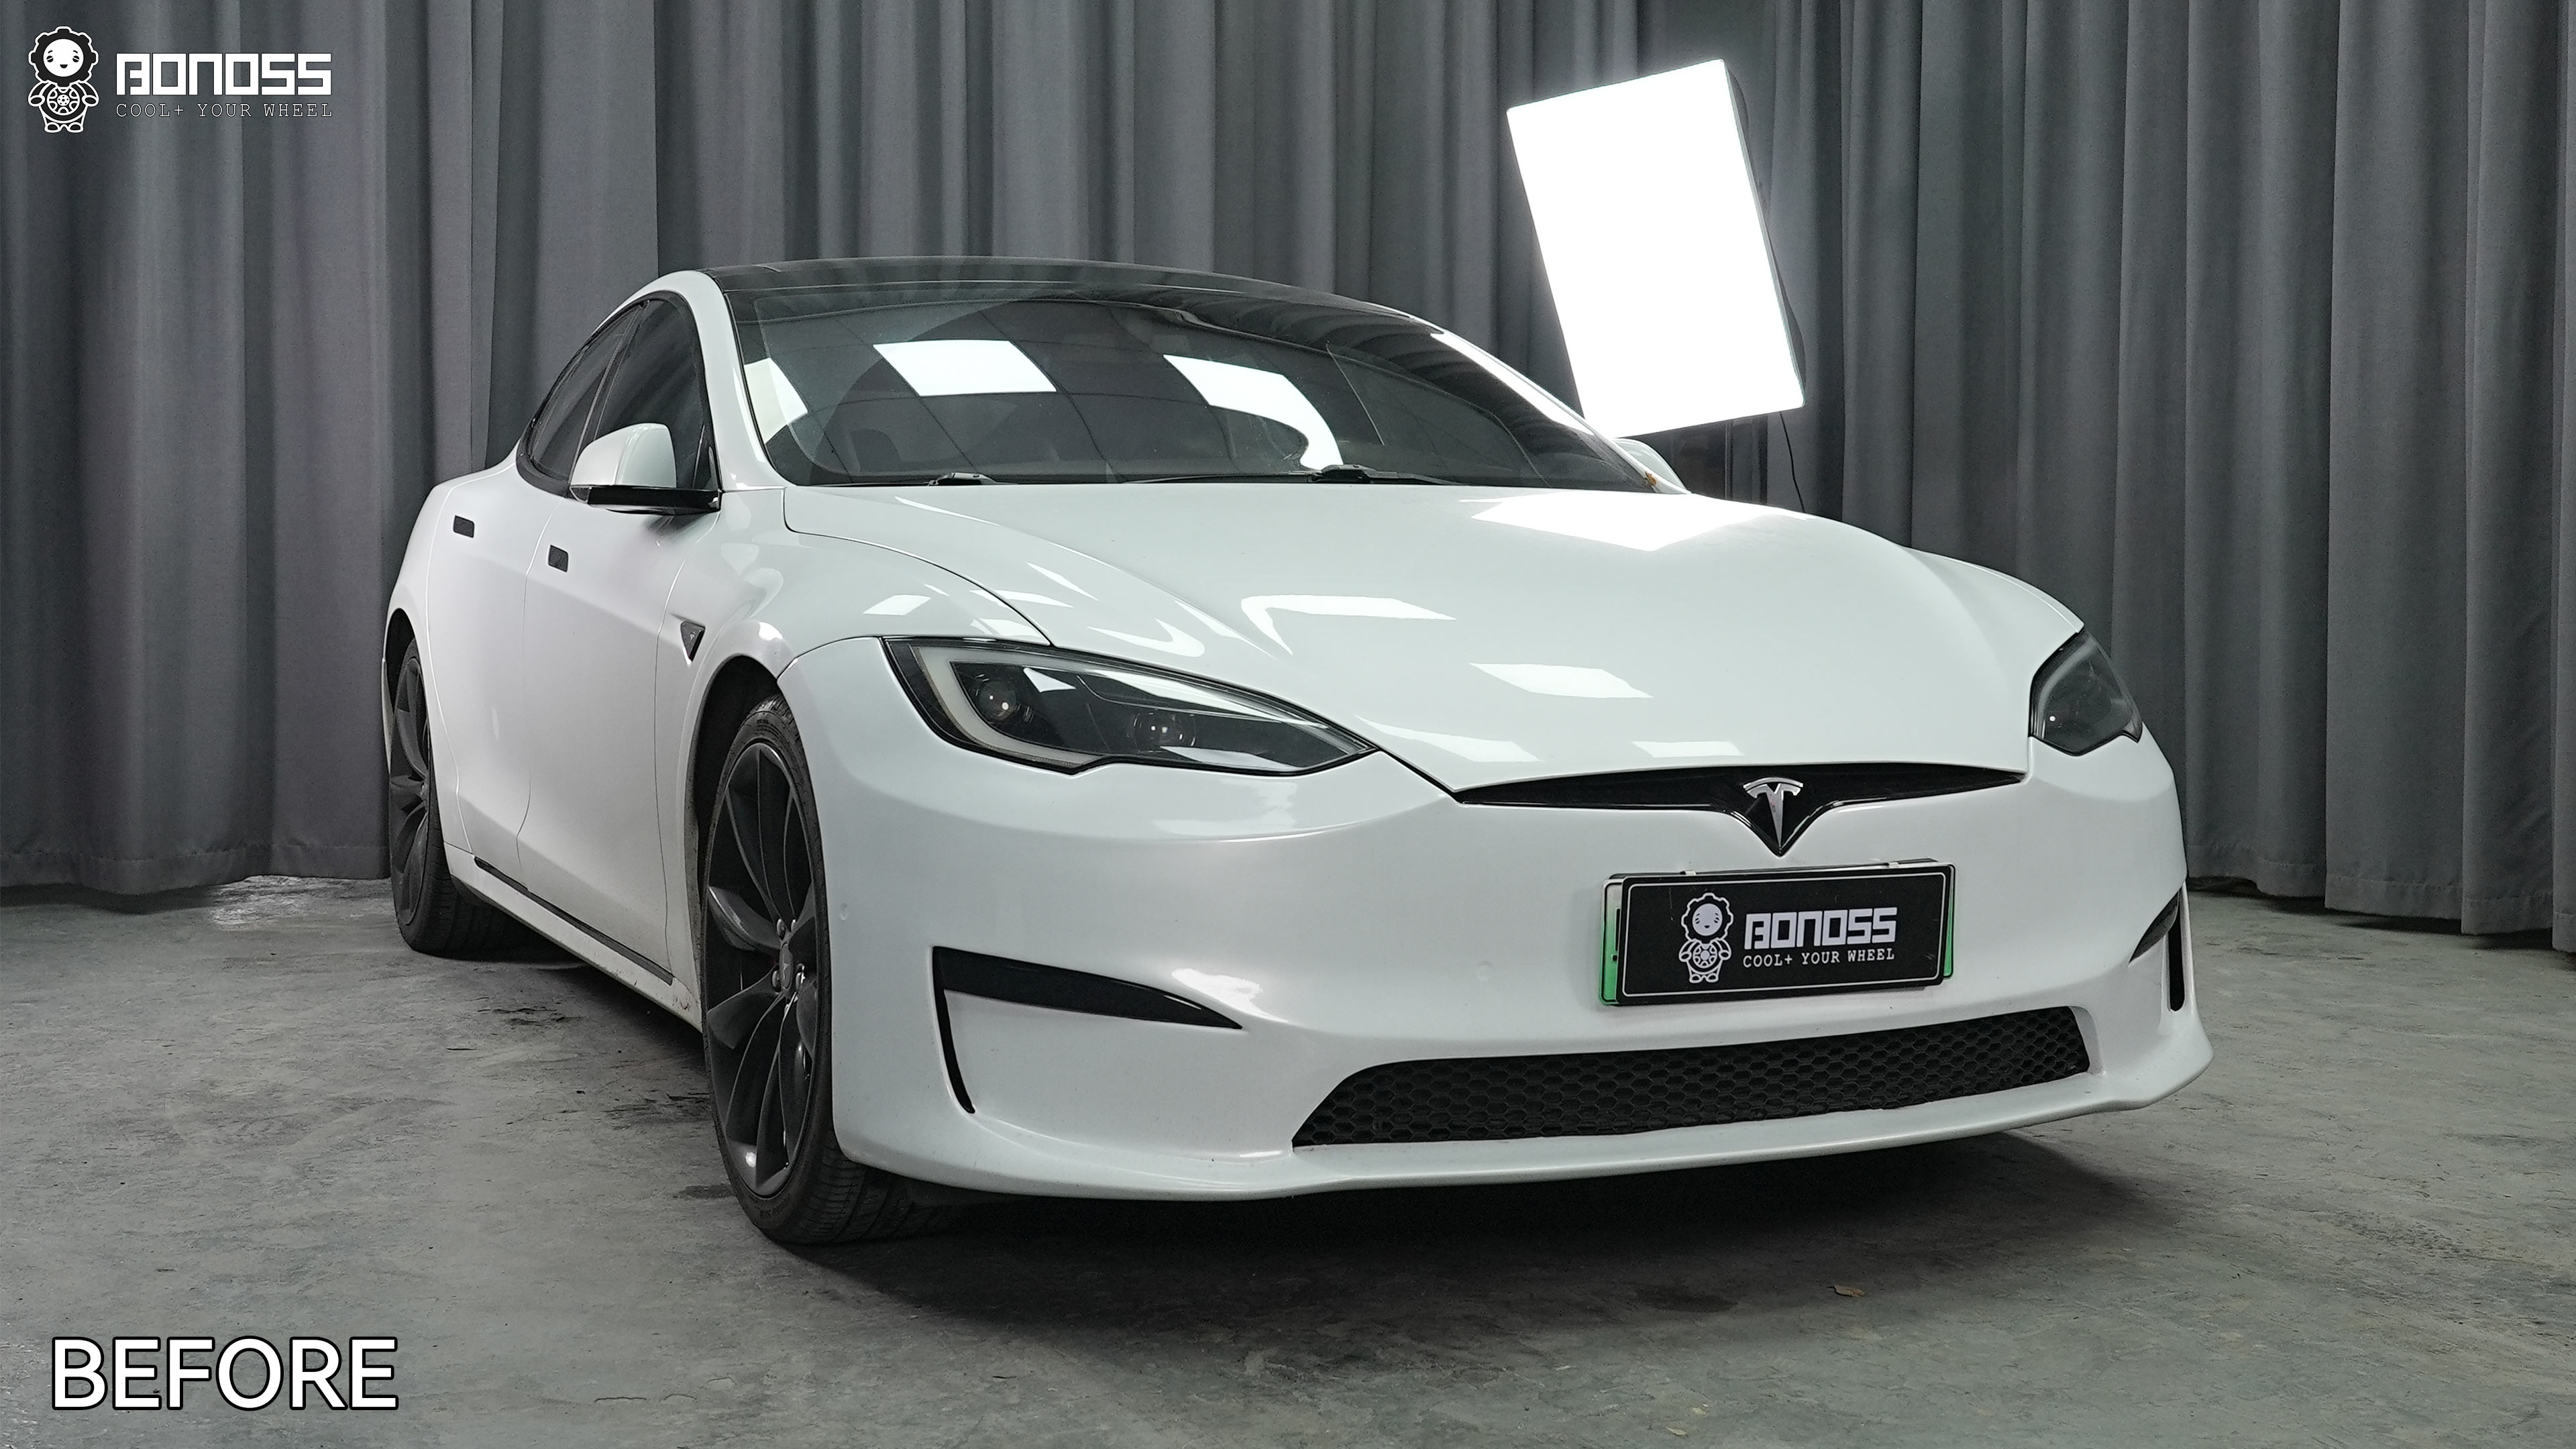
His target was a flush stance, not a wheel pushed beyond the bodywork. A flush setup places the wheel face closer to the fender line while preserving clearance through normal suspension and steering movement. Go too conservative and the visual inset remains. Go too far and a tidy appearance can become a rubbing problem.
BONOSS staff measured the wheel fender clearance with a high-accuracy ruler rather than choosing a common thickness by eye. The left-front reading supported a 20mm spacer. The right-rear reading supported 30mm. Different front and rear values are not a mistake; they reflect the fact that the two ends of the car did not need identical outward movement.
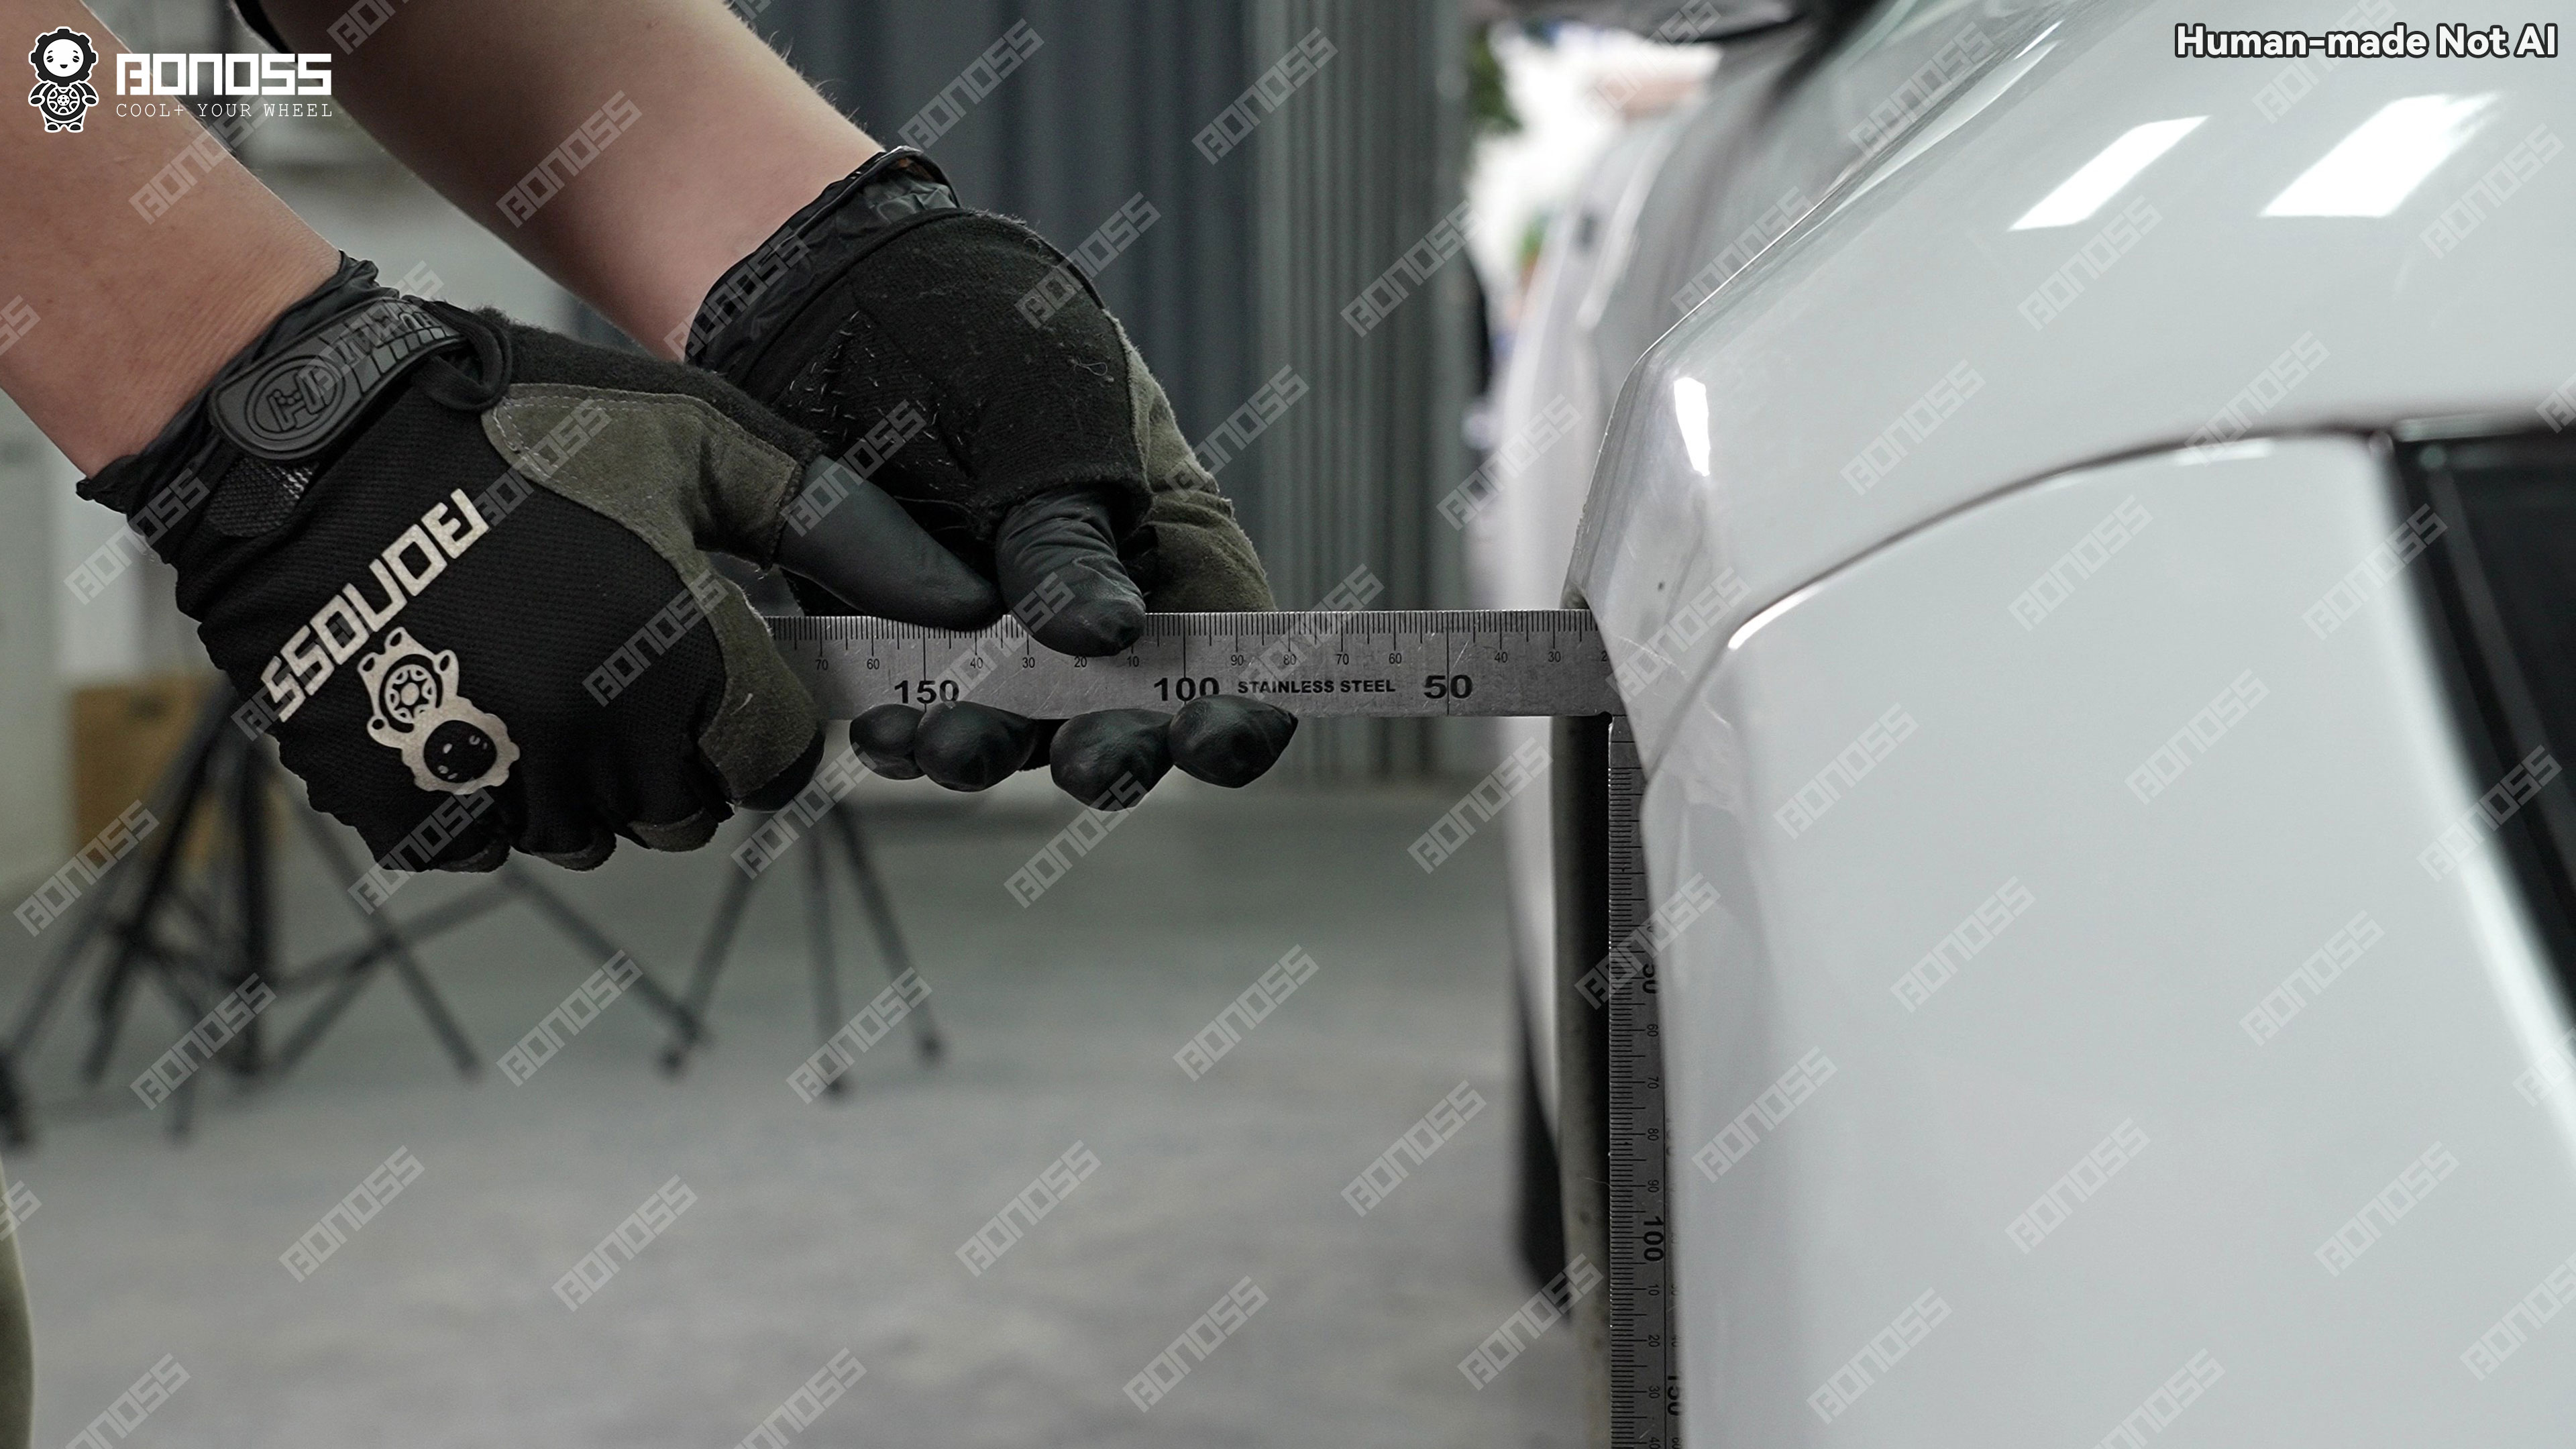
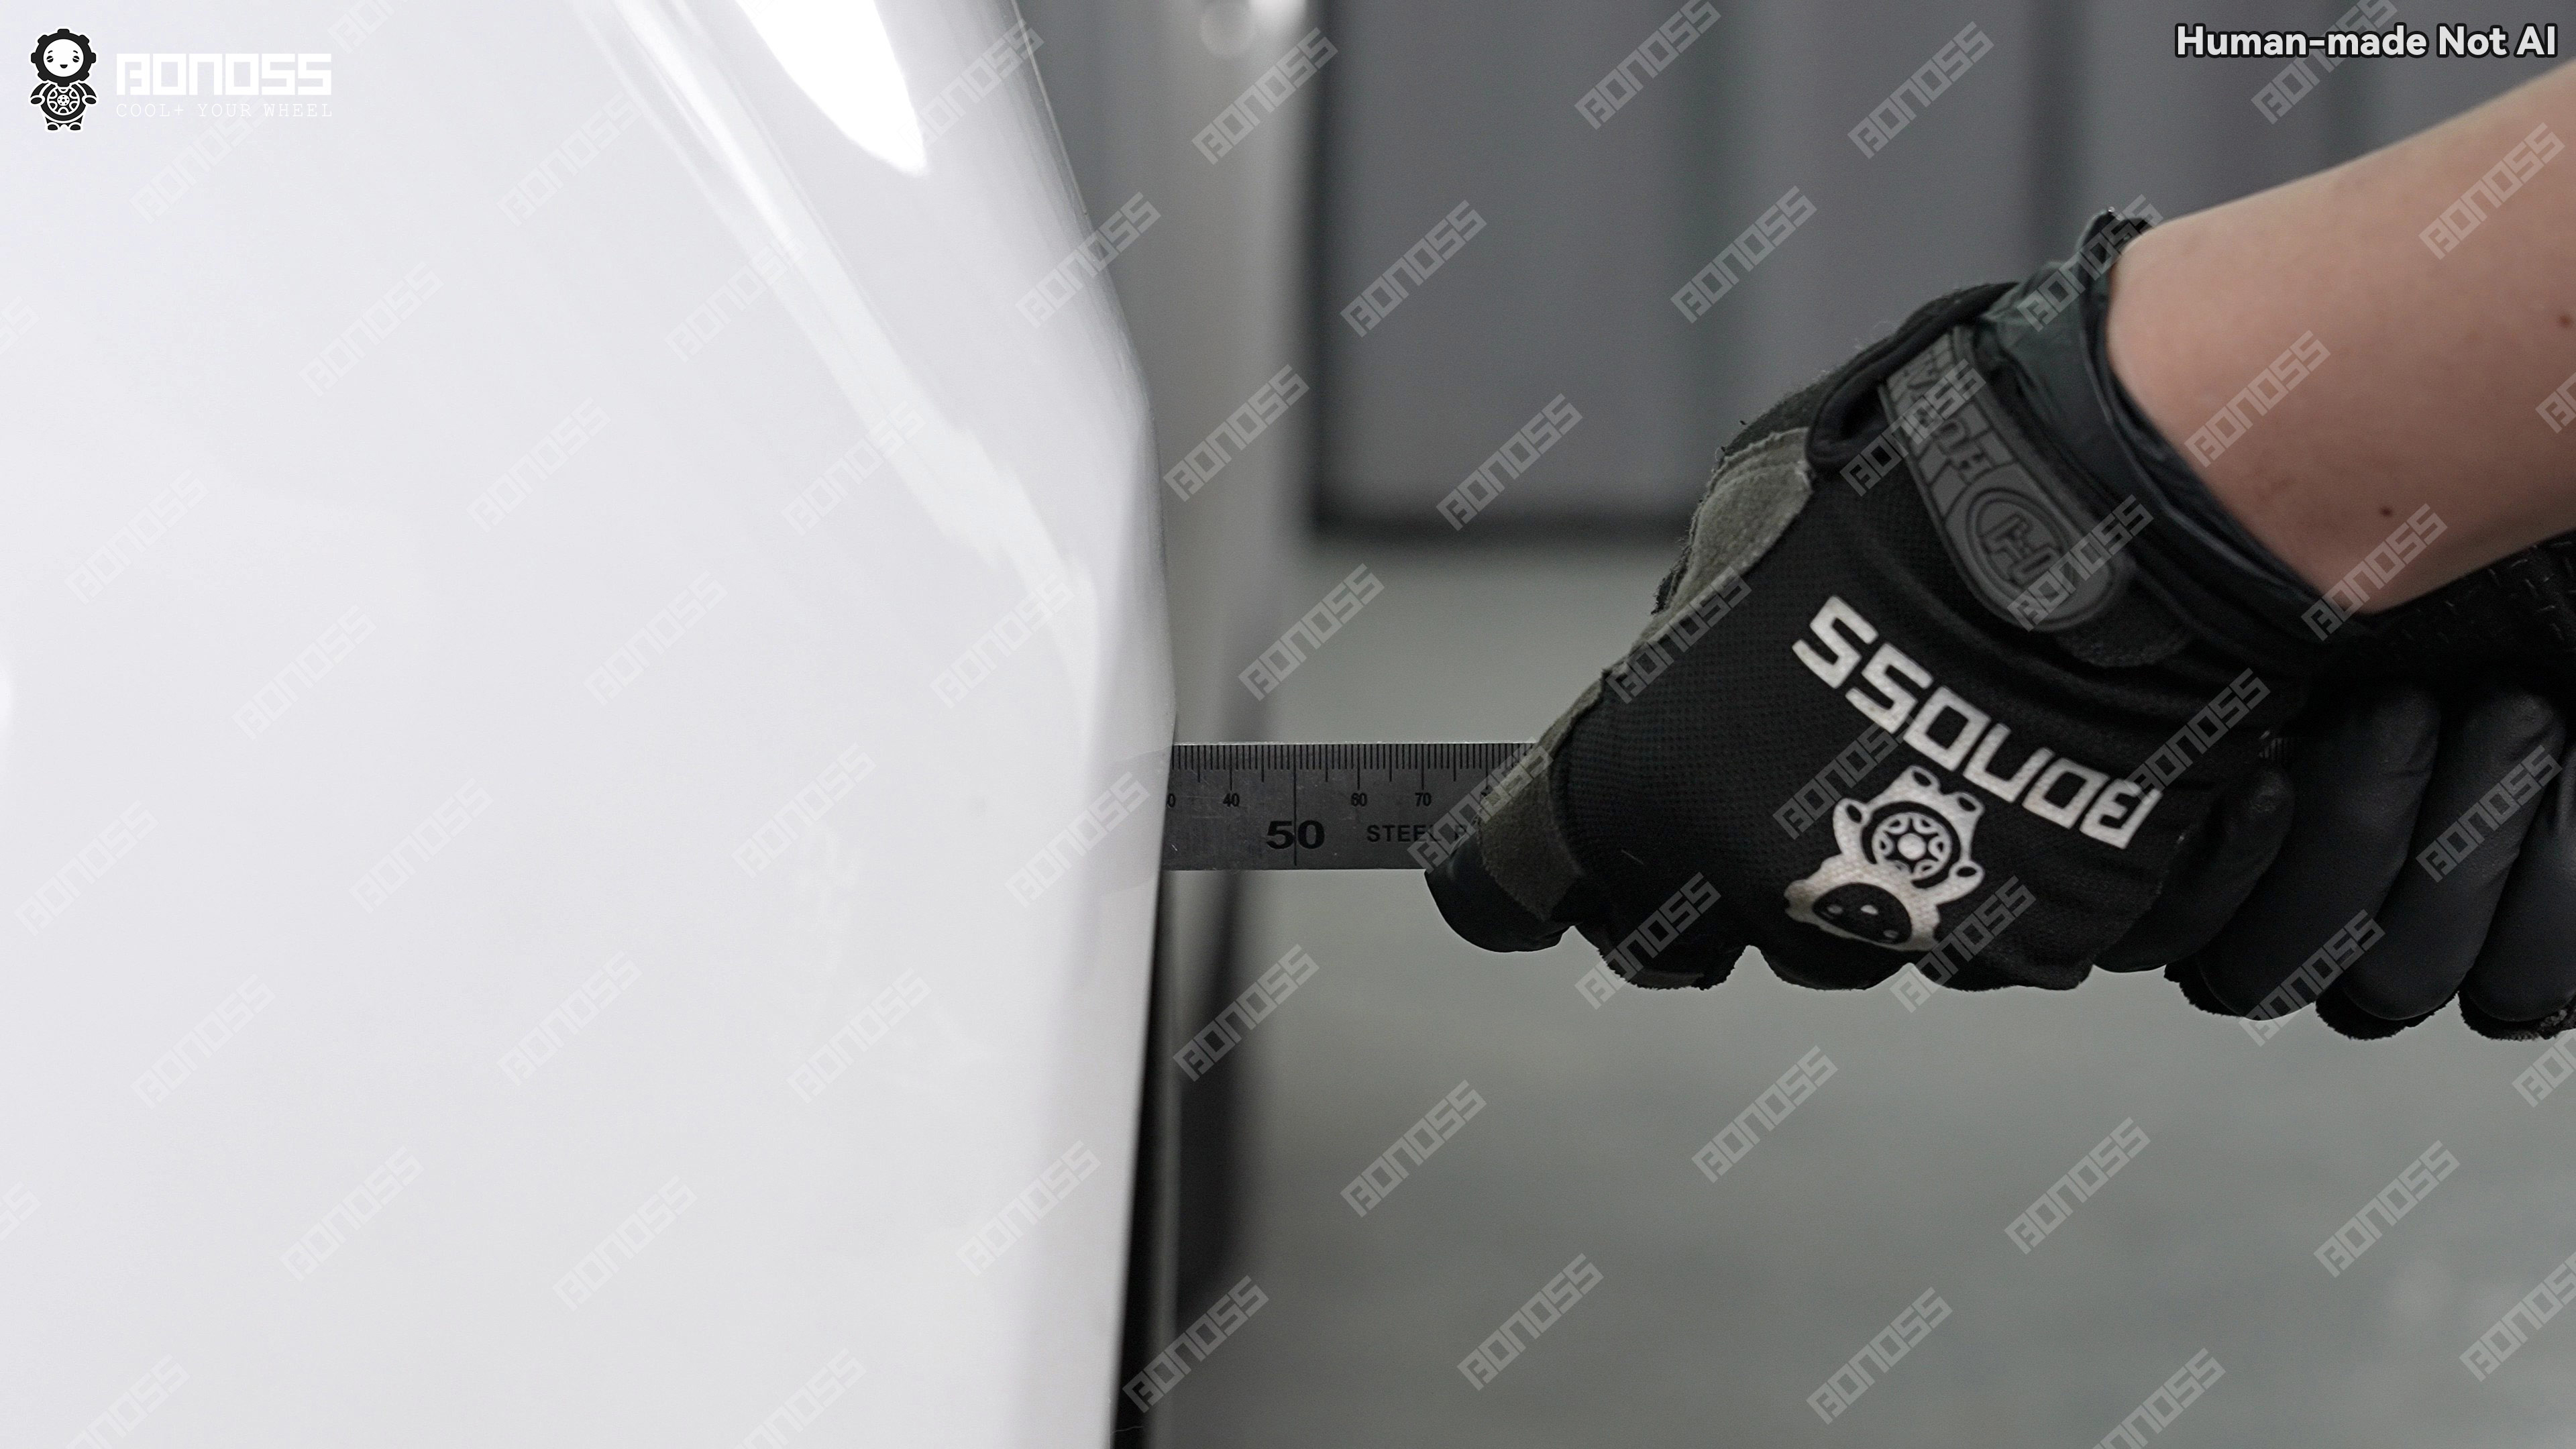
That is the first useful lesson for anyone researching Model S spacers for flush fitment. The correct thickness starts with the actual car, its original wheel offset, and the available fender gap. A photograph of another Model S can establish a style preference, but it cannot supply your measurements.
The Whole Plan Was One Modification, Done in the Right Order
A stance build often involves several parts. This one deliberately did not. The factory 245/35ZR21 tires and ET40 wheels stayed. Ride height stayed. The 5×120 wheel spacers Tesla Model S owners often ask about simply moved each original wheel outward by a selected amount.
The offset arithmetic is direct. Adding a 20mm spacer to an ET40 wheel reduces effective offset to ET20. Adding a 30mm spacer reduces it to ET10. Track width increases by twice the spacer thickness at that axle: 40mm across the front and 60mm across the rear, before considering any tire or alignment effects. Those are geometric changes, not claims about improved handling.
The work order mattered more than the parts list:
- Measure fender clearance and choose front and rear thicknesses separately.
- Inspect the hub pilot, stock stud projection, and wheel mounting pockets.
- Verify the hub-centric interfaces on both sides of each spacer.
- Clean the axle hubs completely.
- Install and torque the spacers, then install and torque the wheels as two distinct operations.
- Evaluate the stance and monitor the car in real driving.
This sequence prevented the most common bad purchase in this kind of project: ordering a thickness first and discovering the mechanical constraints afterward.
Why 20mm Worked Without Cutting the Factory Studs
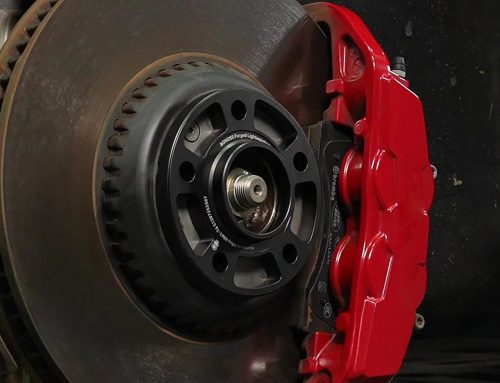
A bolt-on spacer occupies space between the axle hub and wheel. If the factory studs project beyond that spacer, they need somewhere to go. Many OEM wheels have recessed pockets on the back face, but their depth must be measured rather than assumed.
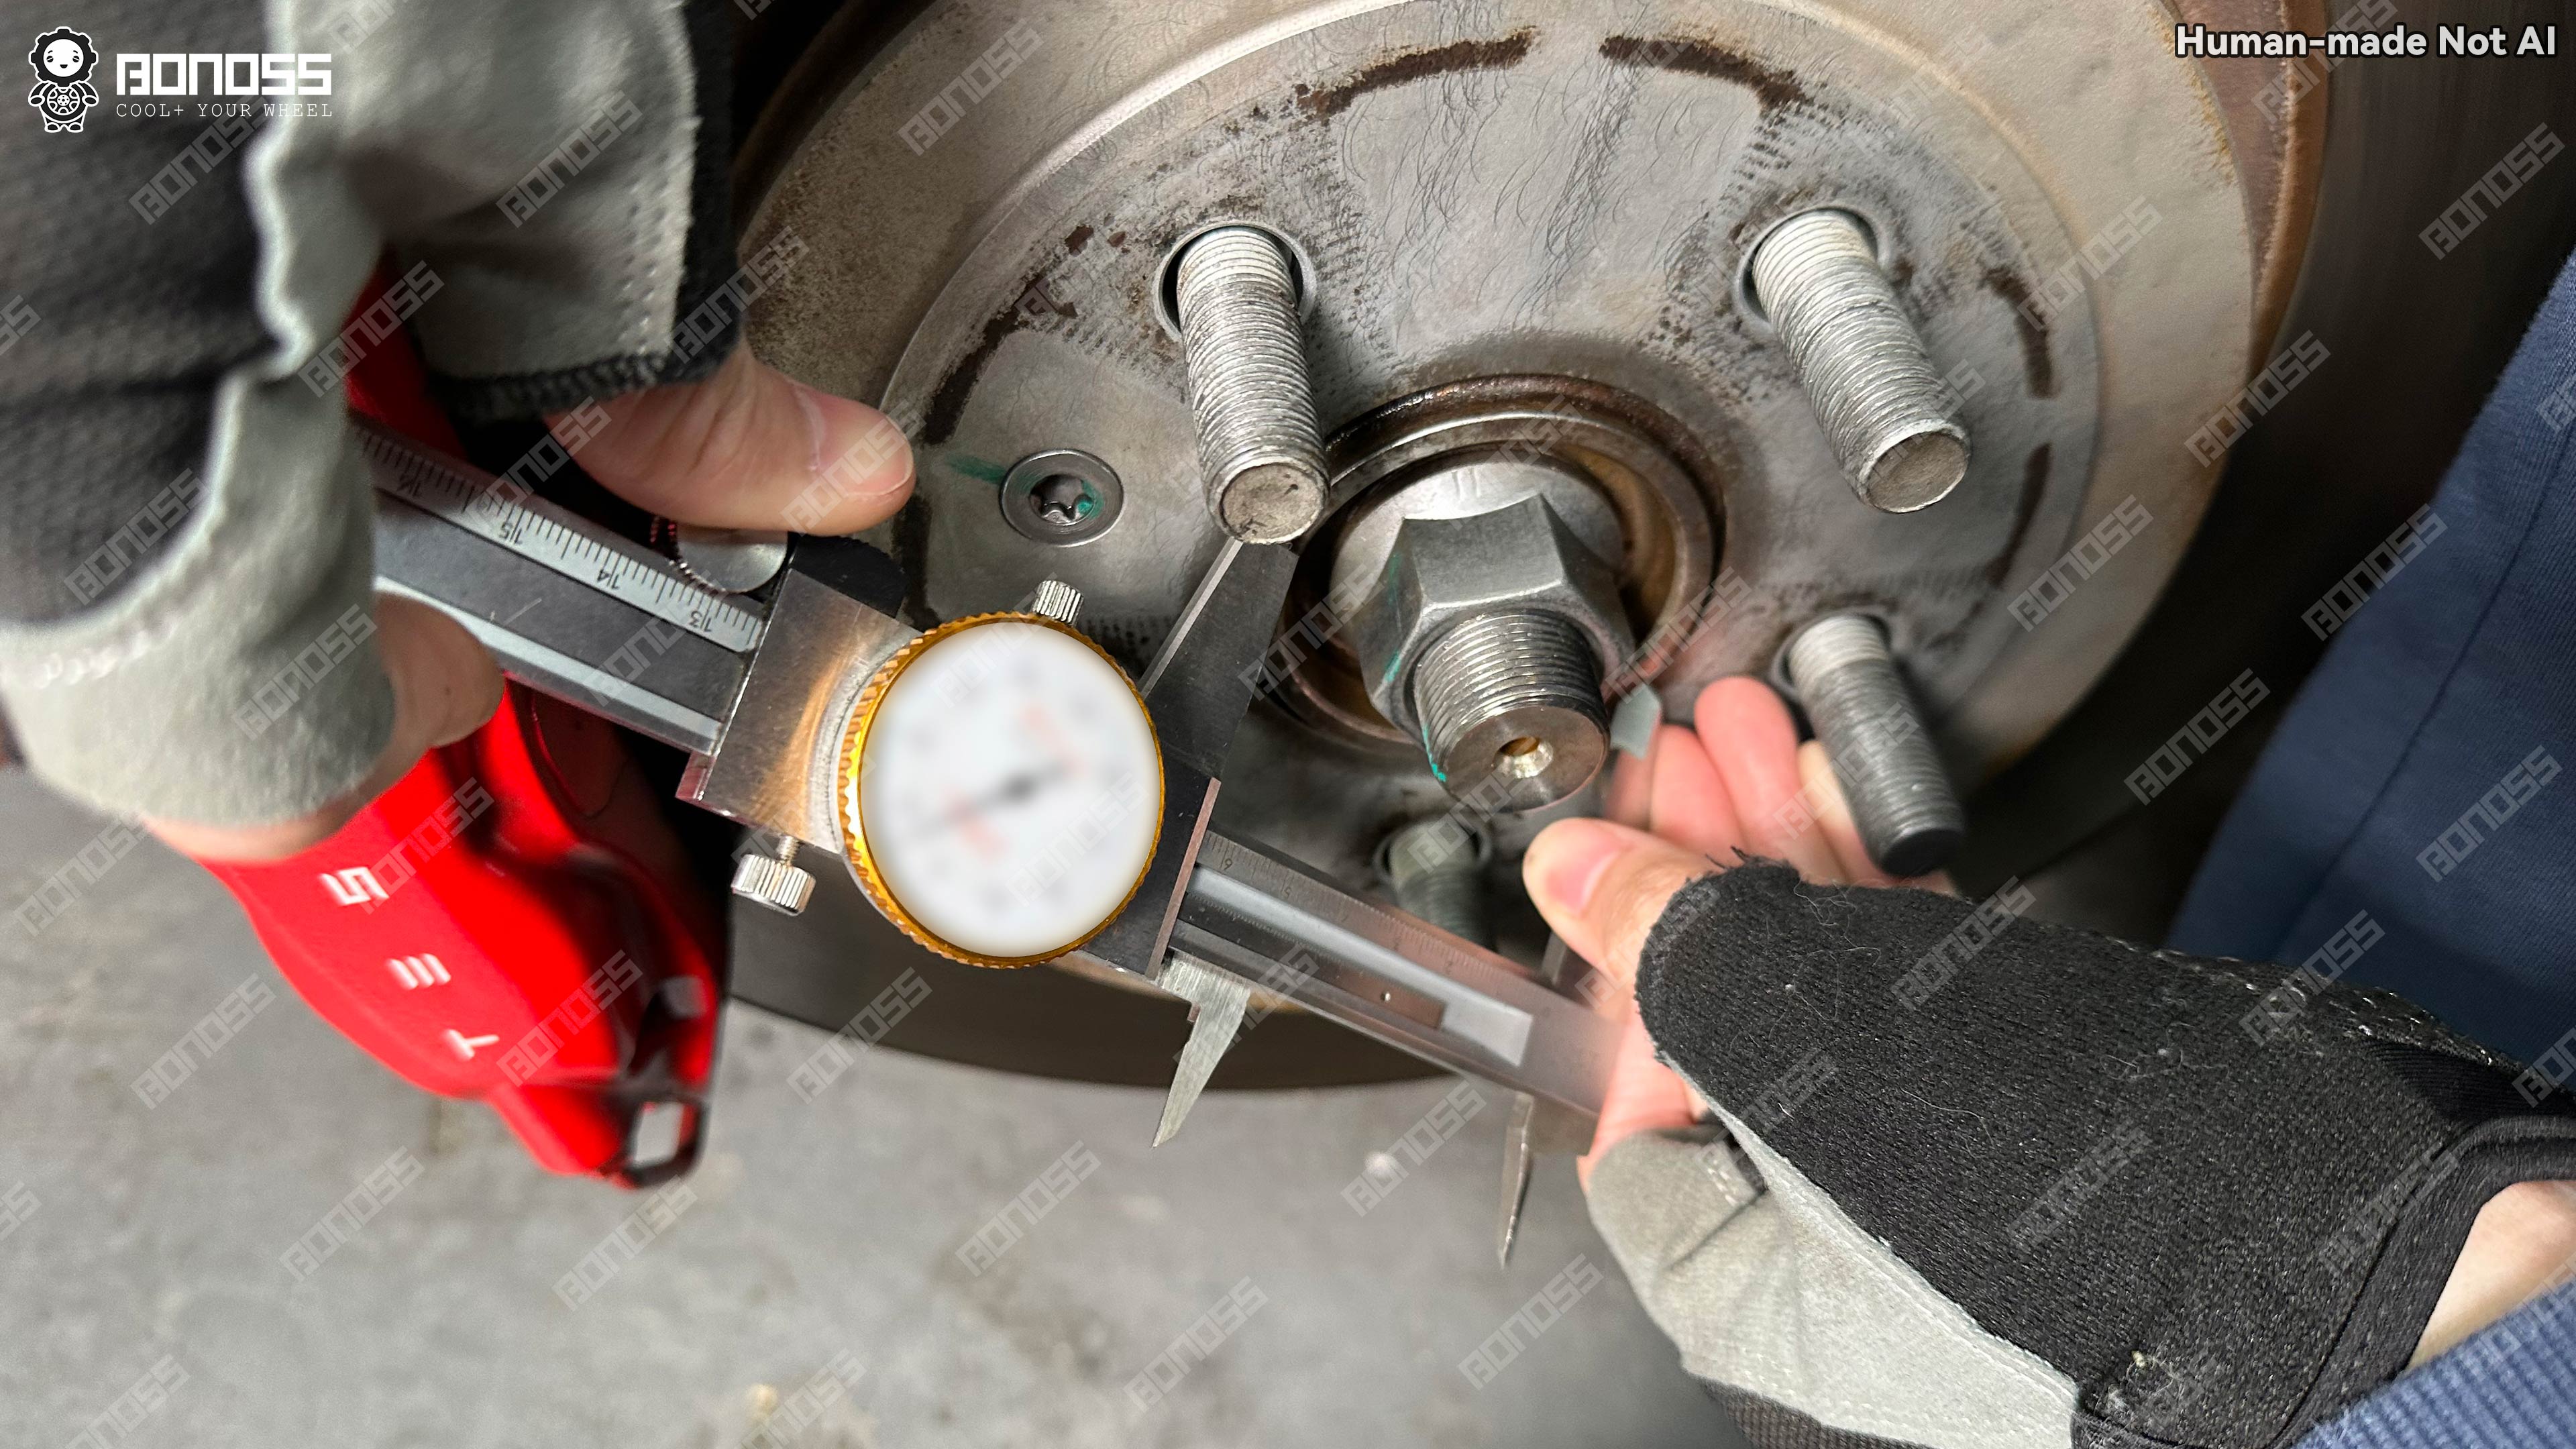
On this P85, a vernier caliper recorded a stock stud projection of 38.26mm. Another caliper measurement put the OEM wheel-pocket depth at 20.58mm. The numbers explain why Daniel’s 20mm front setup did not require trimming.
With a 20mm spacer installed, 38.26 minus 20 leaves 18.26mm of stud projecting beyond the spacer face. A 20.58mm pocket can accommodate that projection with 2.32mm of nominal depth remaining. With a 15mm spacer, the projection would be 23.26mm, exceeding the measured pocket depth by 2.68mm. On this particular wheel and hub combination, that is why 15mm would require shortening the studs while 20mm did not.
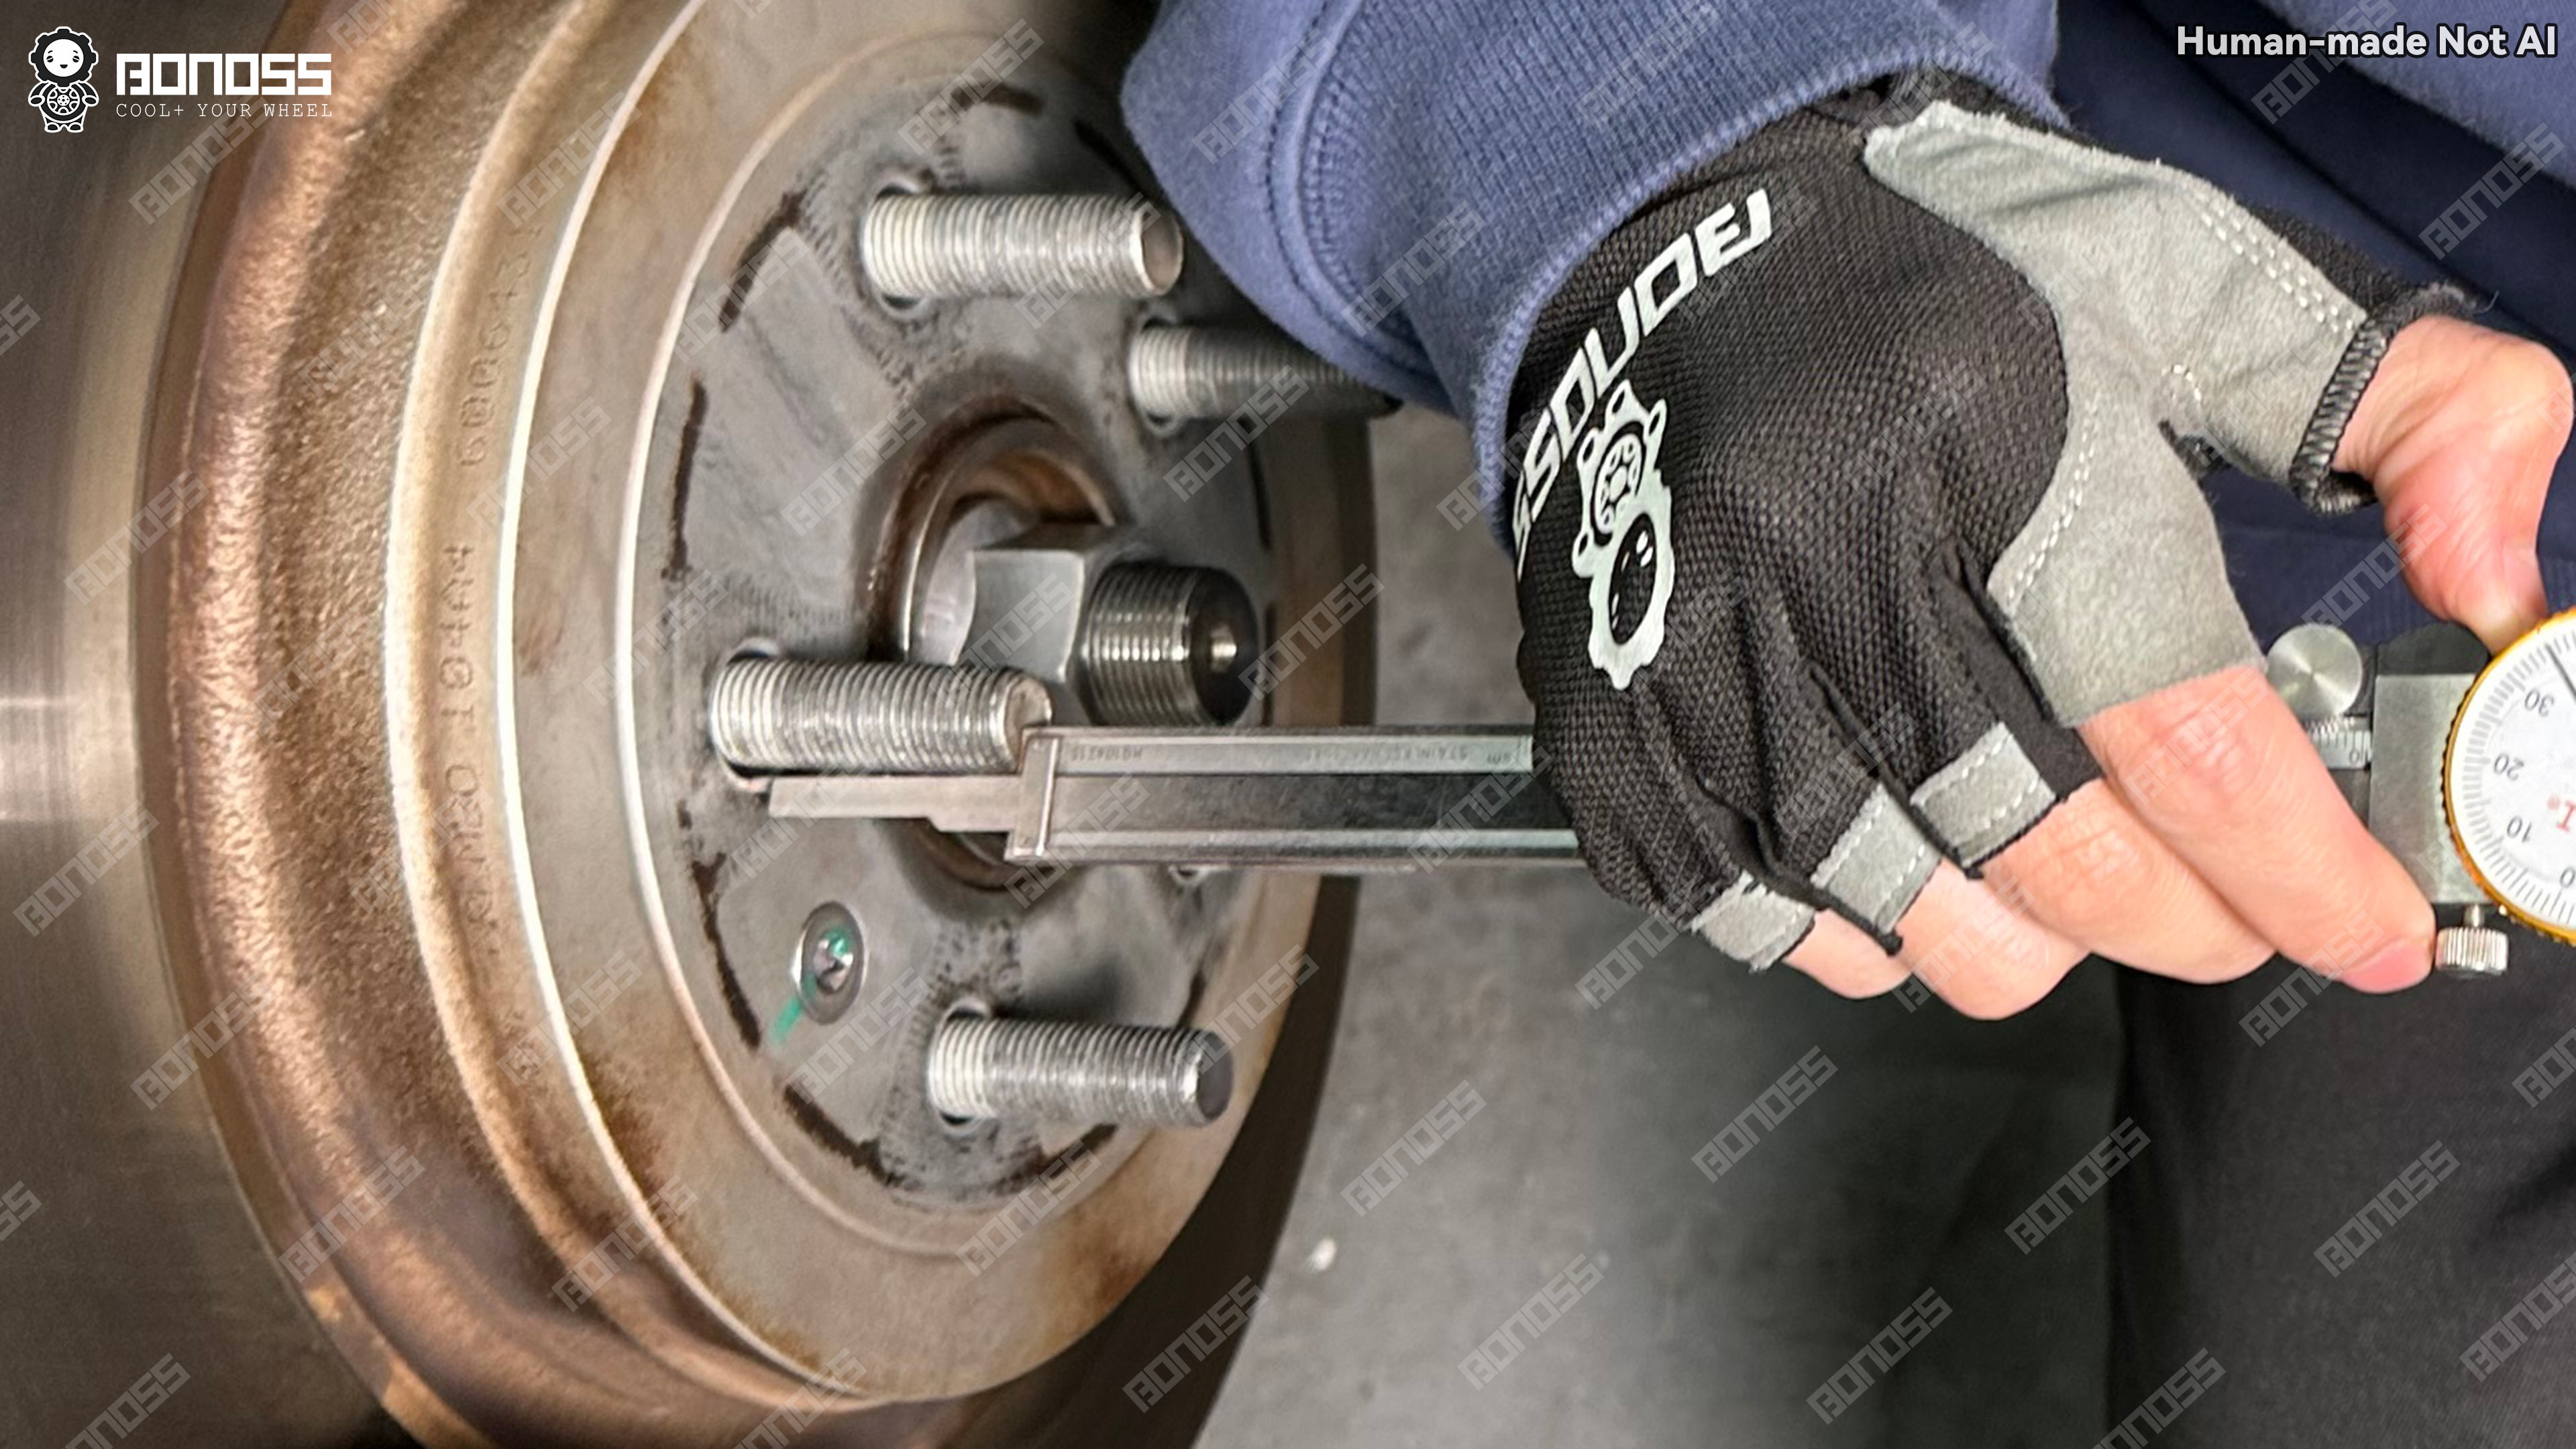
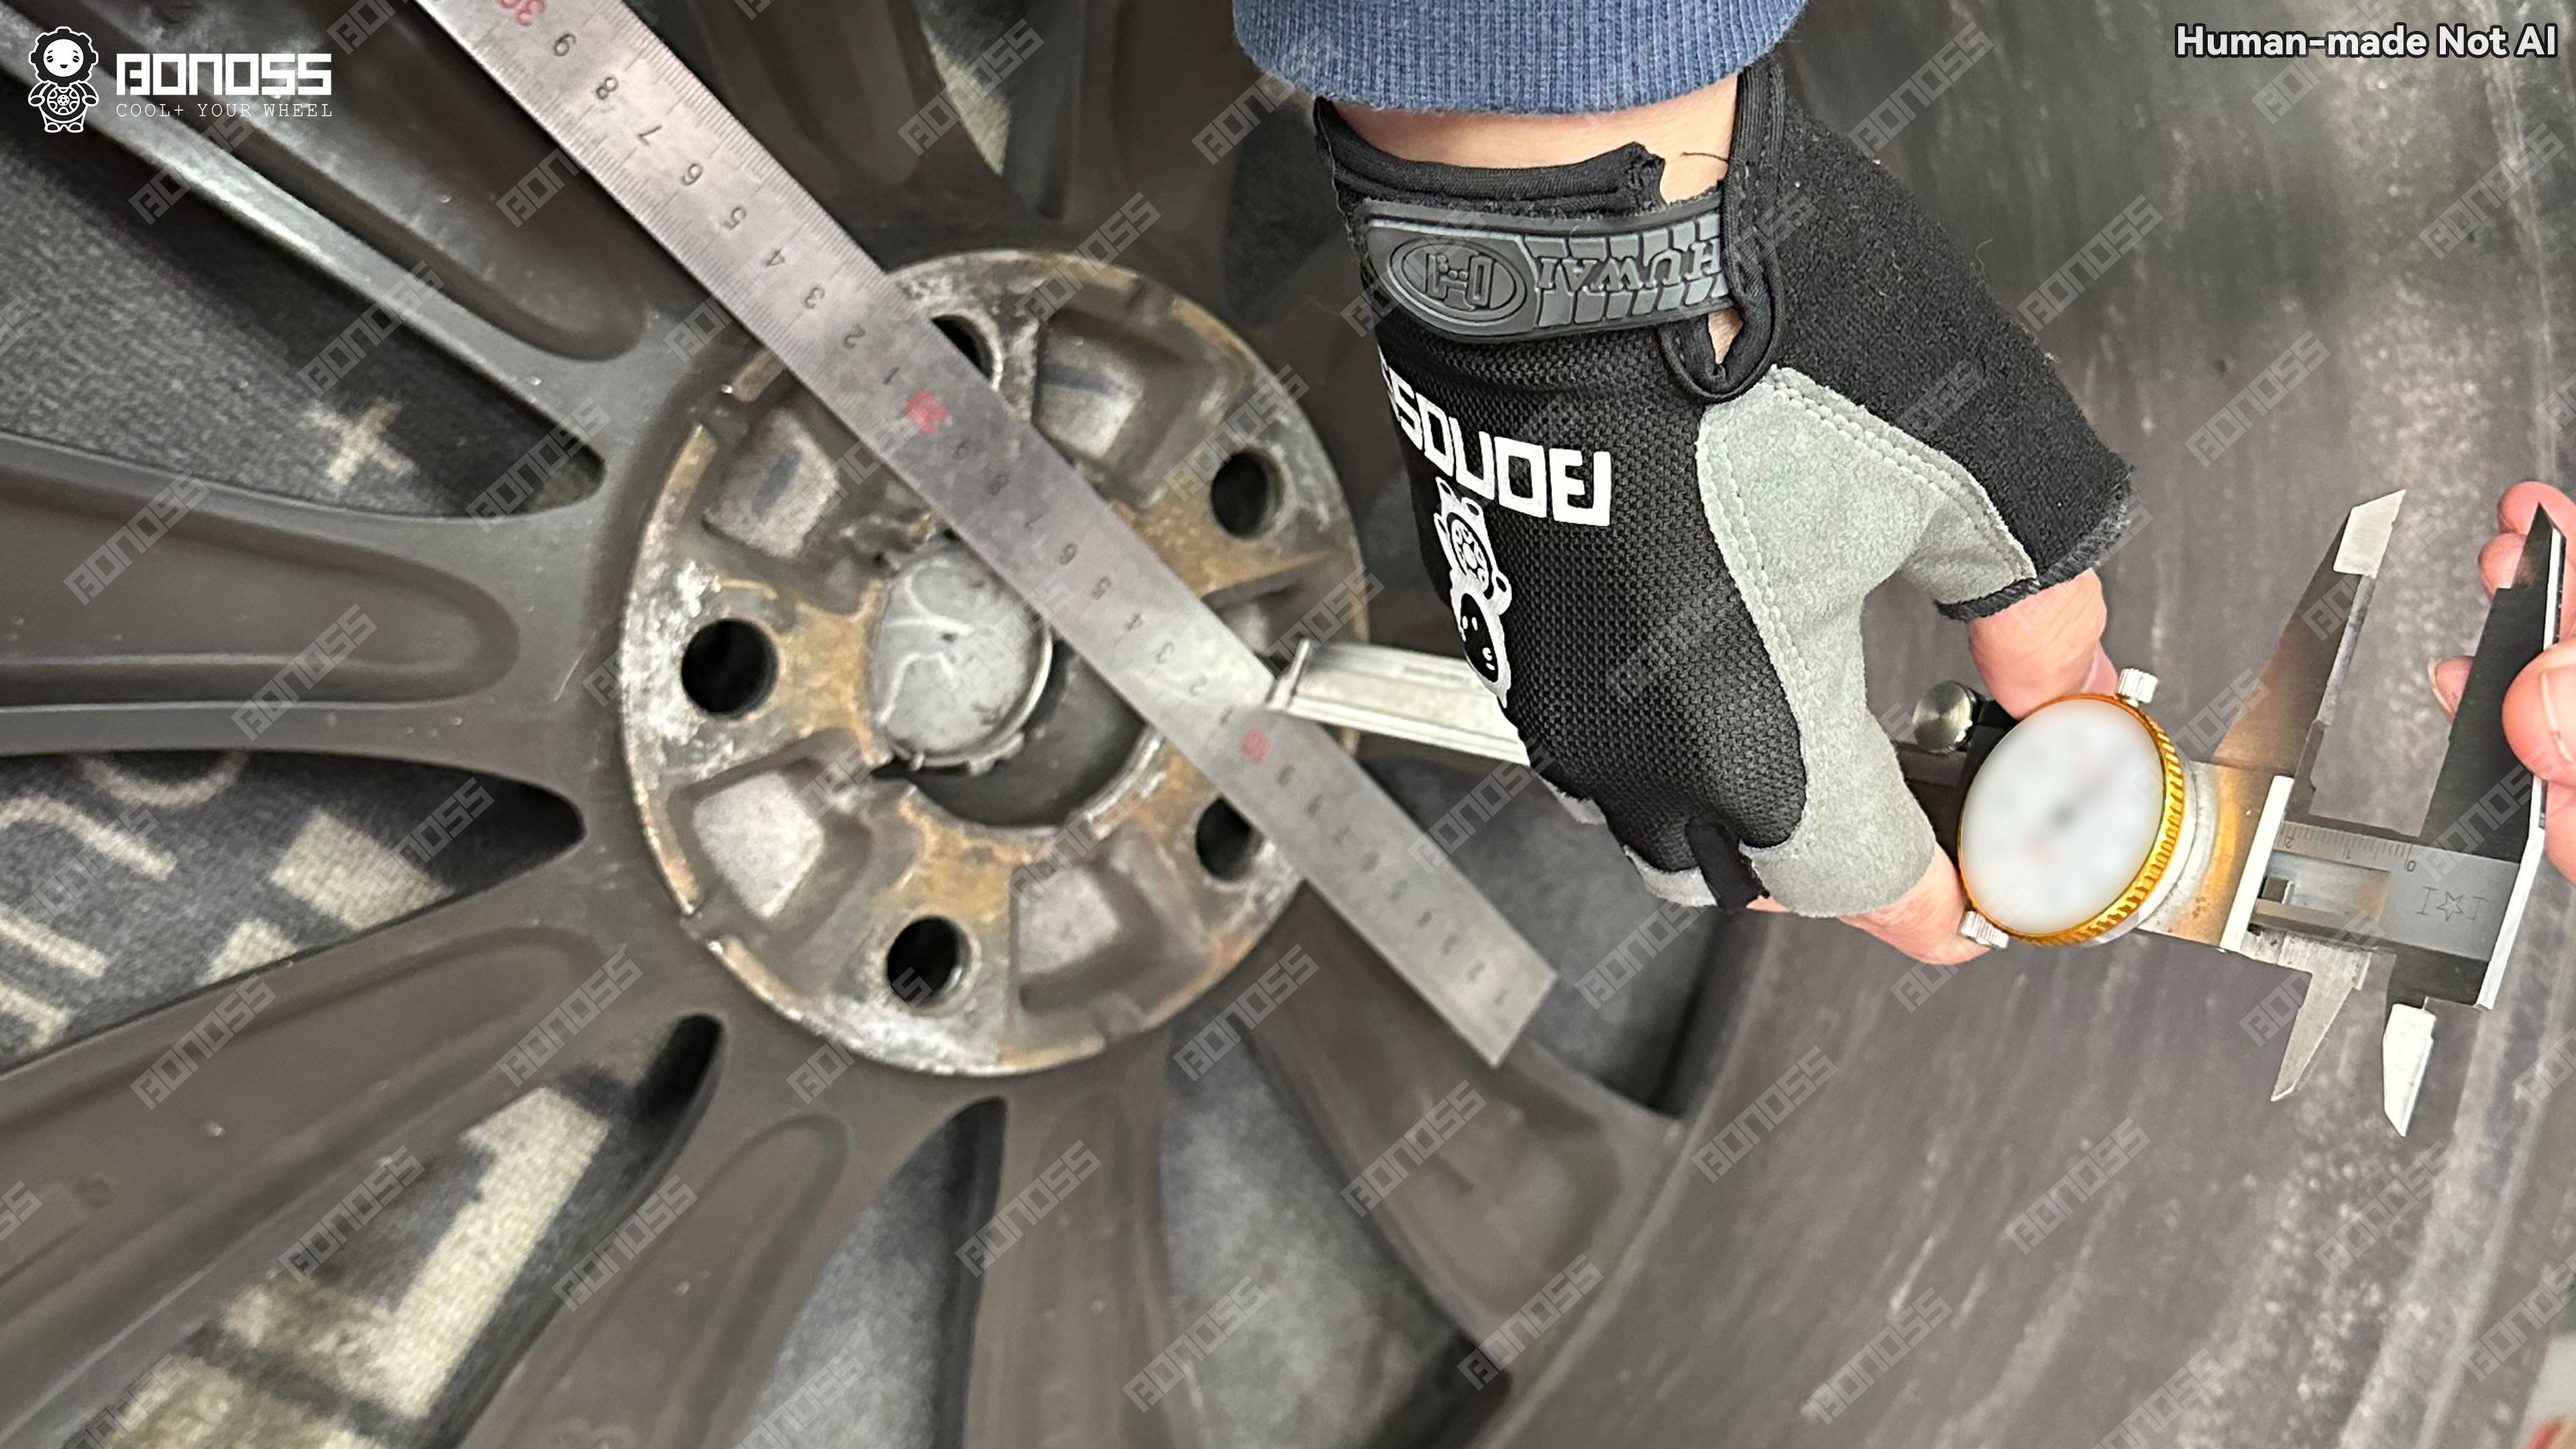
Daniel summarized the ownership-side result plainly: “Stud length wasn’t a problem for me—the wheel pockets are deep enough for 20mm. But with 15mm spacers, you might have to trim the studs slightly for OEM wheels.”
That boundary applies to these measured components. A different wheel casting can have shallower pockets, and a different hub can have a different stud projection. The arithmetic is reusable; the clearances are not universal.
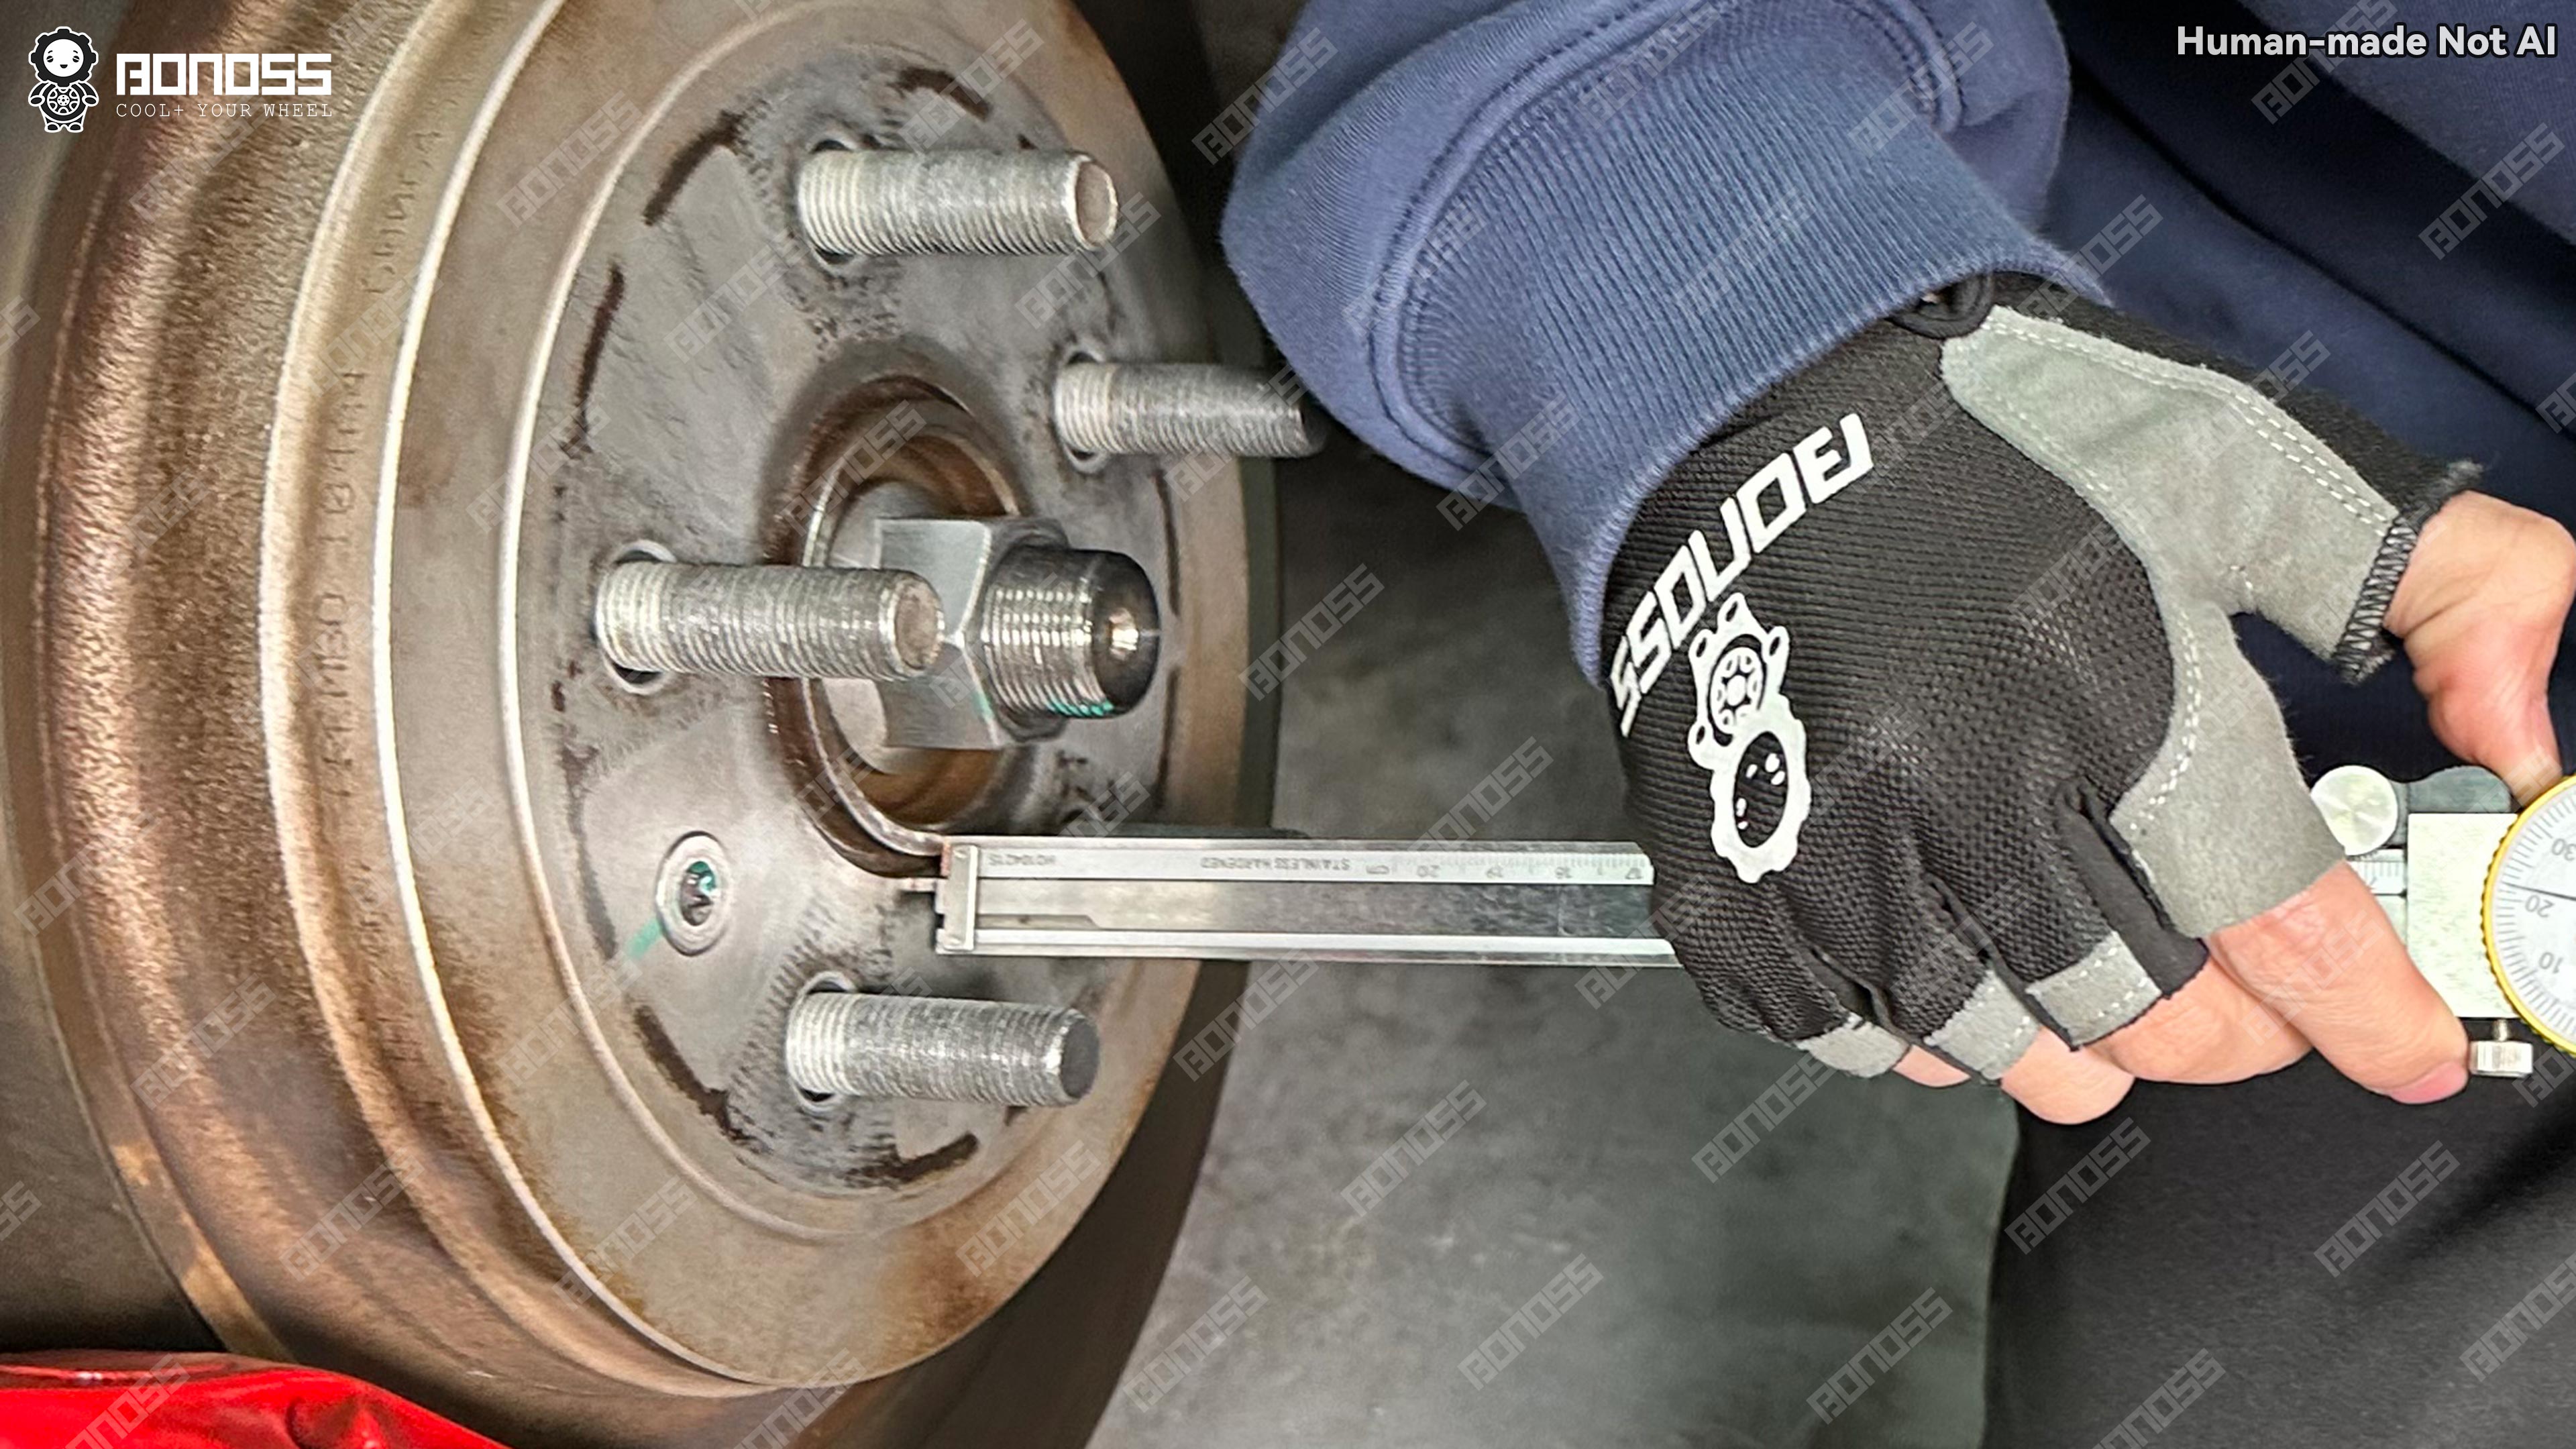
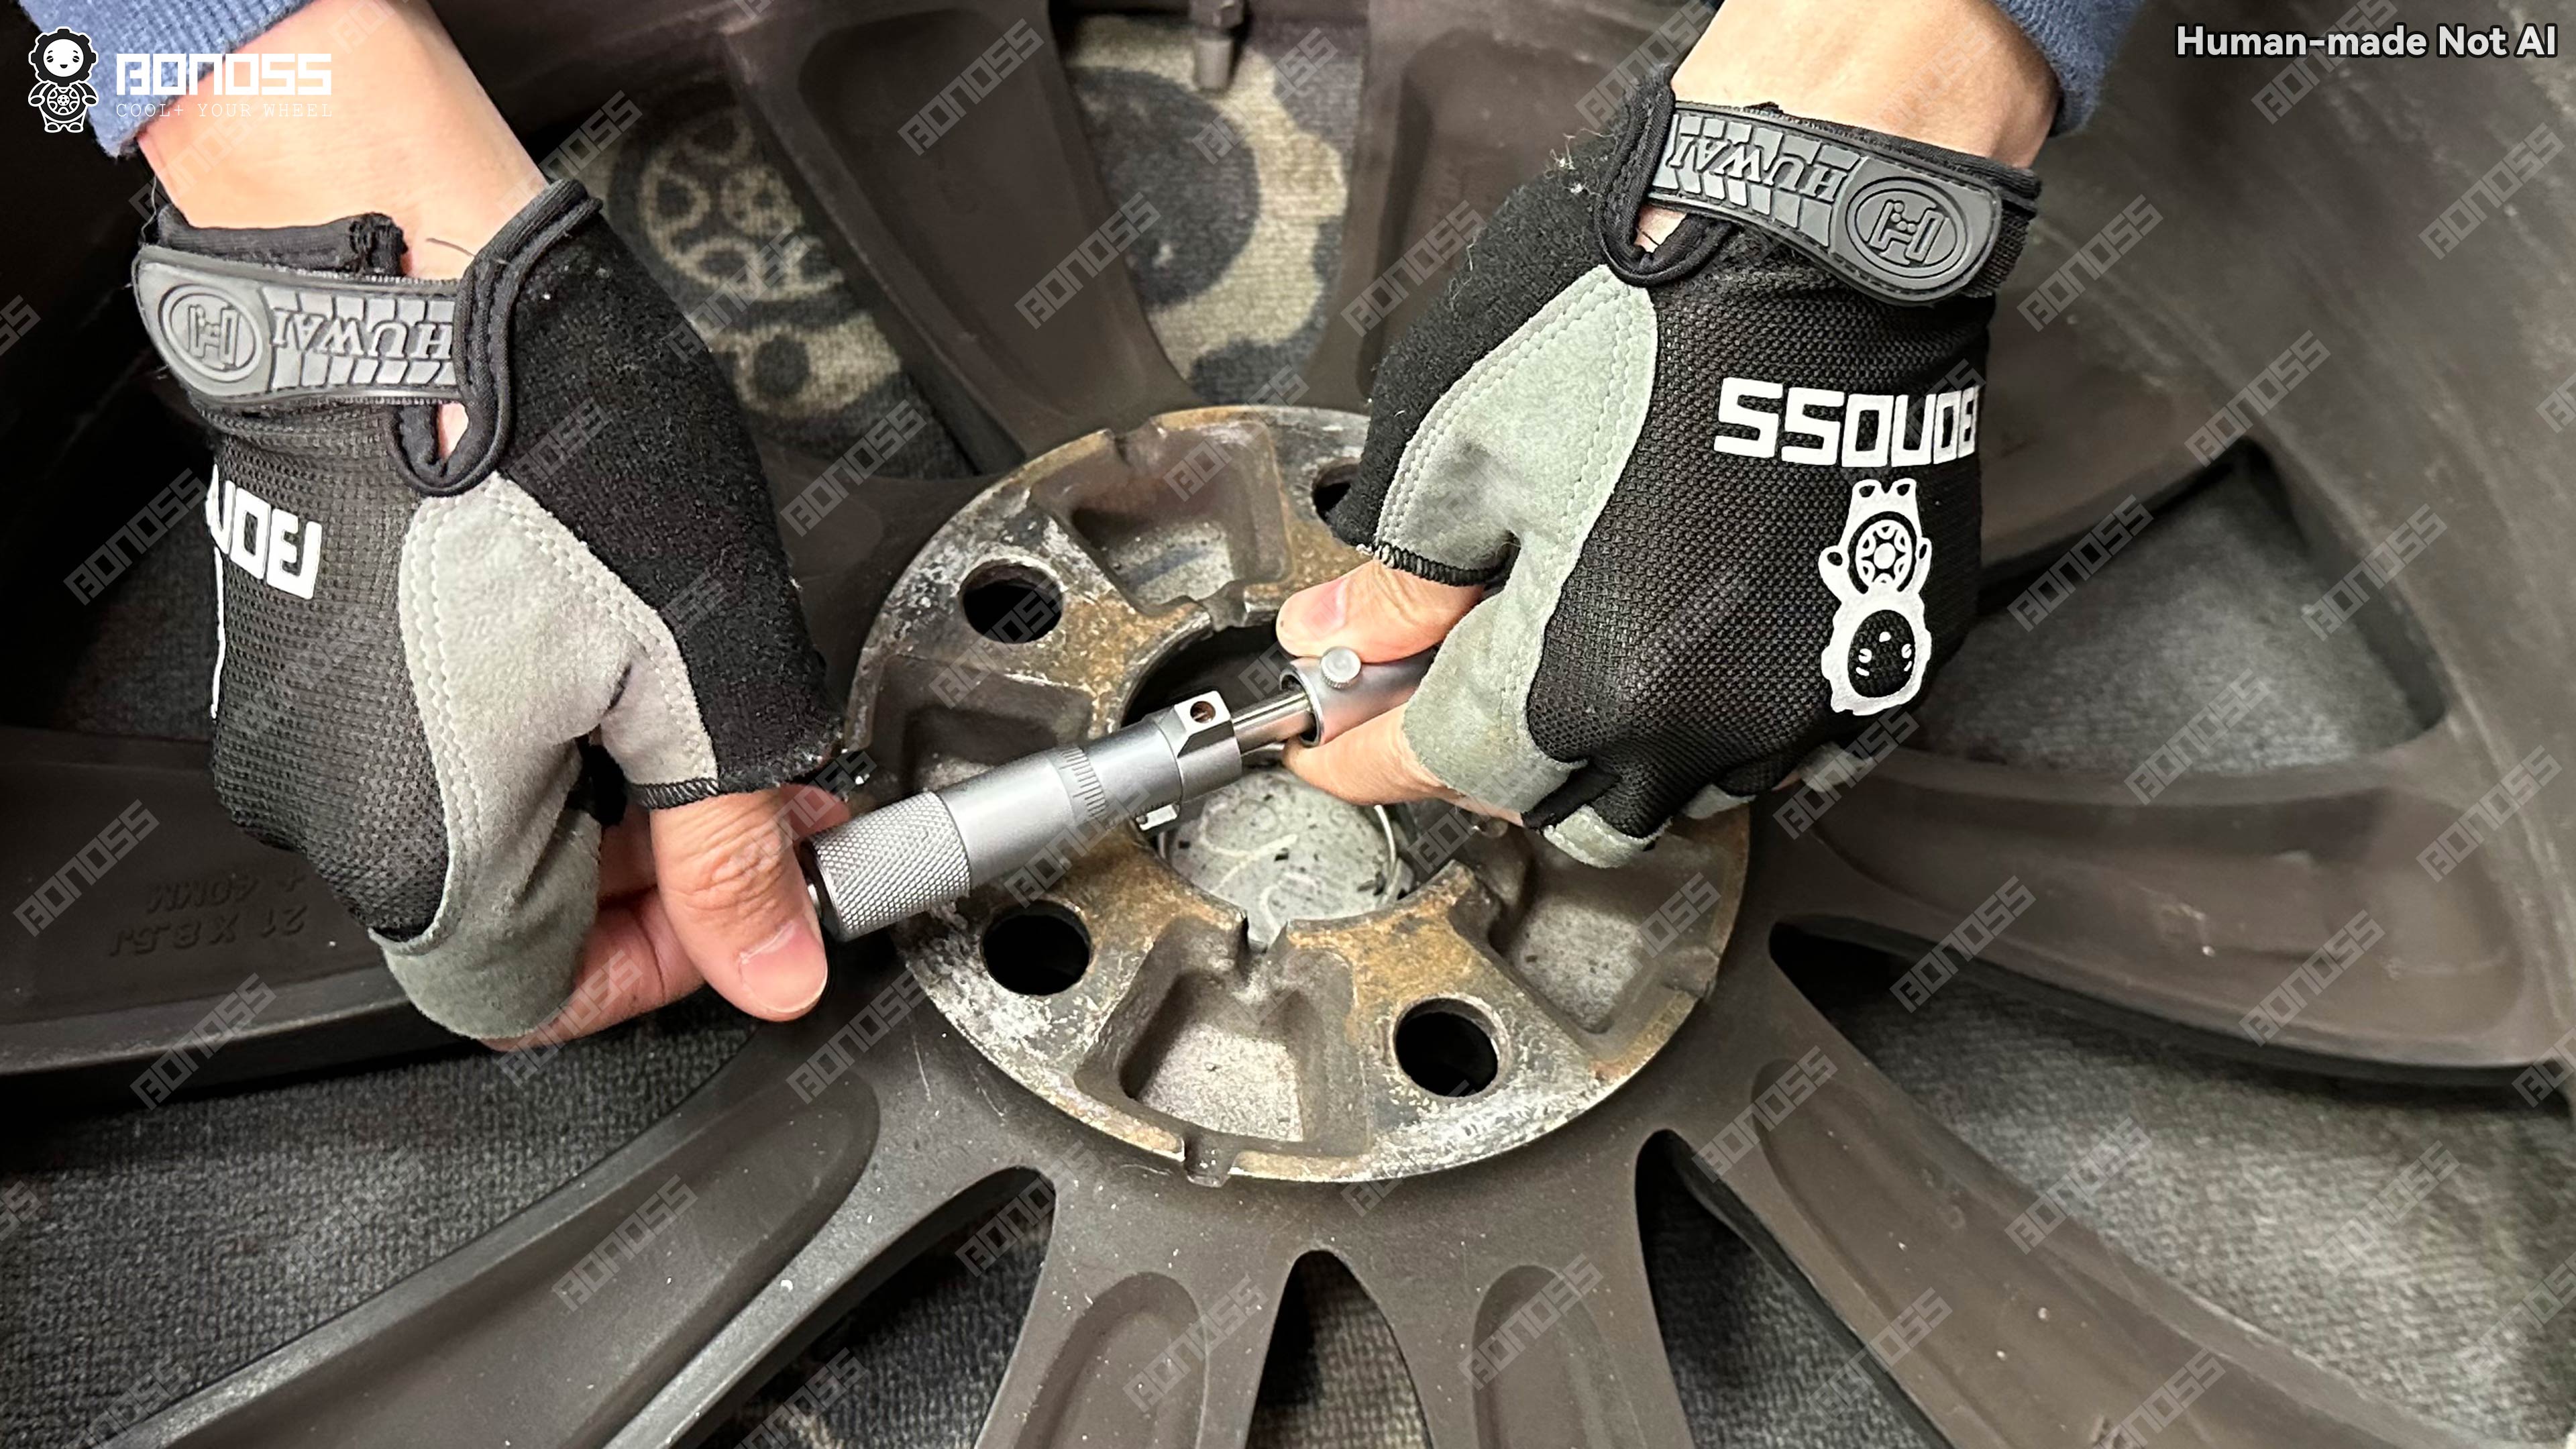
The spacer has to bridge both interfaces. Its multi-stage vehicle-side bore matches the 64.06mm hub through the stepped register, while its 64.1mm wheel-side pilot enters the 64.28mm wheel bore. That produces a 0.18mm diametral clearance, or 0.09mm per side when centered. This is the close hub-centric relationship intended for the wheel side, not an impossible claim of zero clearance everywhere.
The axle-hub pilot height also measured 4.23mm. Recording that step matters because a spacer must seat against the intended flange without interference from the register geometry. Together, these measurements explain why 64.1mm hub bore spacers Model S shoppers see listed cannot be assessed by center-bore number alone.
BONOSS specifies CNC machining to a 0.02mm tolerance class for the spacer. That manufacturing control supports consistent mating surfaces and concentricity. It does not eliminate the need to clean the hub or verify the actual wheel, but it gives the installer a precise component to work with.
The Spacer Features That Mattered Here
Daniel used BONOSS forged active cooling wheel spacers made from 6061-T6 aluminum. Three features are relevant to this installation: active-cooling grooves, a multi-stage hub-centric profile, and ISO Grade 12.9 studs paired with ISO Grade 10 nuts.The active-cooling grooves are shaped to move outside air through the spacer as it rotates. That is the design’s intended airflow path around the brake area.
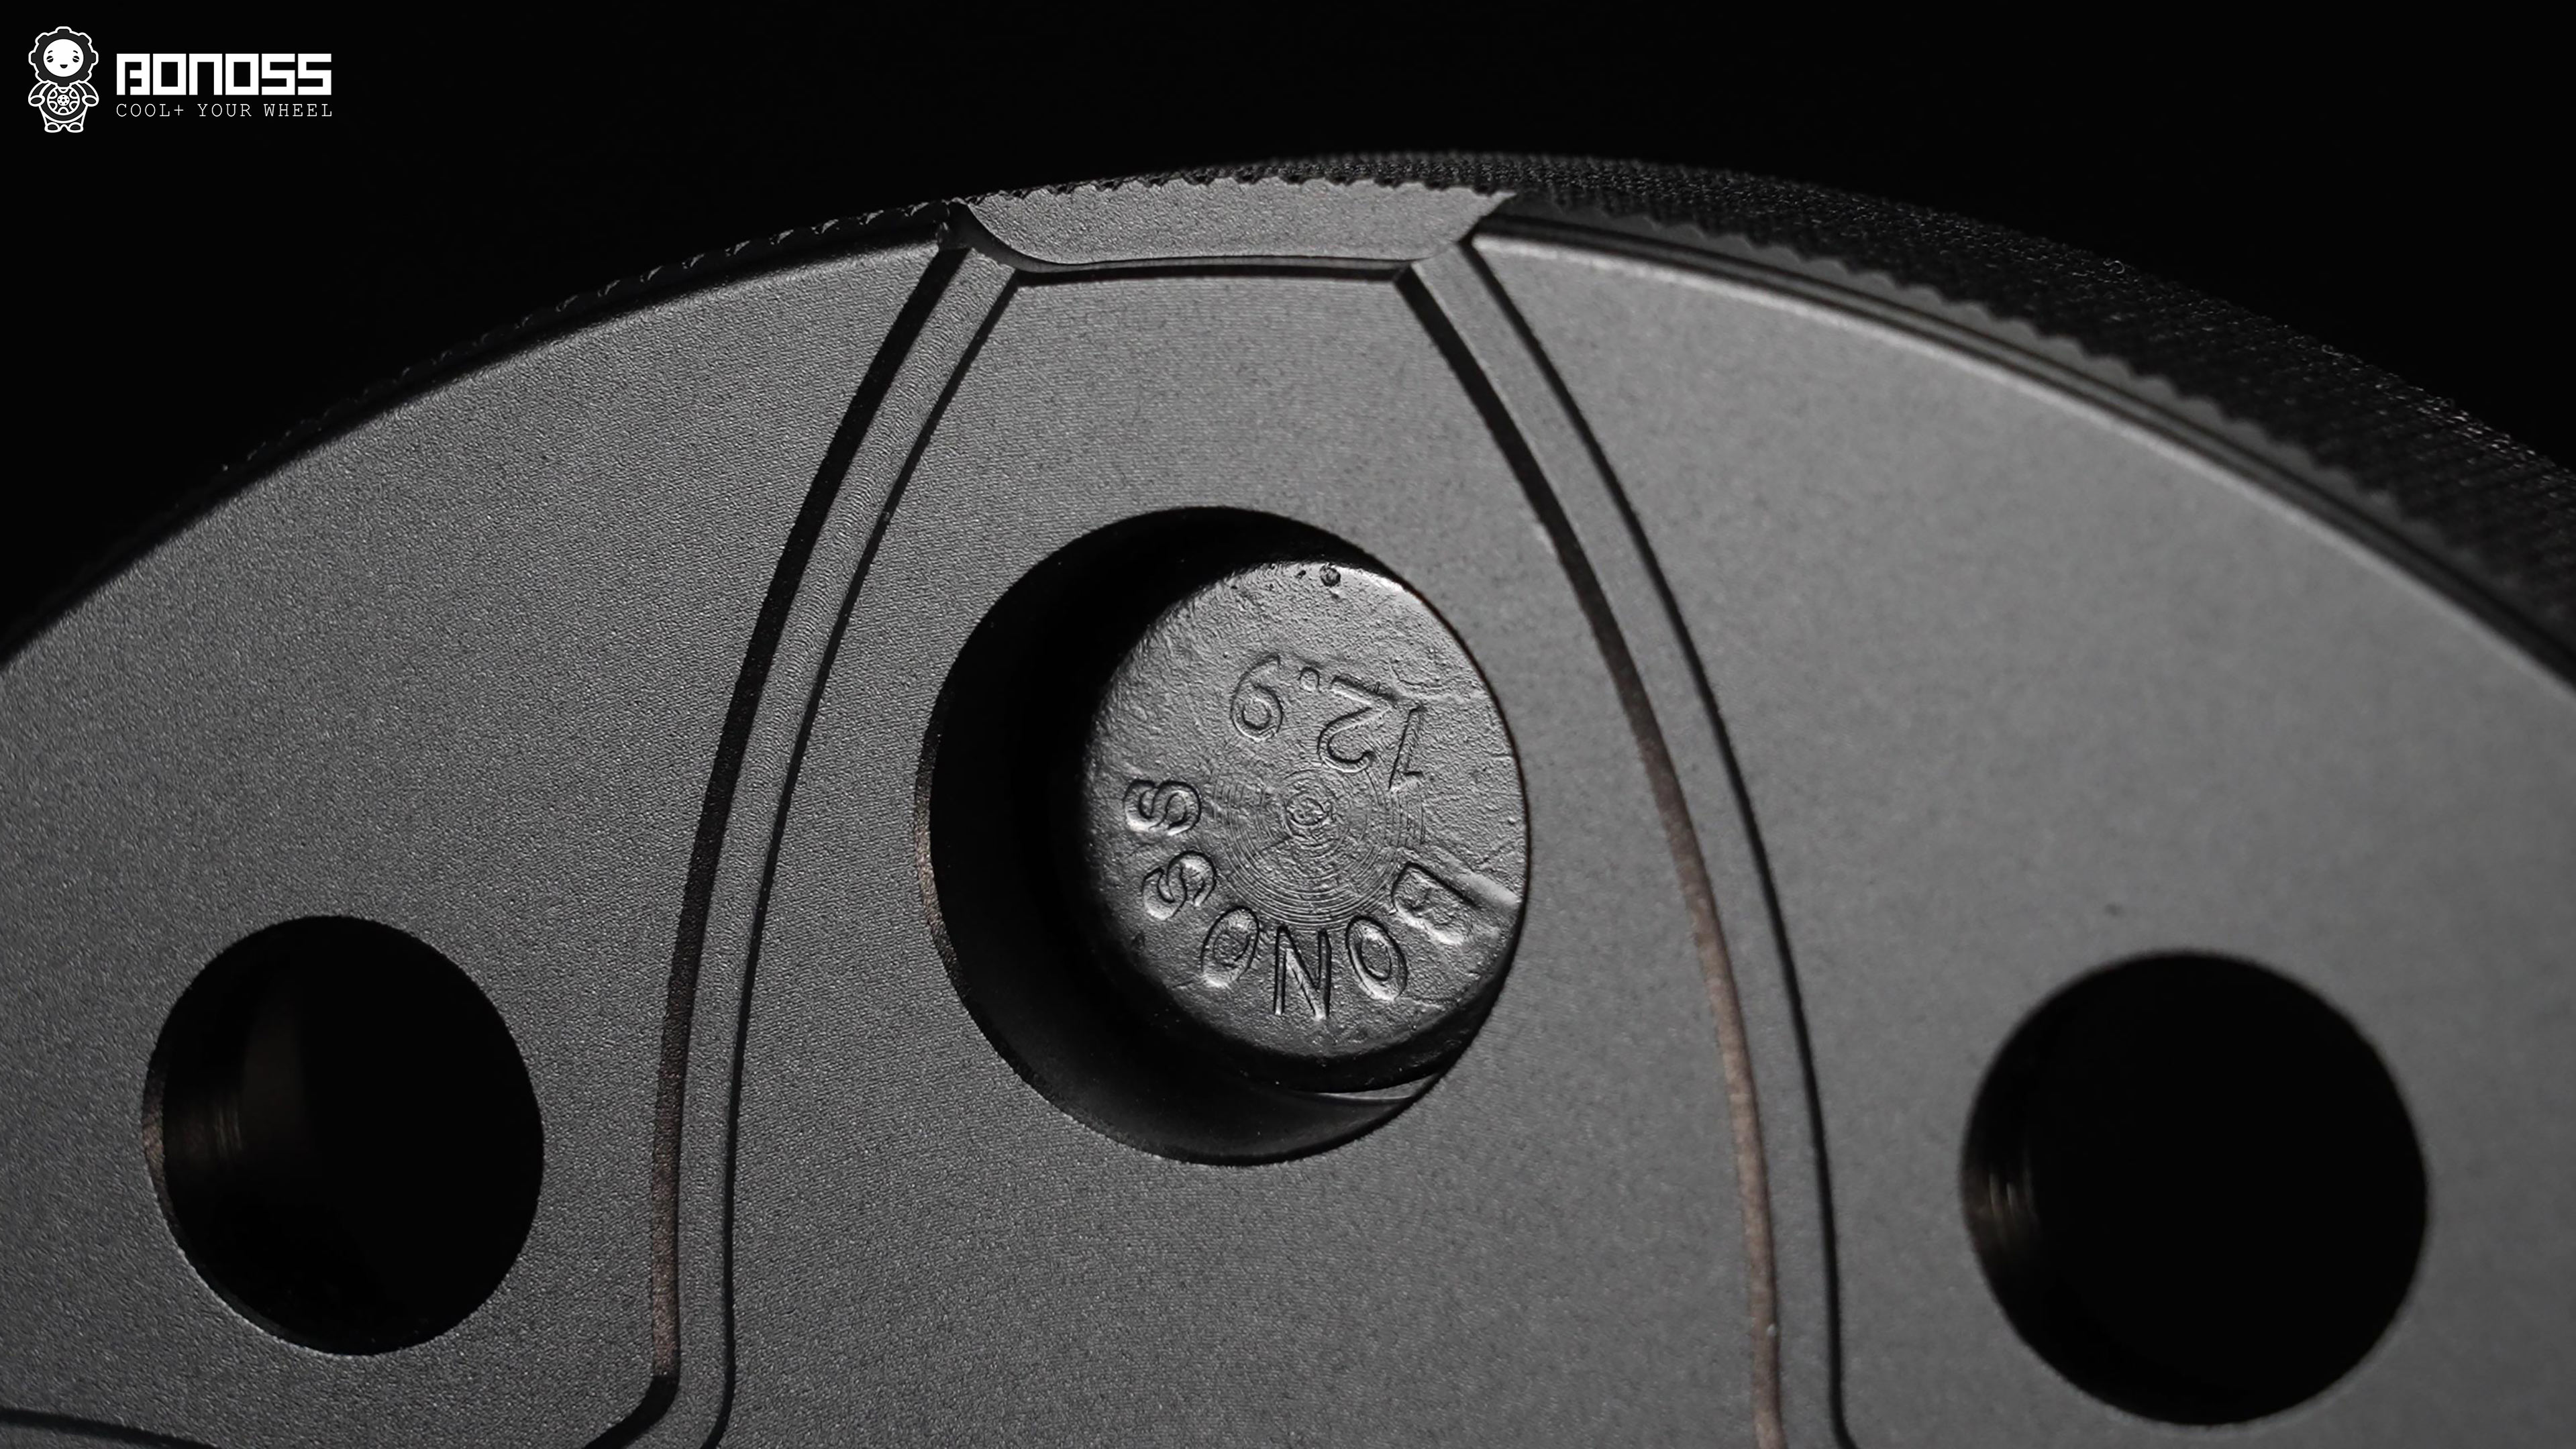
The multi-stage profile mattered more directly because the measured vehicle and wheel interfaces were different. Side knurling and disassembly grooves also serve practical purposes: they provide purchase when handling the spacer and a place to work carefully if a spacer later needs removal.
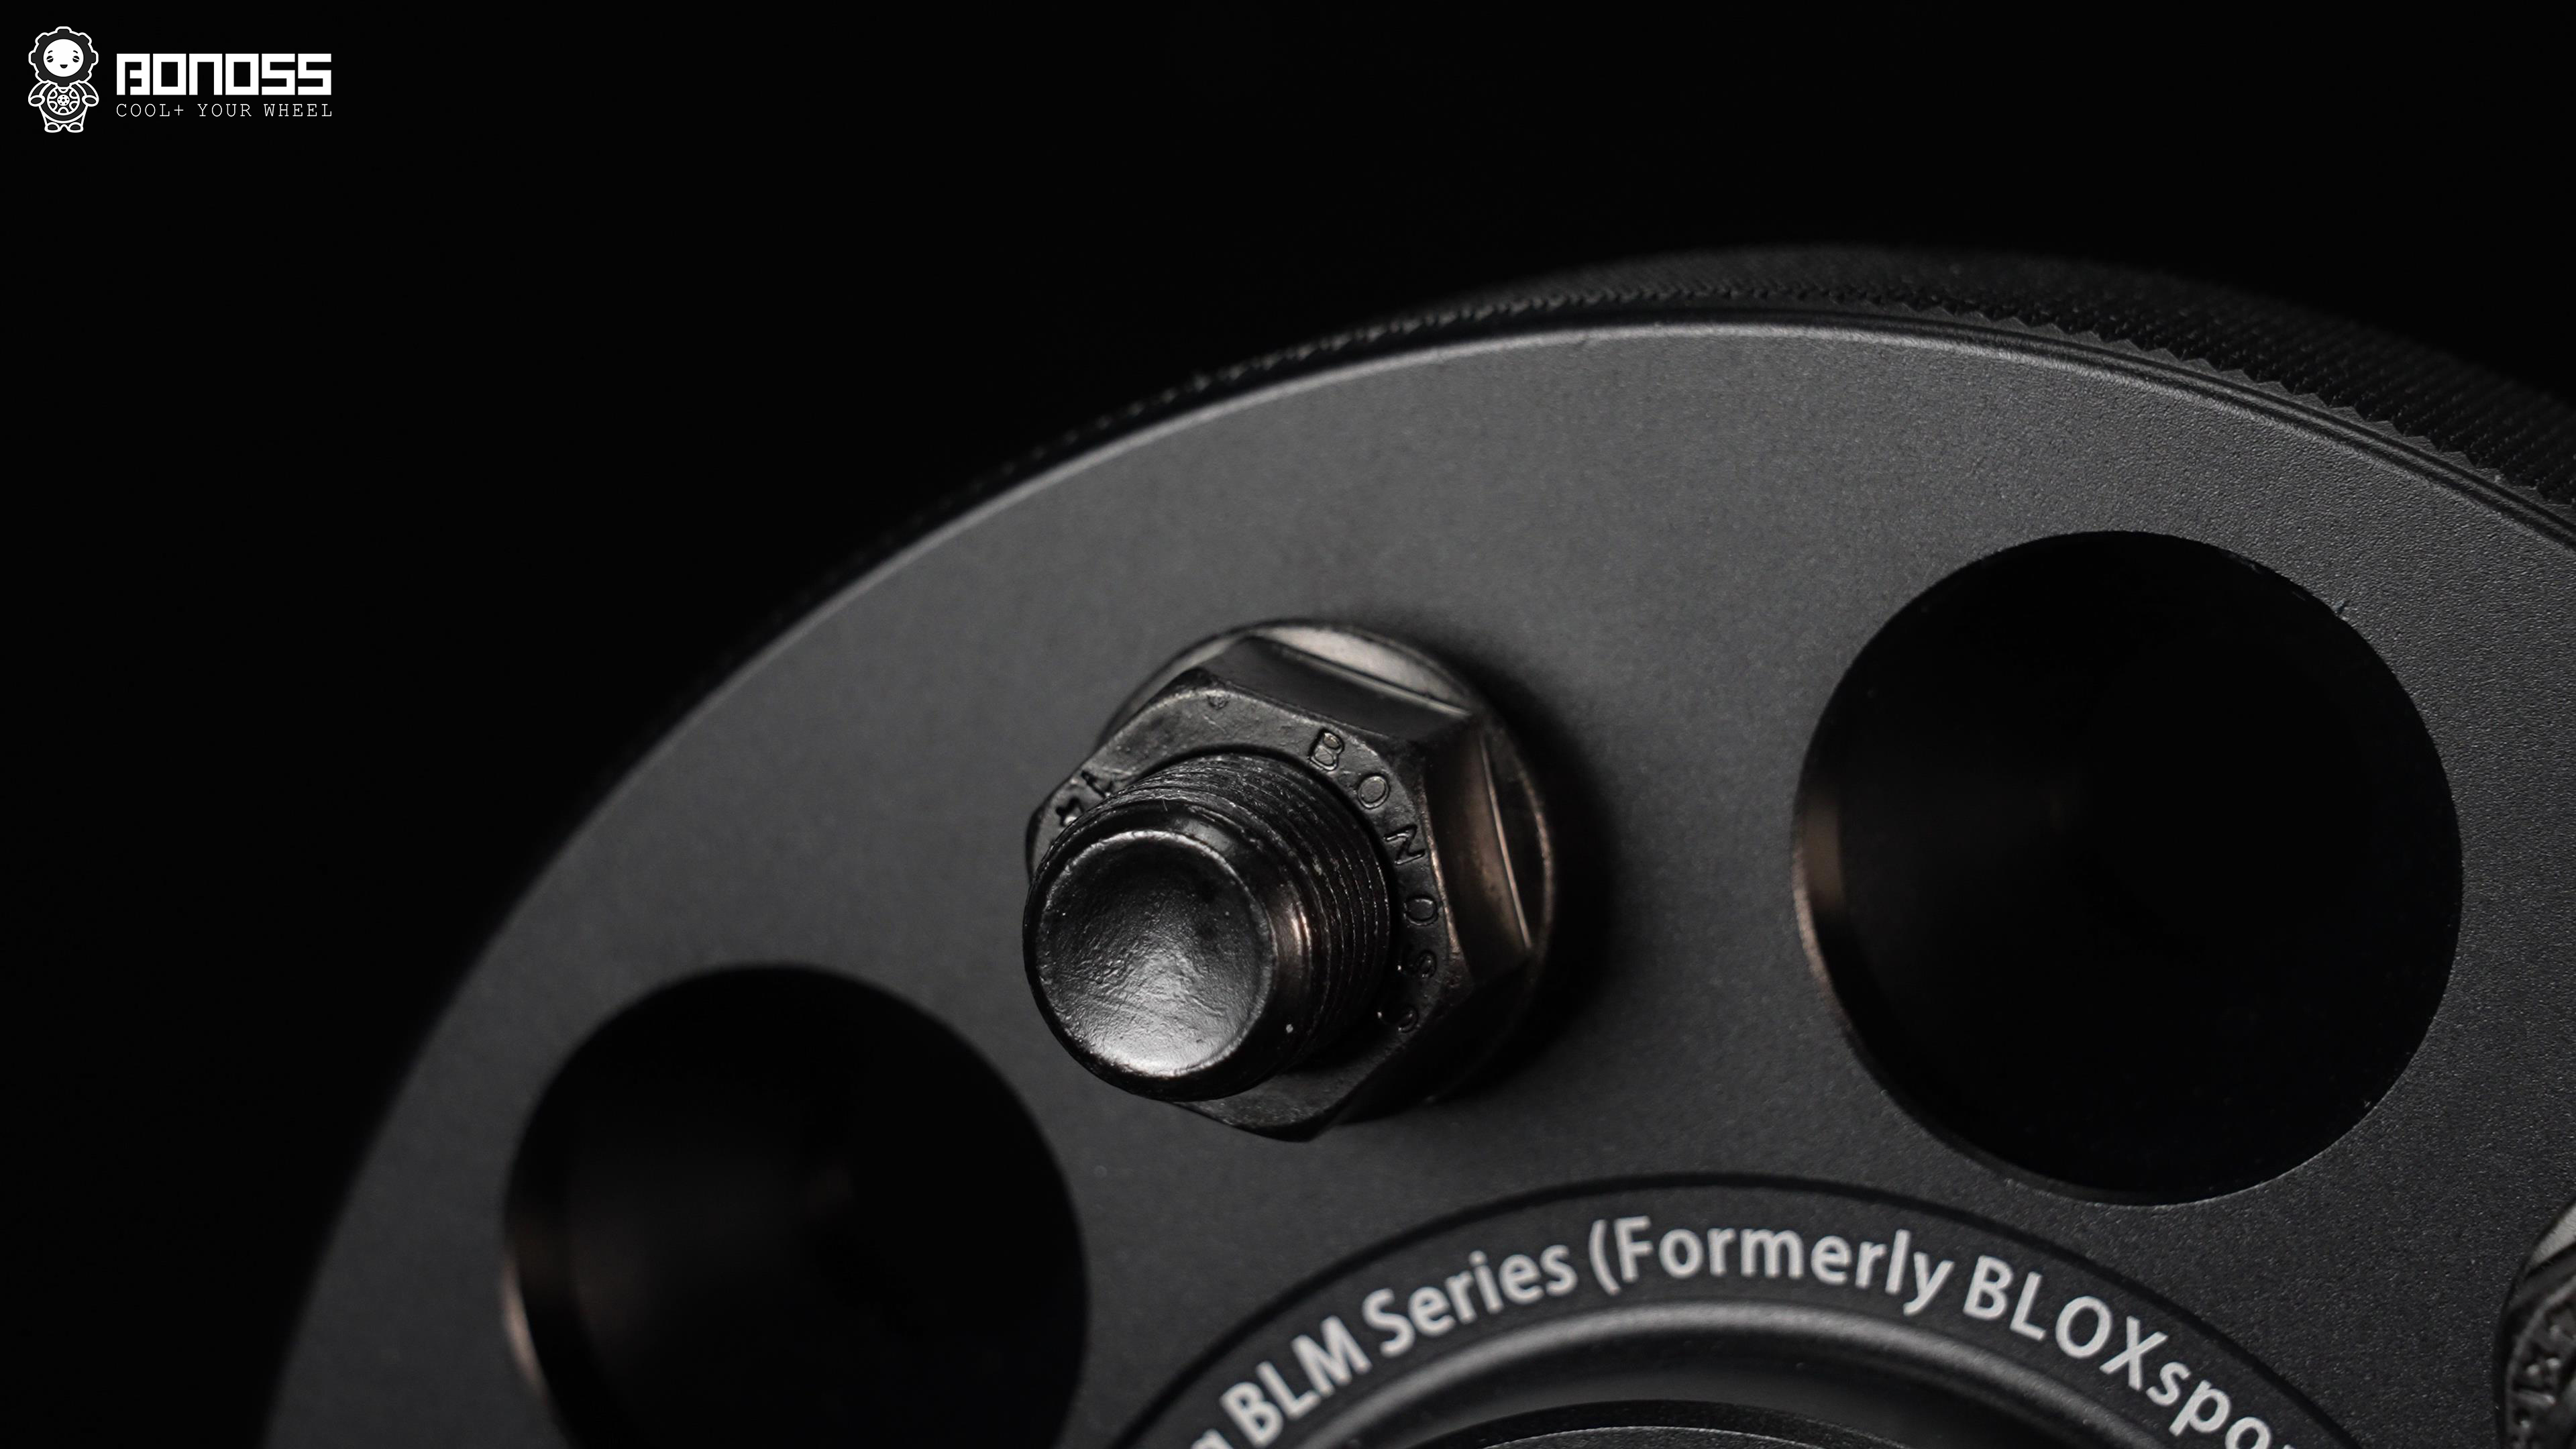
The supplied M14x1.5 studs use a full-cone-seat fastening system with the matching nuts. The factory wheel nuts retain the OEM conical-seat interface at the wheel. Keeping those two fastening stages separate is central to both the hardware layout and the torque instructions.
What the Test Reports Actually Support
The reports below document specific samples under named ISO test methods. They are evidence of tested material or fastener properties, not a promise that every laboratory, production batch, or thread specification will return an identical number.
| Tested item | Reported result | Test method and report |
|---|---|---|
| 6061-T6 spacer hardness, TÜV Test | 101-103 | ISO 6506-1:2014 hardness test |
| 6061-T6 neutral salt spray, TÜV Test | 240 hours with no defects | ISO 9227:2022+Amd 1:2024 test |
| M14x1.5 stud tensile strength, SGS Test | 1268 MPa | ISO 898-1:2013+Cor-1:2013 tensile test |
| M14x1.5 stud hardness, SGS Test | 391-401 HV10 | ISO 6507-1:2018 hardness test |
| M14x1.5 stud proof load, SGS Test | 121 kN | ISO 898-1:2013+Cor-1:2013 proof-load test |
| M14x1.5 stud tensile strength, TÜV Test | 1233 MPa | ISO 898-1:2013+Cor-1:2013 tensile test |
| M14x1.5 stud hardness, TÜV Test | 386-390 HV10 | ISO 6507-1:2018 hardness test |
| M14x1.5 nut hardness, SGS Test | 358-362 HV0.5 | ISO 6507-1:2018 hardness test |
| M14x1.5 nut proof load, SGS Test | 138.8 kN | ISO 898-2:2012 proof-load test |
The two stud tensile results, 1268 MPa and 1233 MPa, should not be averaged or treated as contradictory. Different laboratories, samples, and measurement variation can produce different readings. The nut values also differ because a nut is a different component with a different thread-engagement and loading arrangement. Likewise, M14x1.5 and M14x1.25 fasteners cannot be assumed to share results simply because their nominal diameter is the same. The relevant certified report is the one matching the actual part and thread specification.
Installation: Rust Removal Was Not Optional Detailing
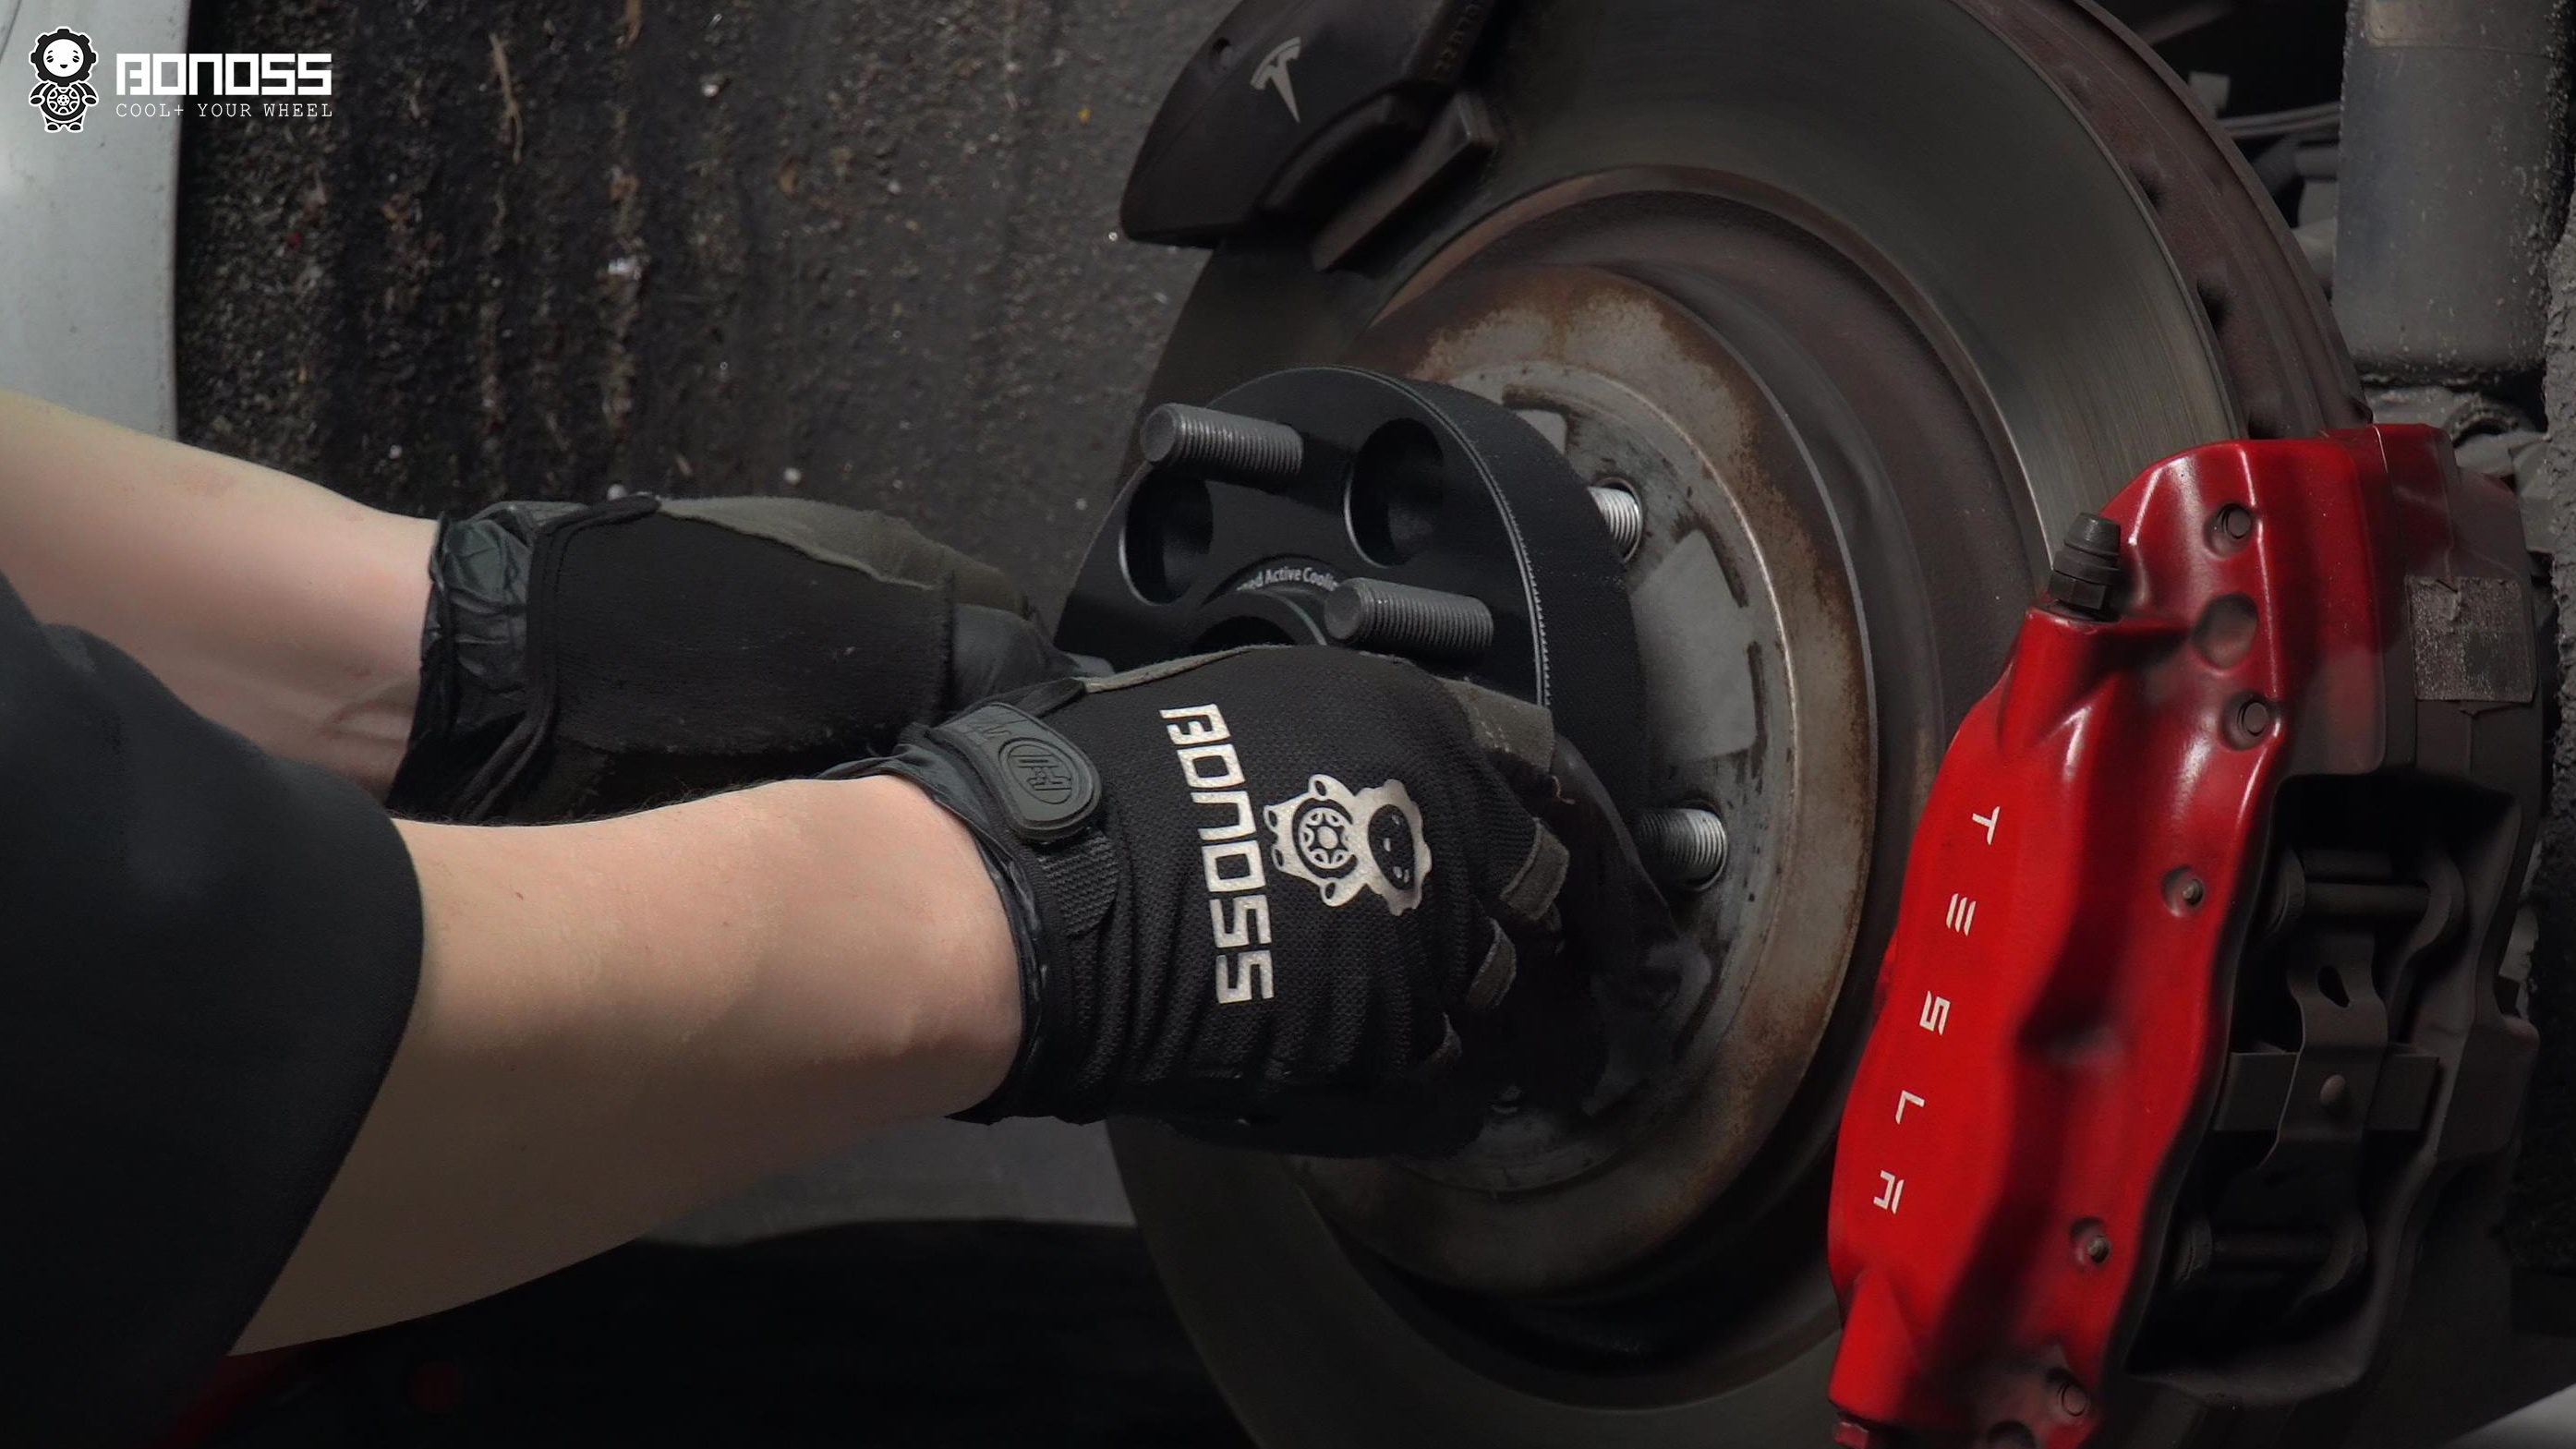
The stock axle hubs had surface rust. Leaving it in place would have put corrosion scale between precision-machined mounting faces, creating an uneven seat. The technicians sprayed rust remover, worked the hubs with abrasive cloth, and removed the loose corrosion before fitting the spacers.
This step is not about making an old hub look new. A spacer needs full, stable contact with the hub flange. Rust, debris, or a raised patch can prevent that contact and create runout that the driver may feel as vibration. Cleaning the mounting face removes an avoidable cause before the first torque wrench clicks.
Each spacer was placed over the original studs and secured with the supplied BONOSS nuts. Those nuts were tightened to 140 Nm (103.5 ft-lb), per BONOSS installation instructions. Only then was the original wheel mounted on the spacer’s studs and secured with the factory wheel nuts at 175 Nm (129 ft-lb), per the owner’s manual. Fasteners were tightened evenly in a diagonal sequence with a torque wrench, following the manufacturer’s service procedure.
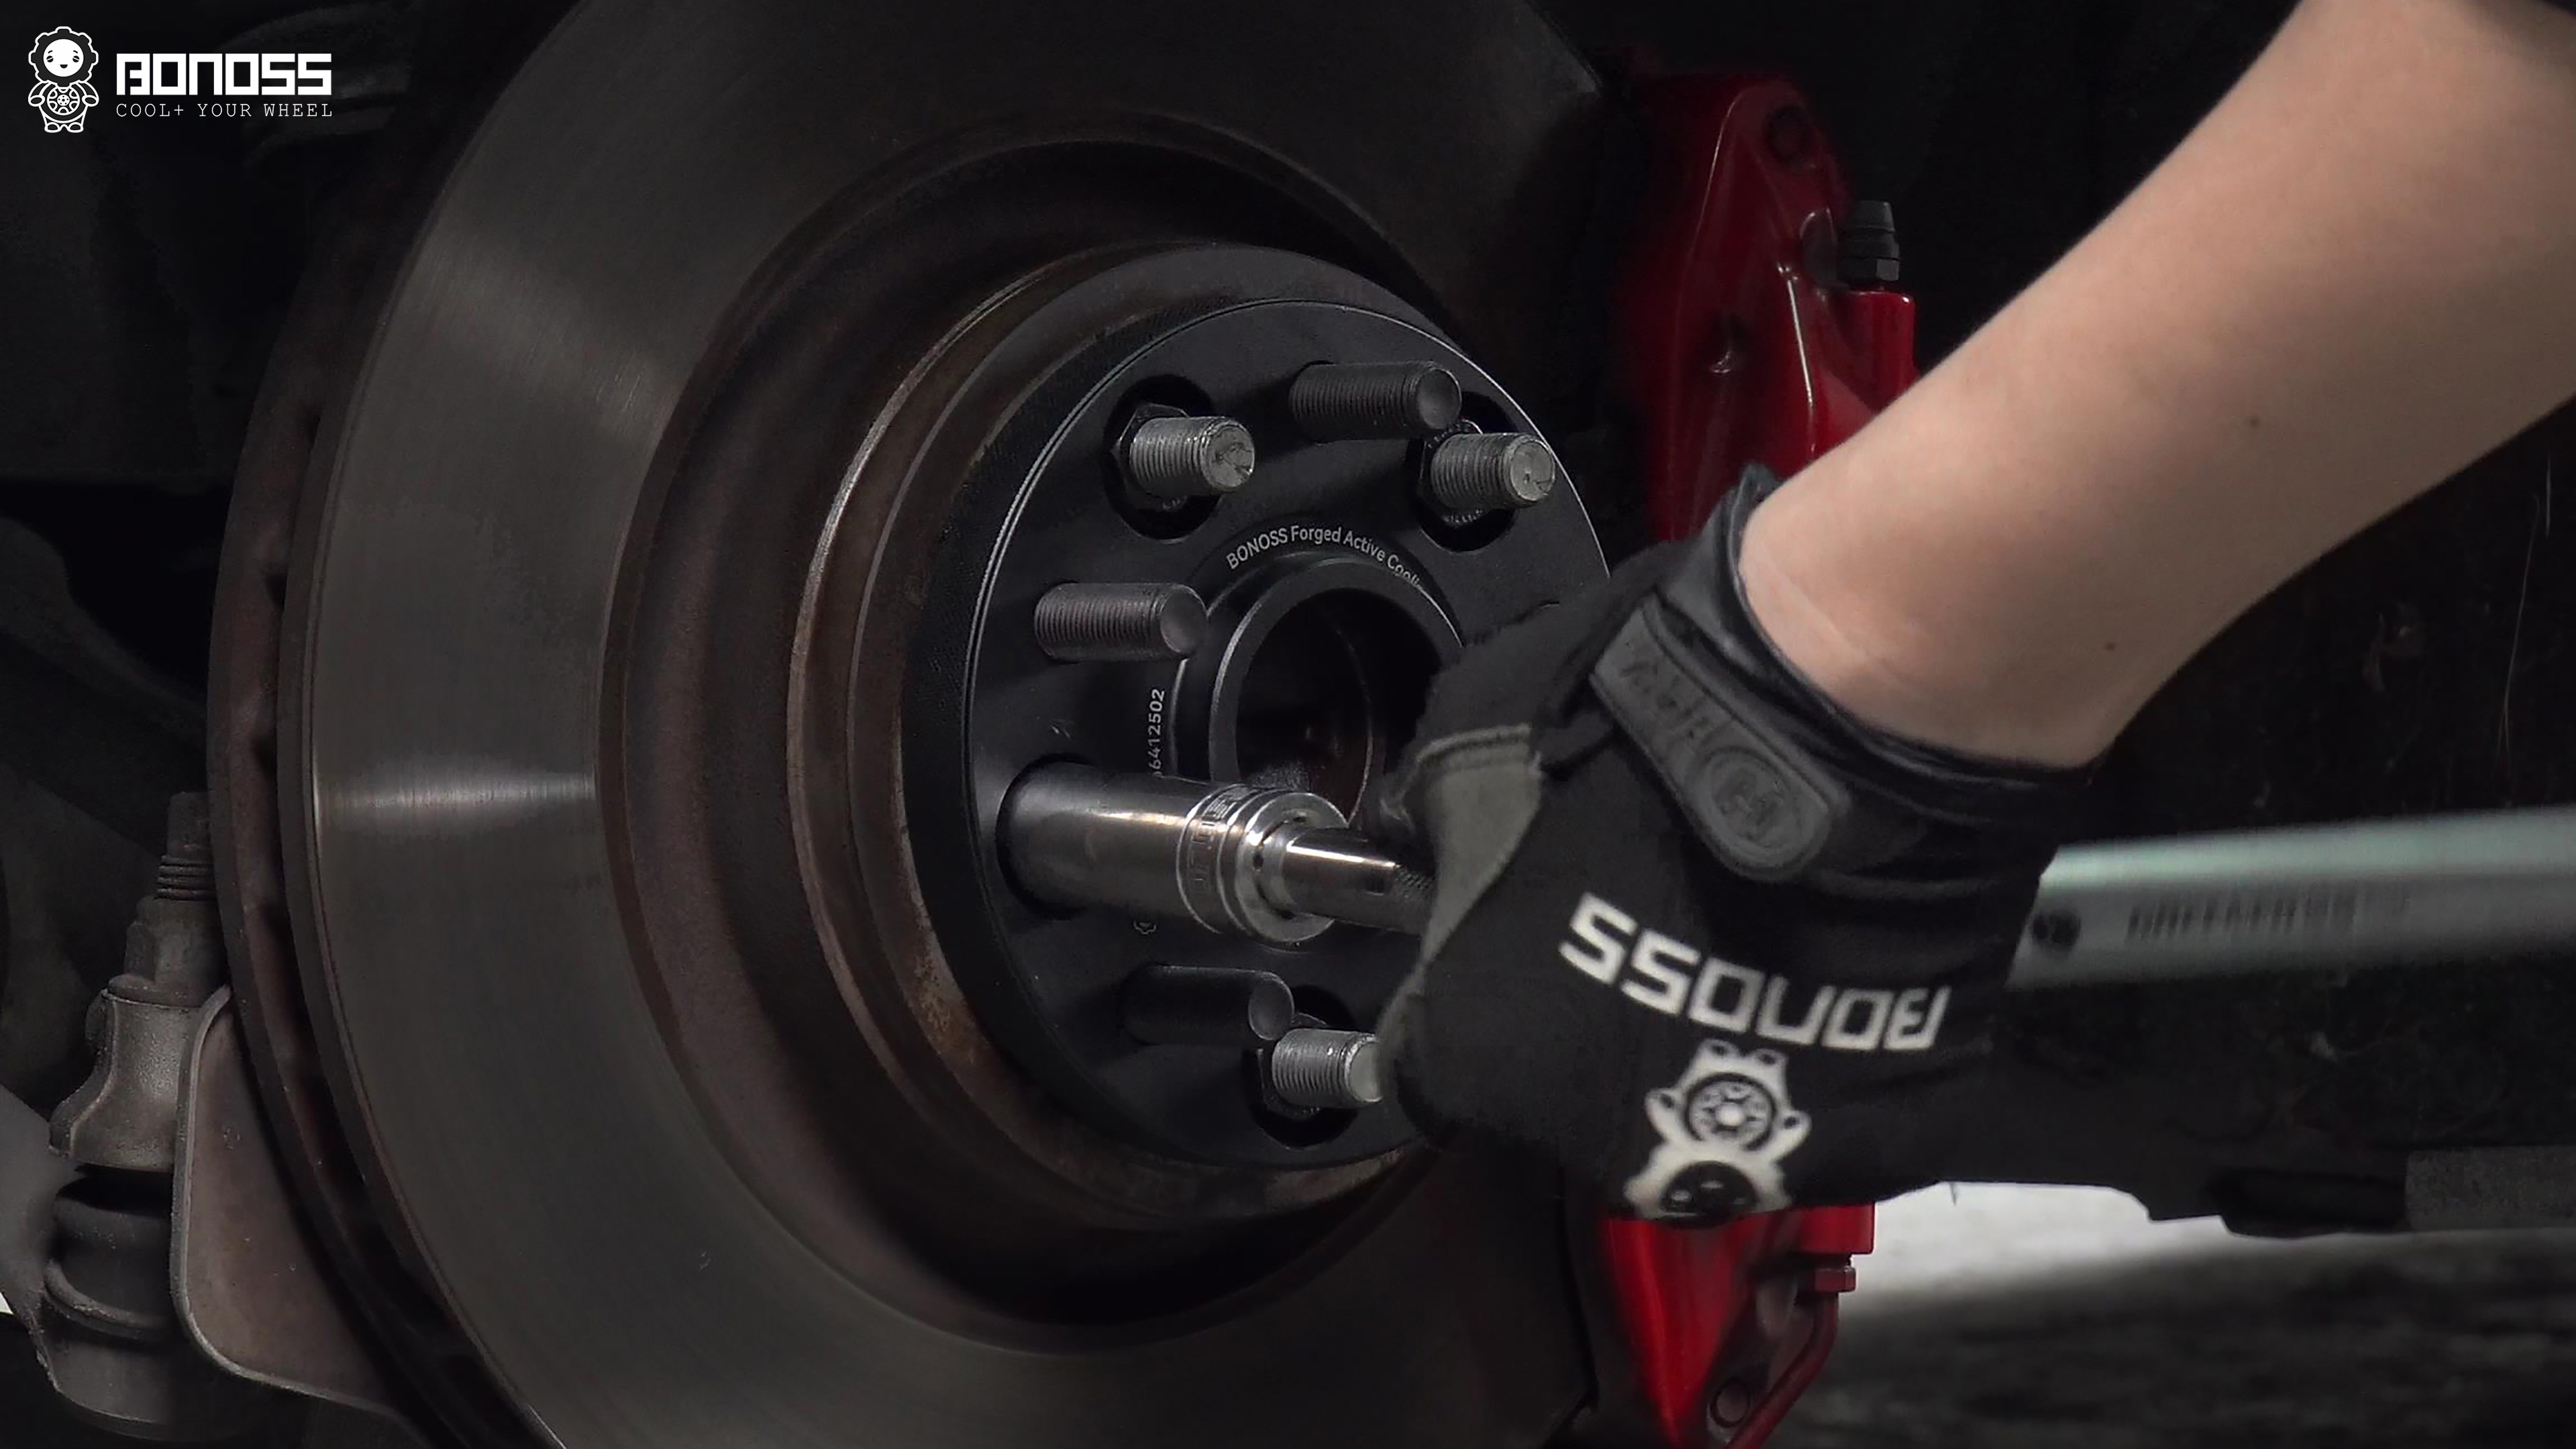
The Tesla Model S wheel spacer DIY installation guide provides the broader procedural checklist. The case-specific point is simpler: do not let one torque setting blur into the other, and do not use an impact tool as a substitute for final torque verification.
Tesla Model S 20mm Spacers Before and After
The front comparison shows the visual effect of moving each OEM wheel from ET40 to an effective ET20. The wheel remains inside the fender line, but the original inset is reduced. Because the wheels, tires, and ride height did not change, the difference is easy to isolate.
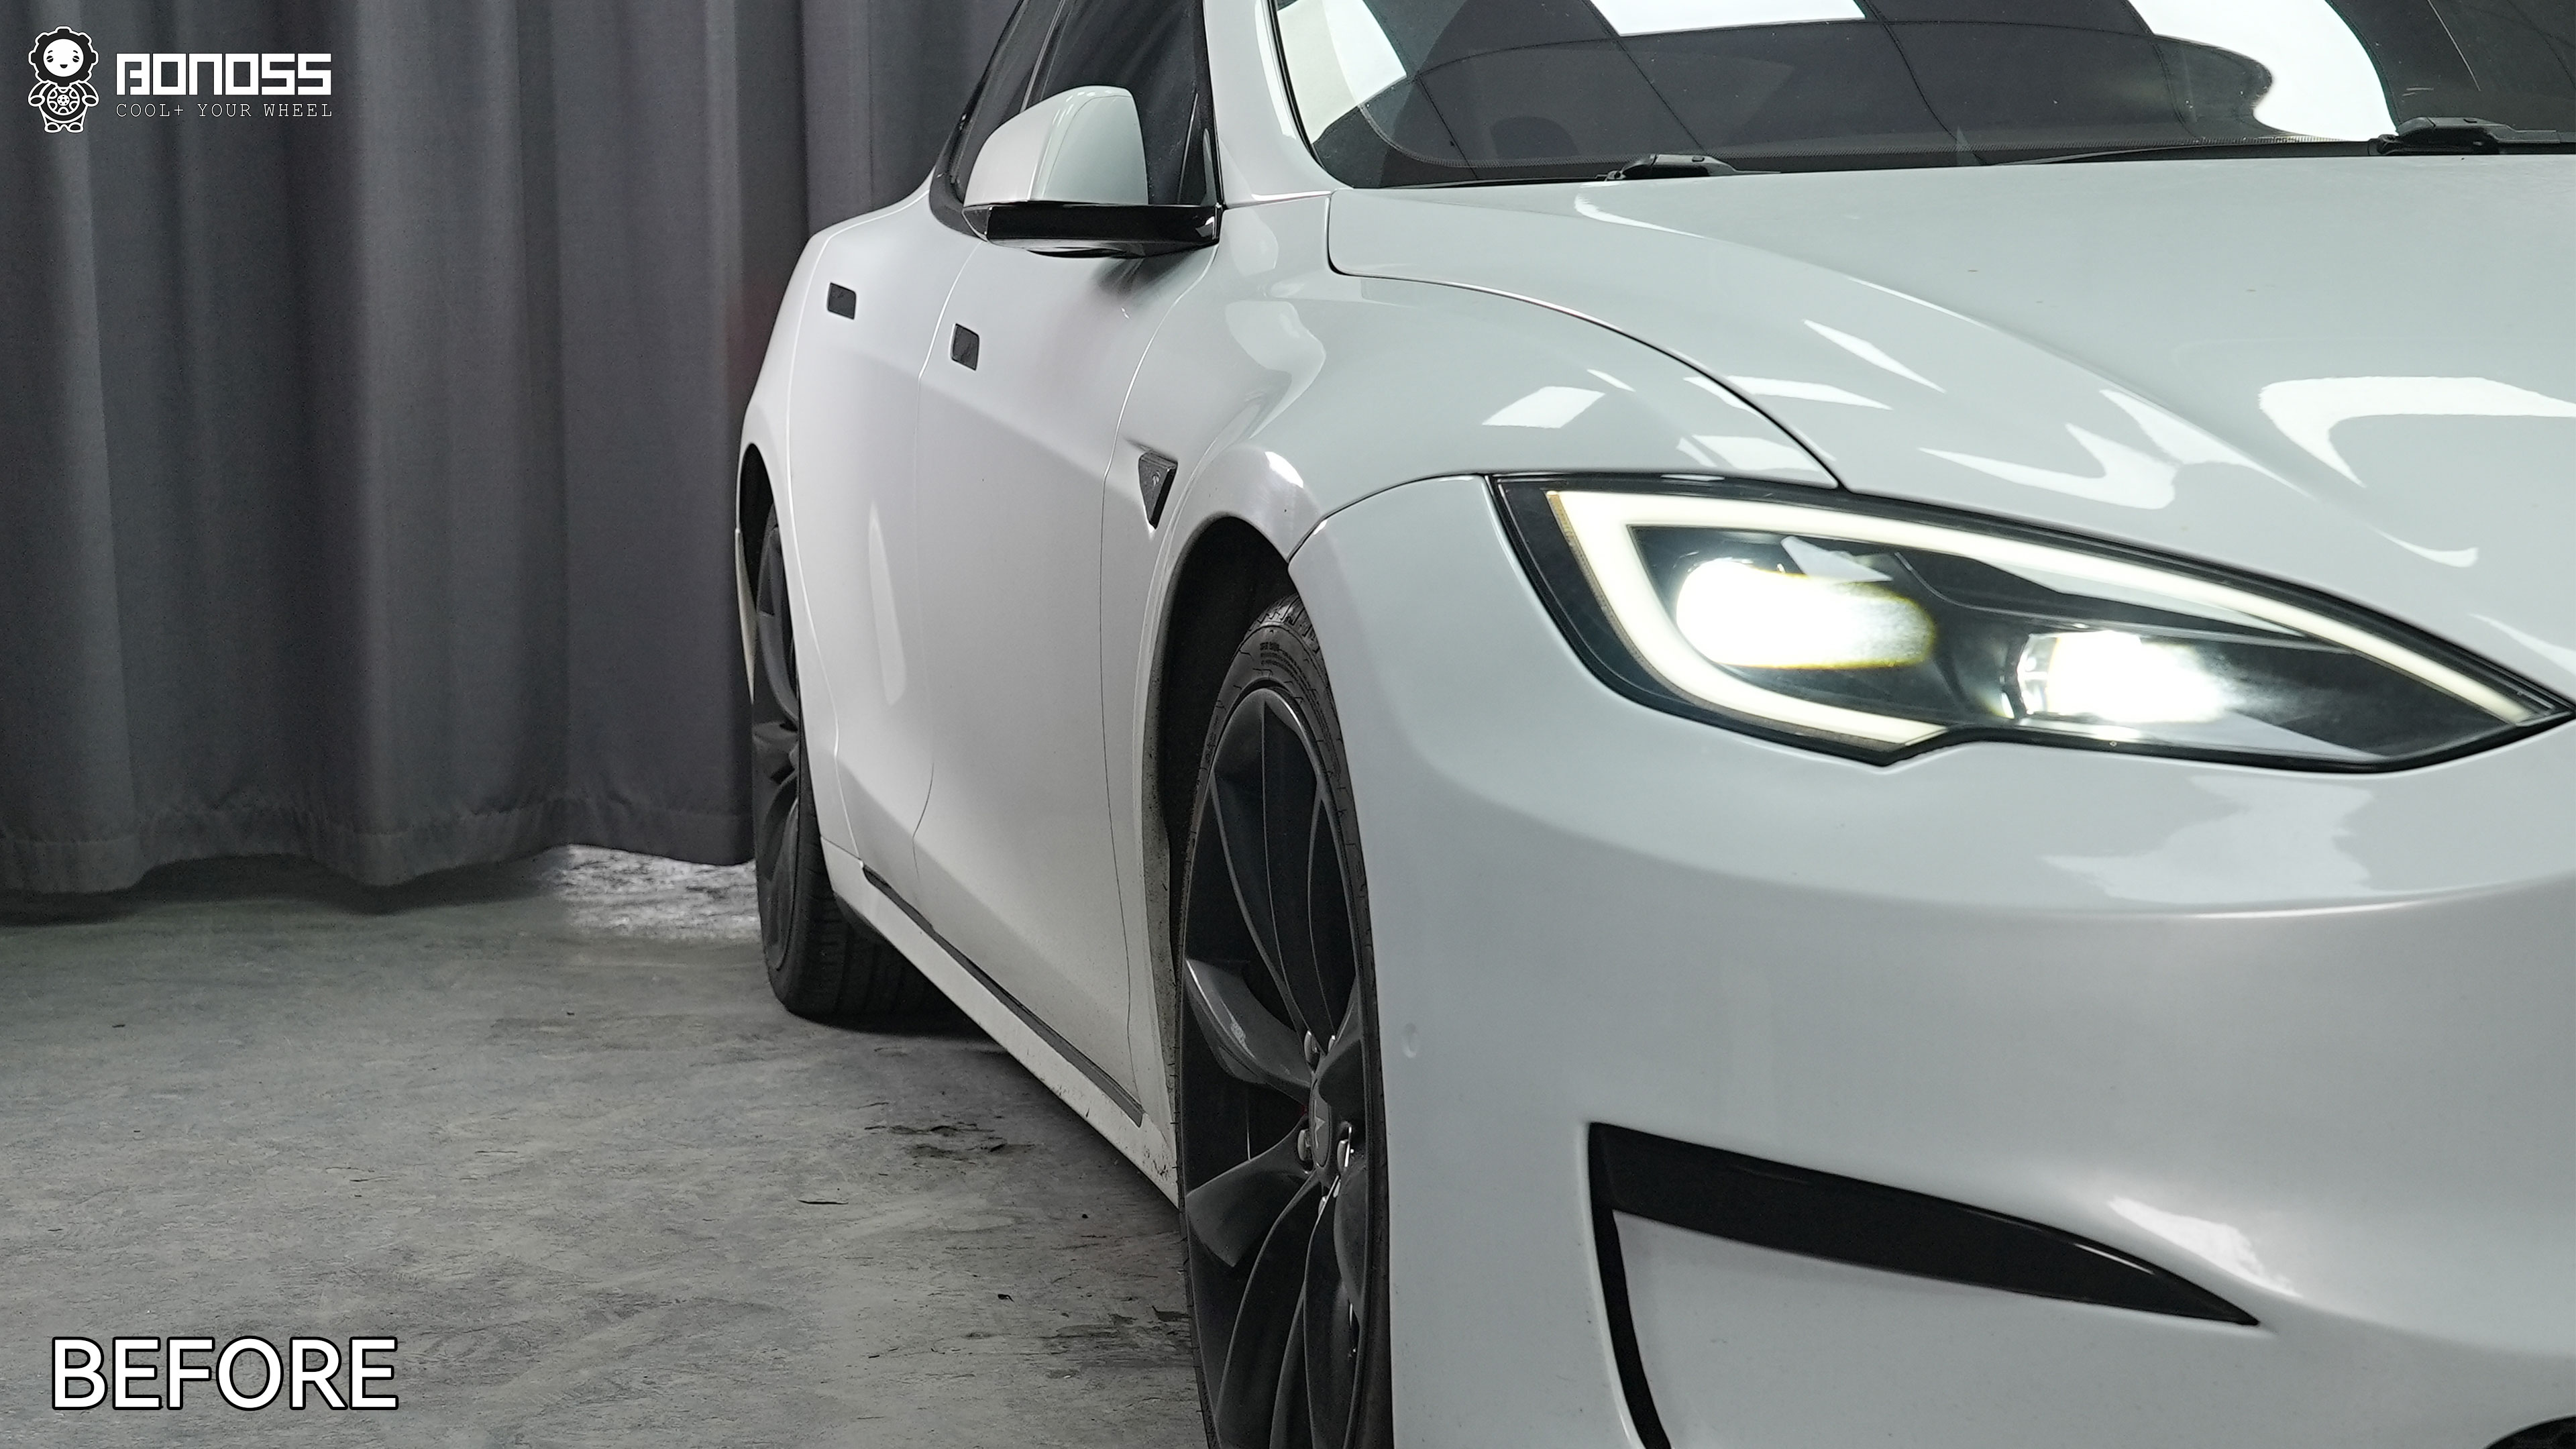
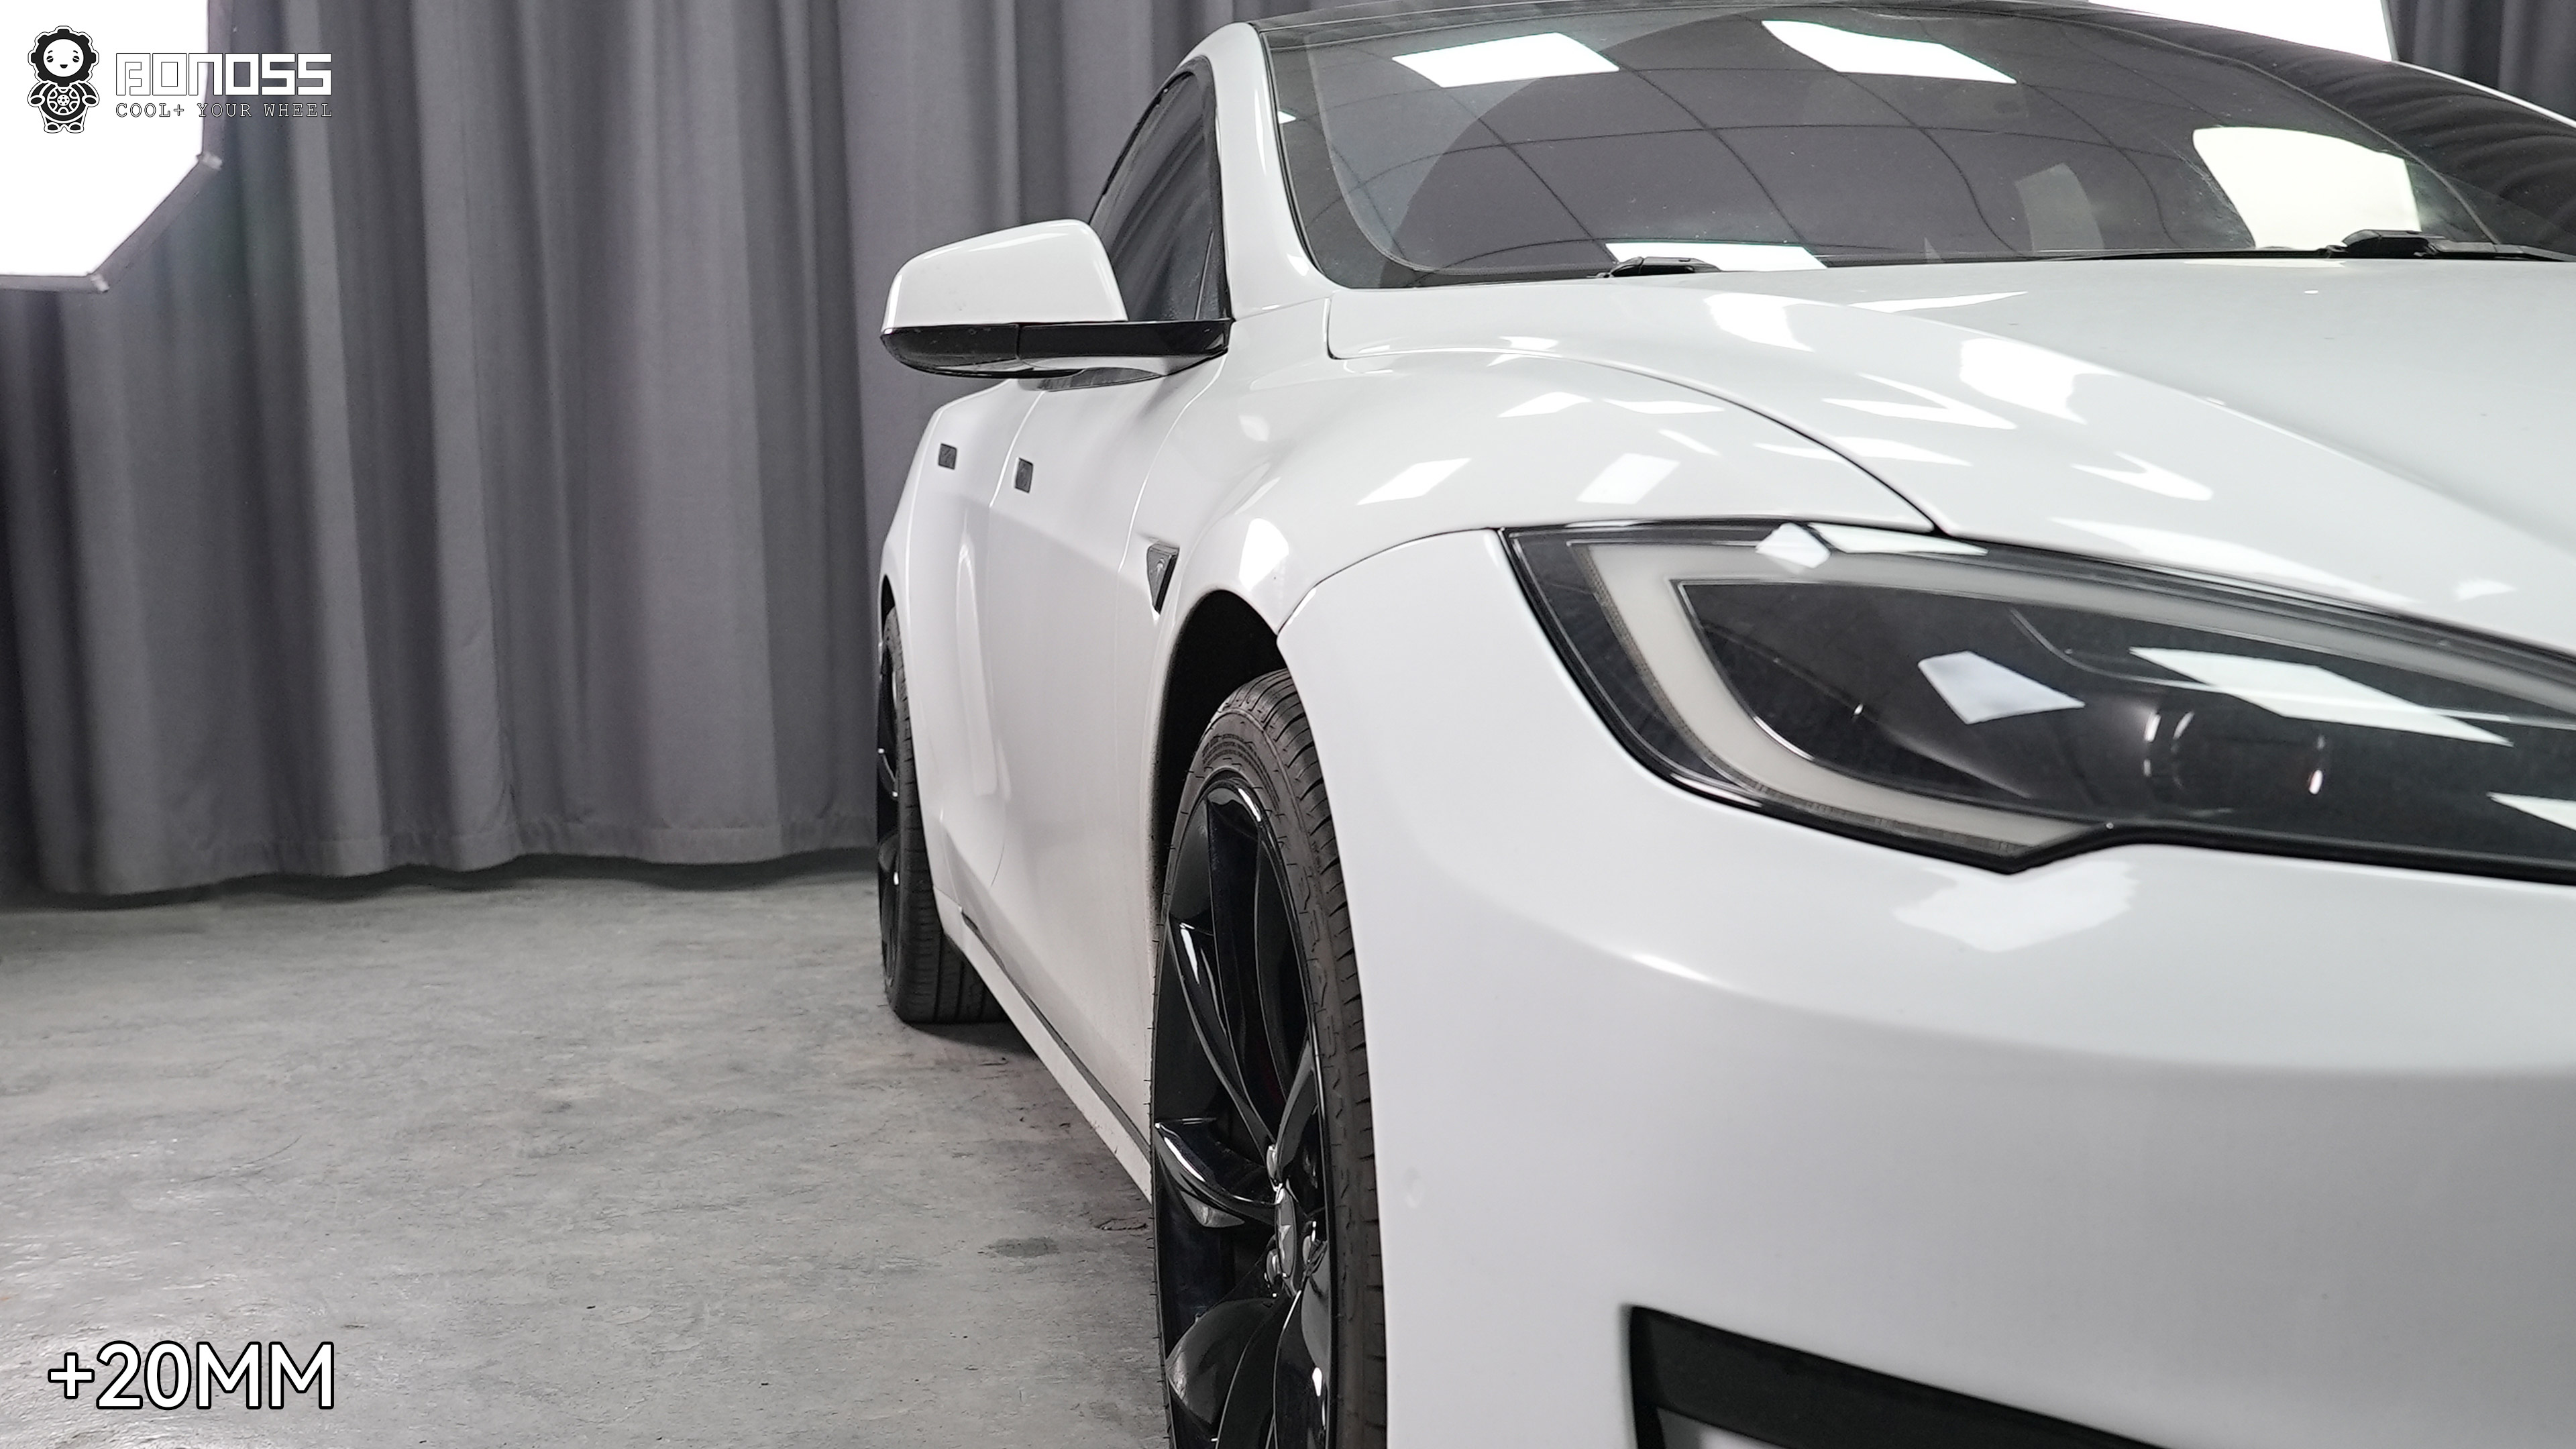
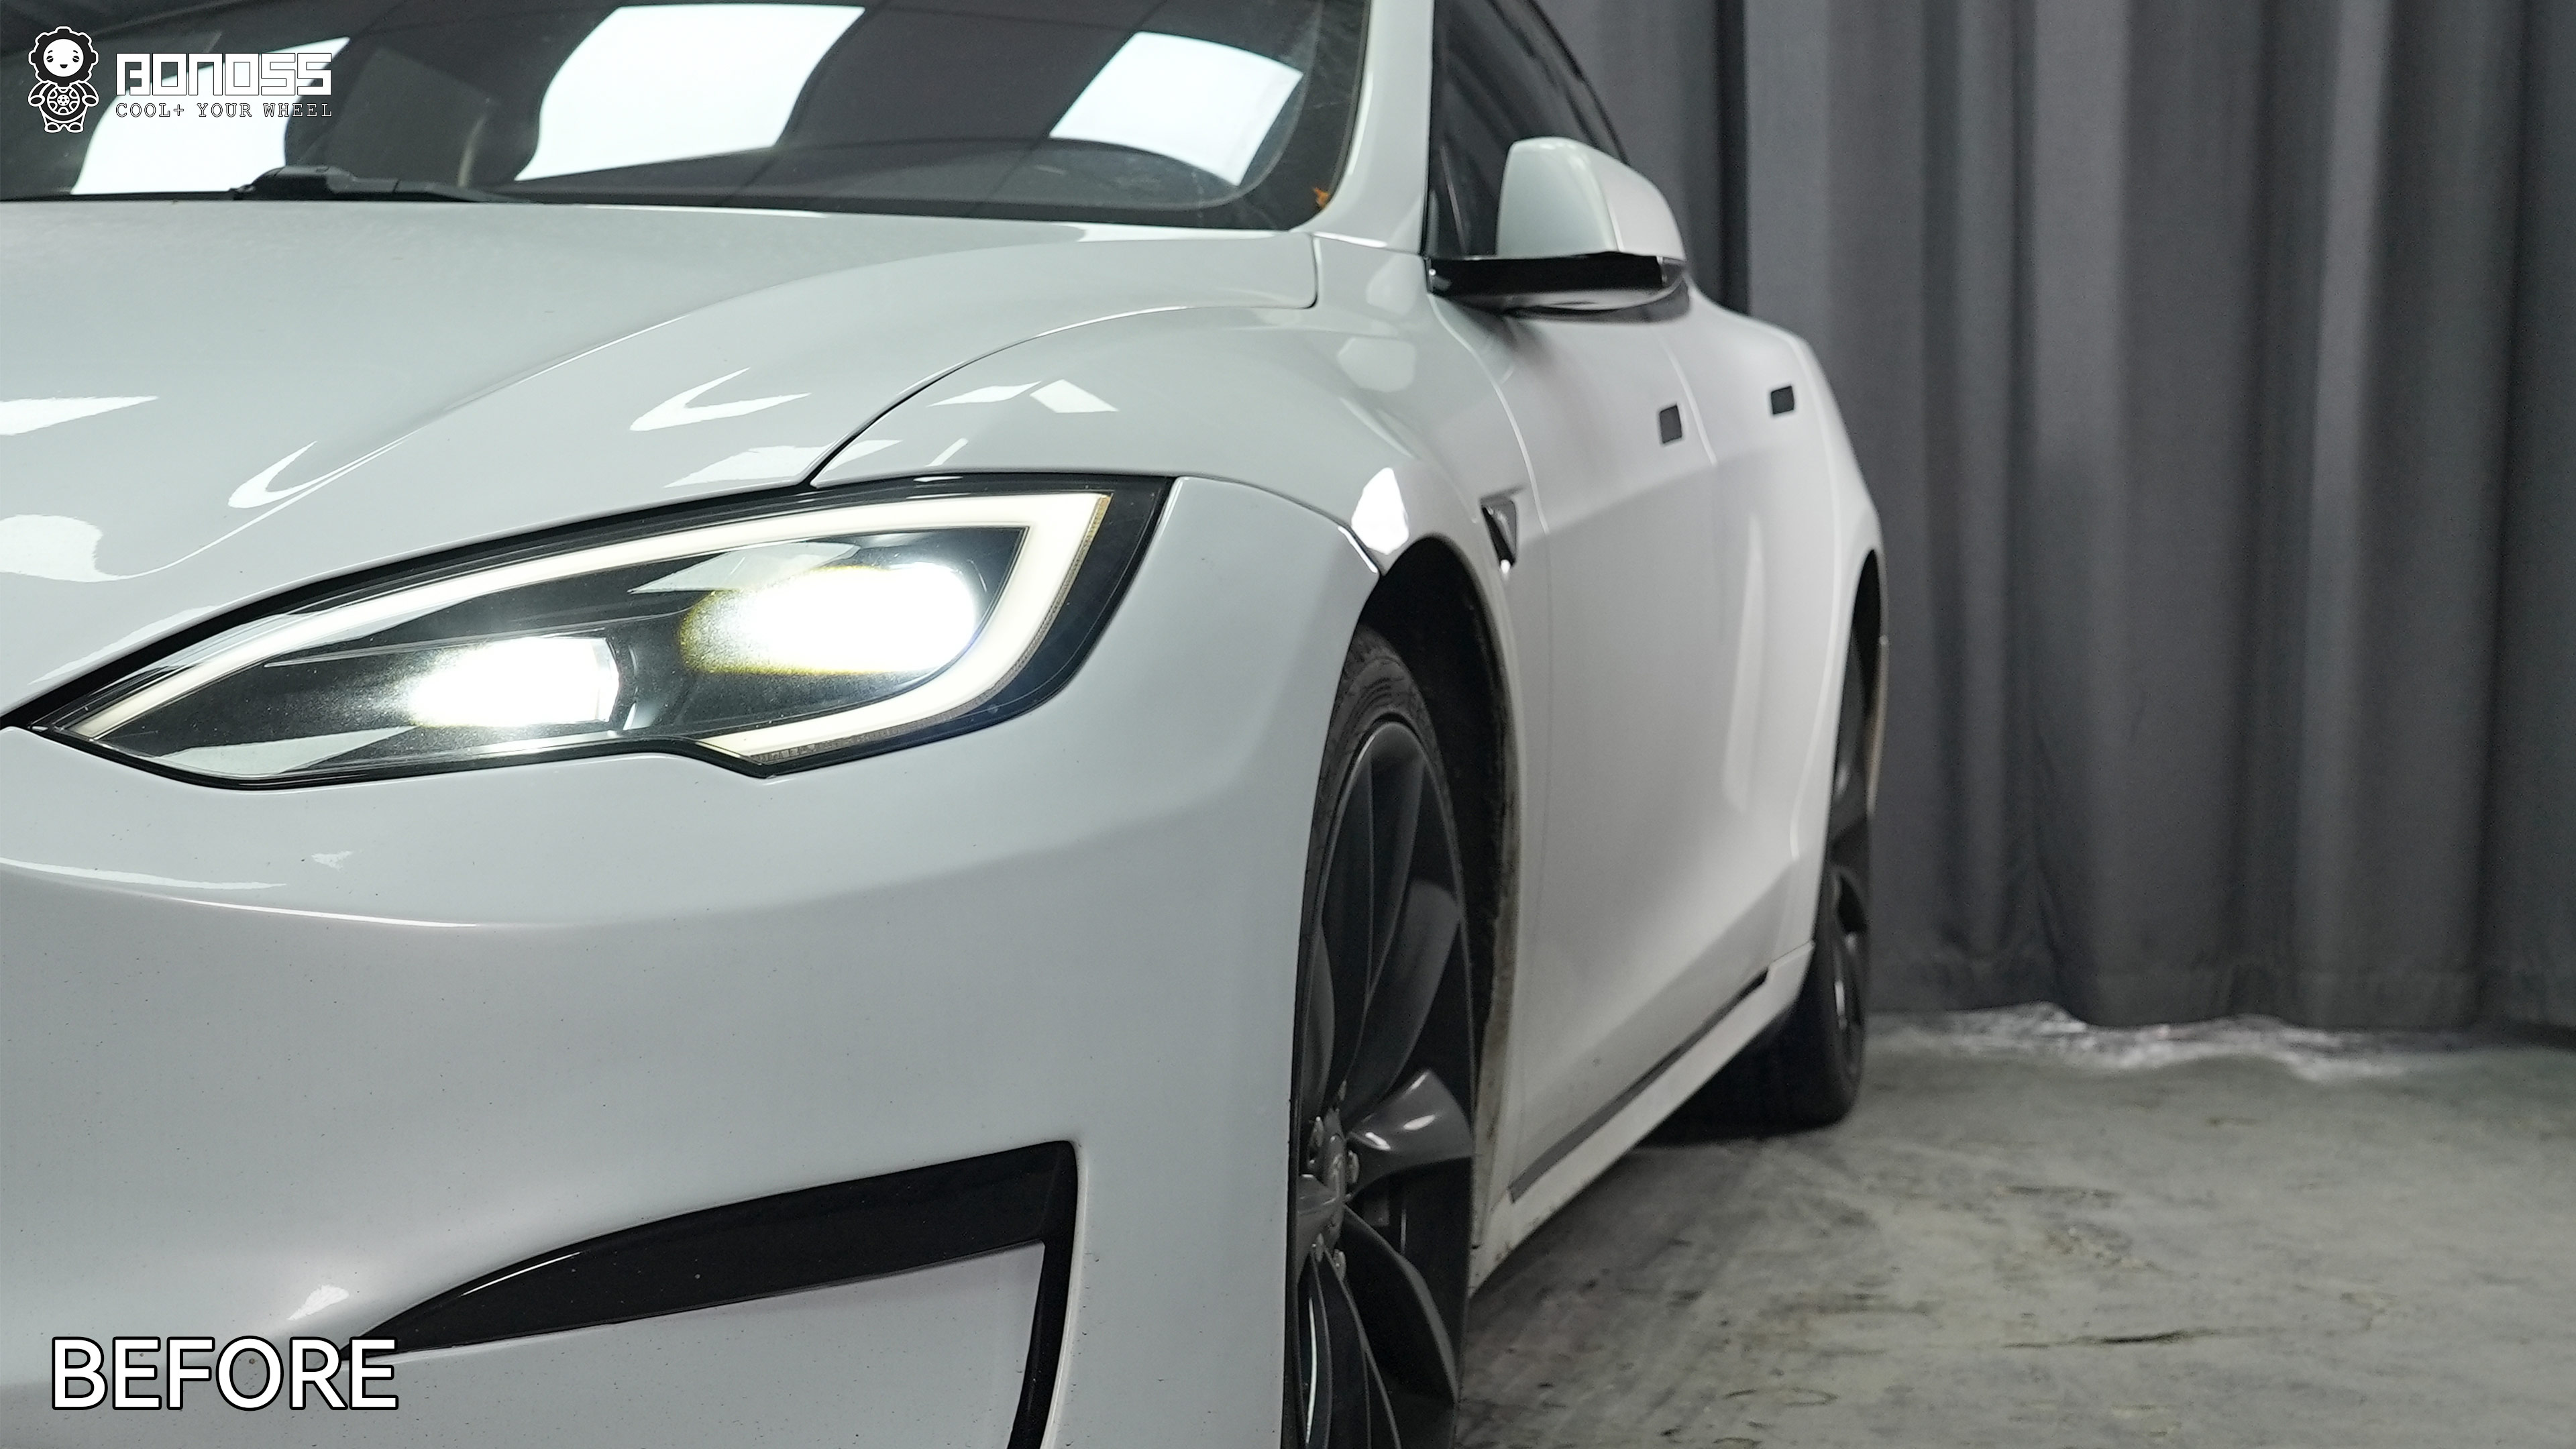
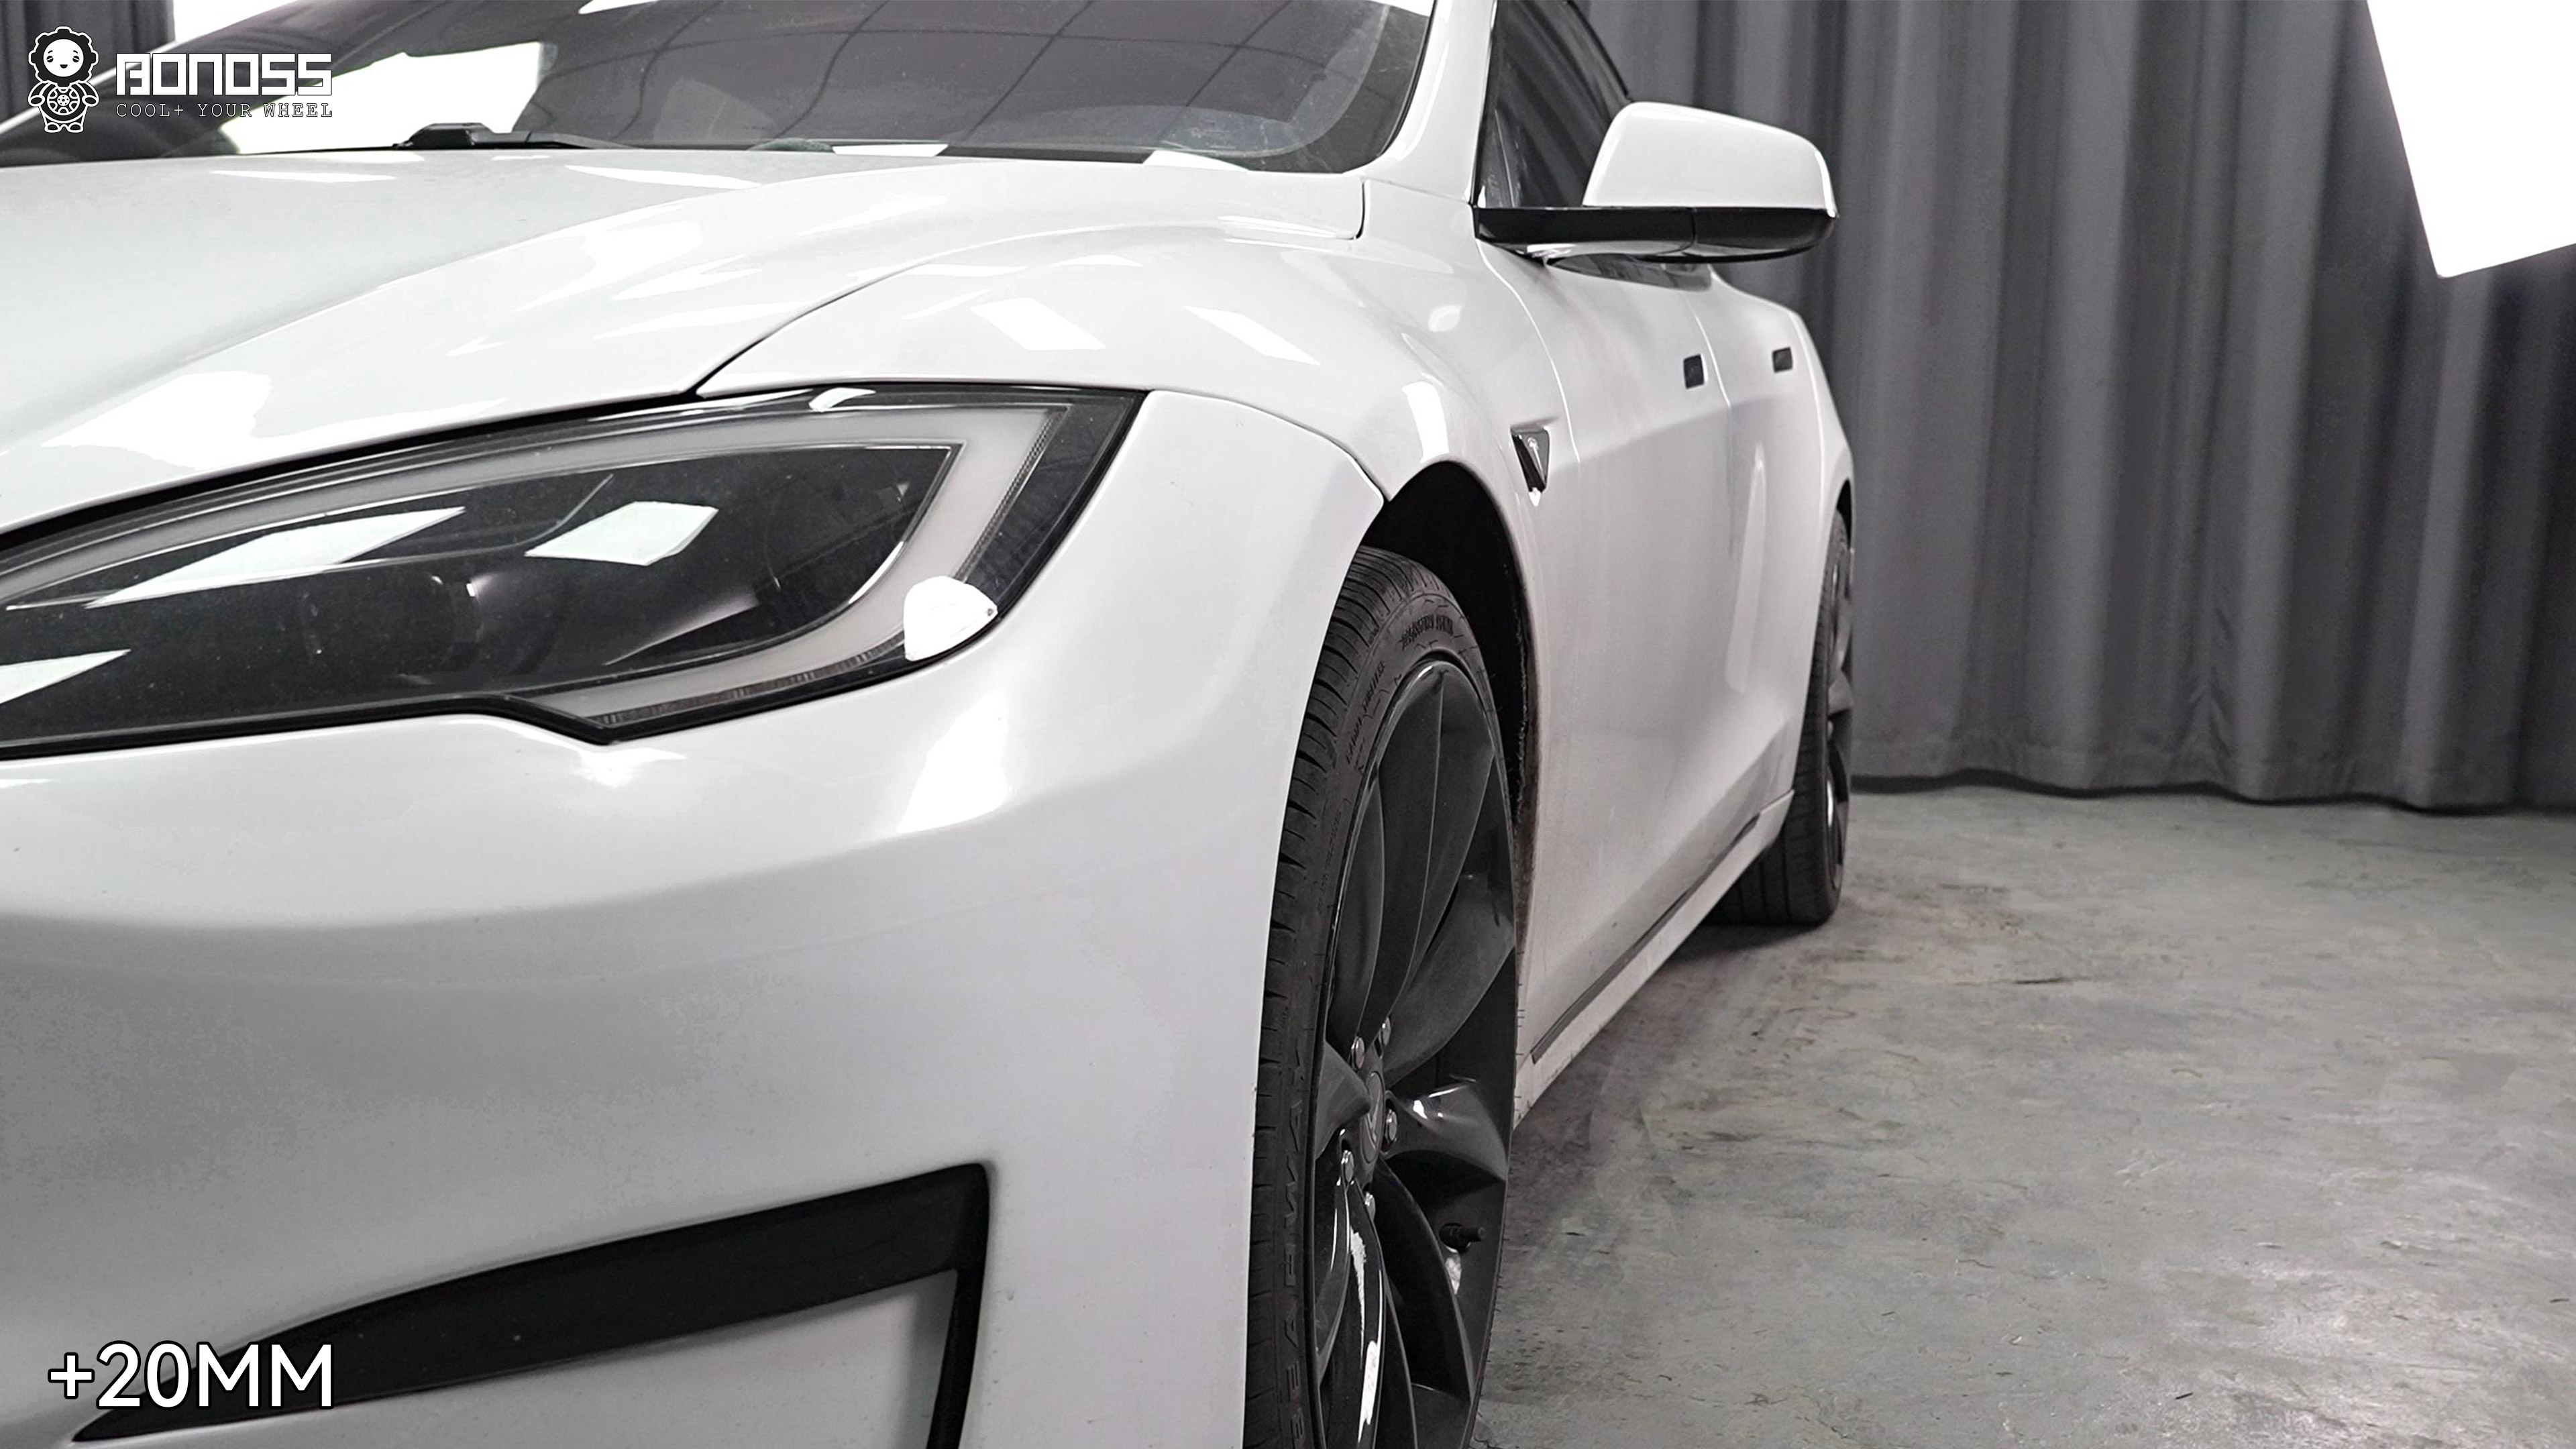
The rear needed the larger correction. A 30mm spacer changed effective offset from ET40 to ET10 and completed the stance without altering the original wheel and tire package. This is why copying 20mm at all four corners would not have reproduced Daniel’s result.
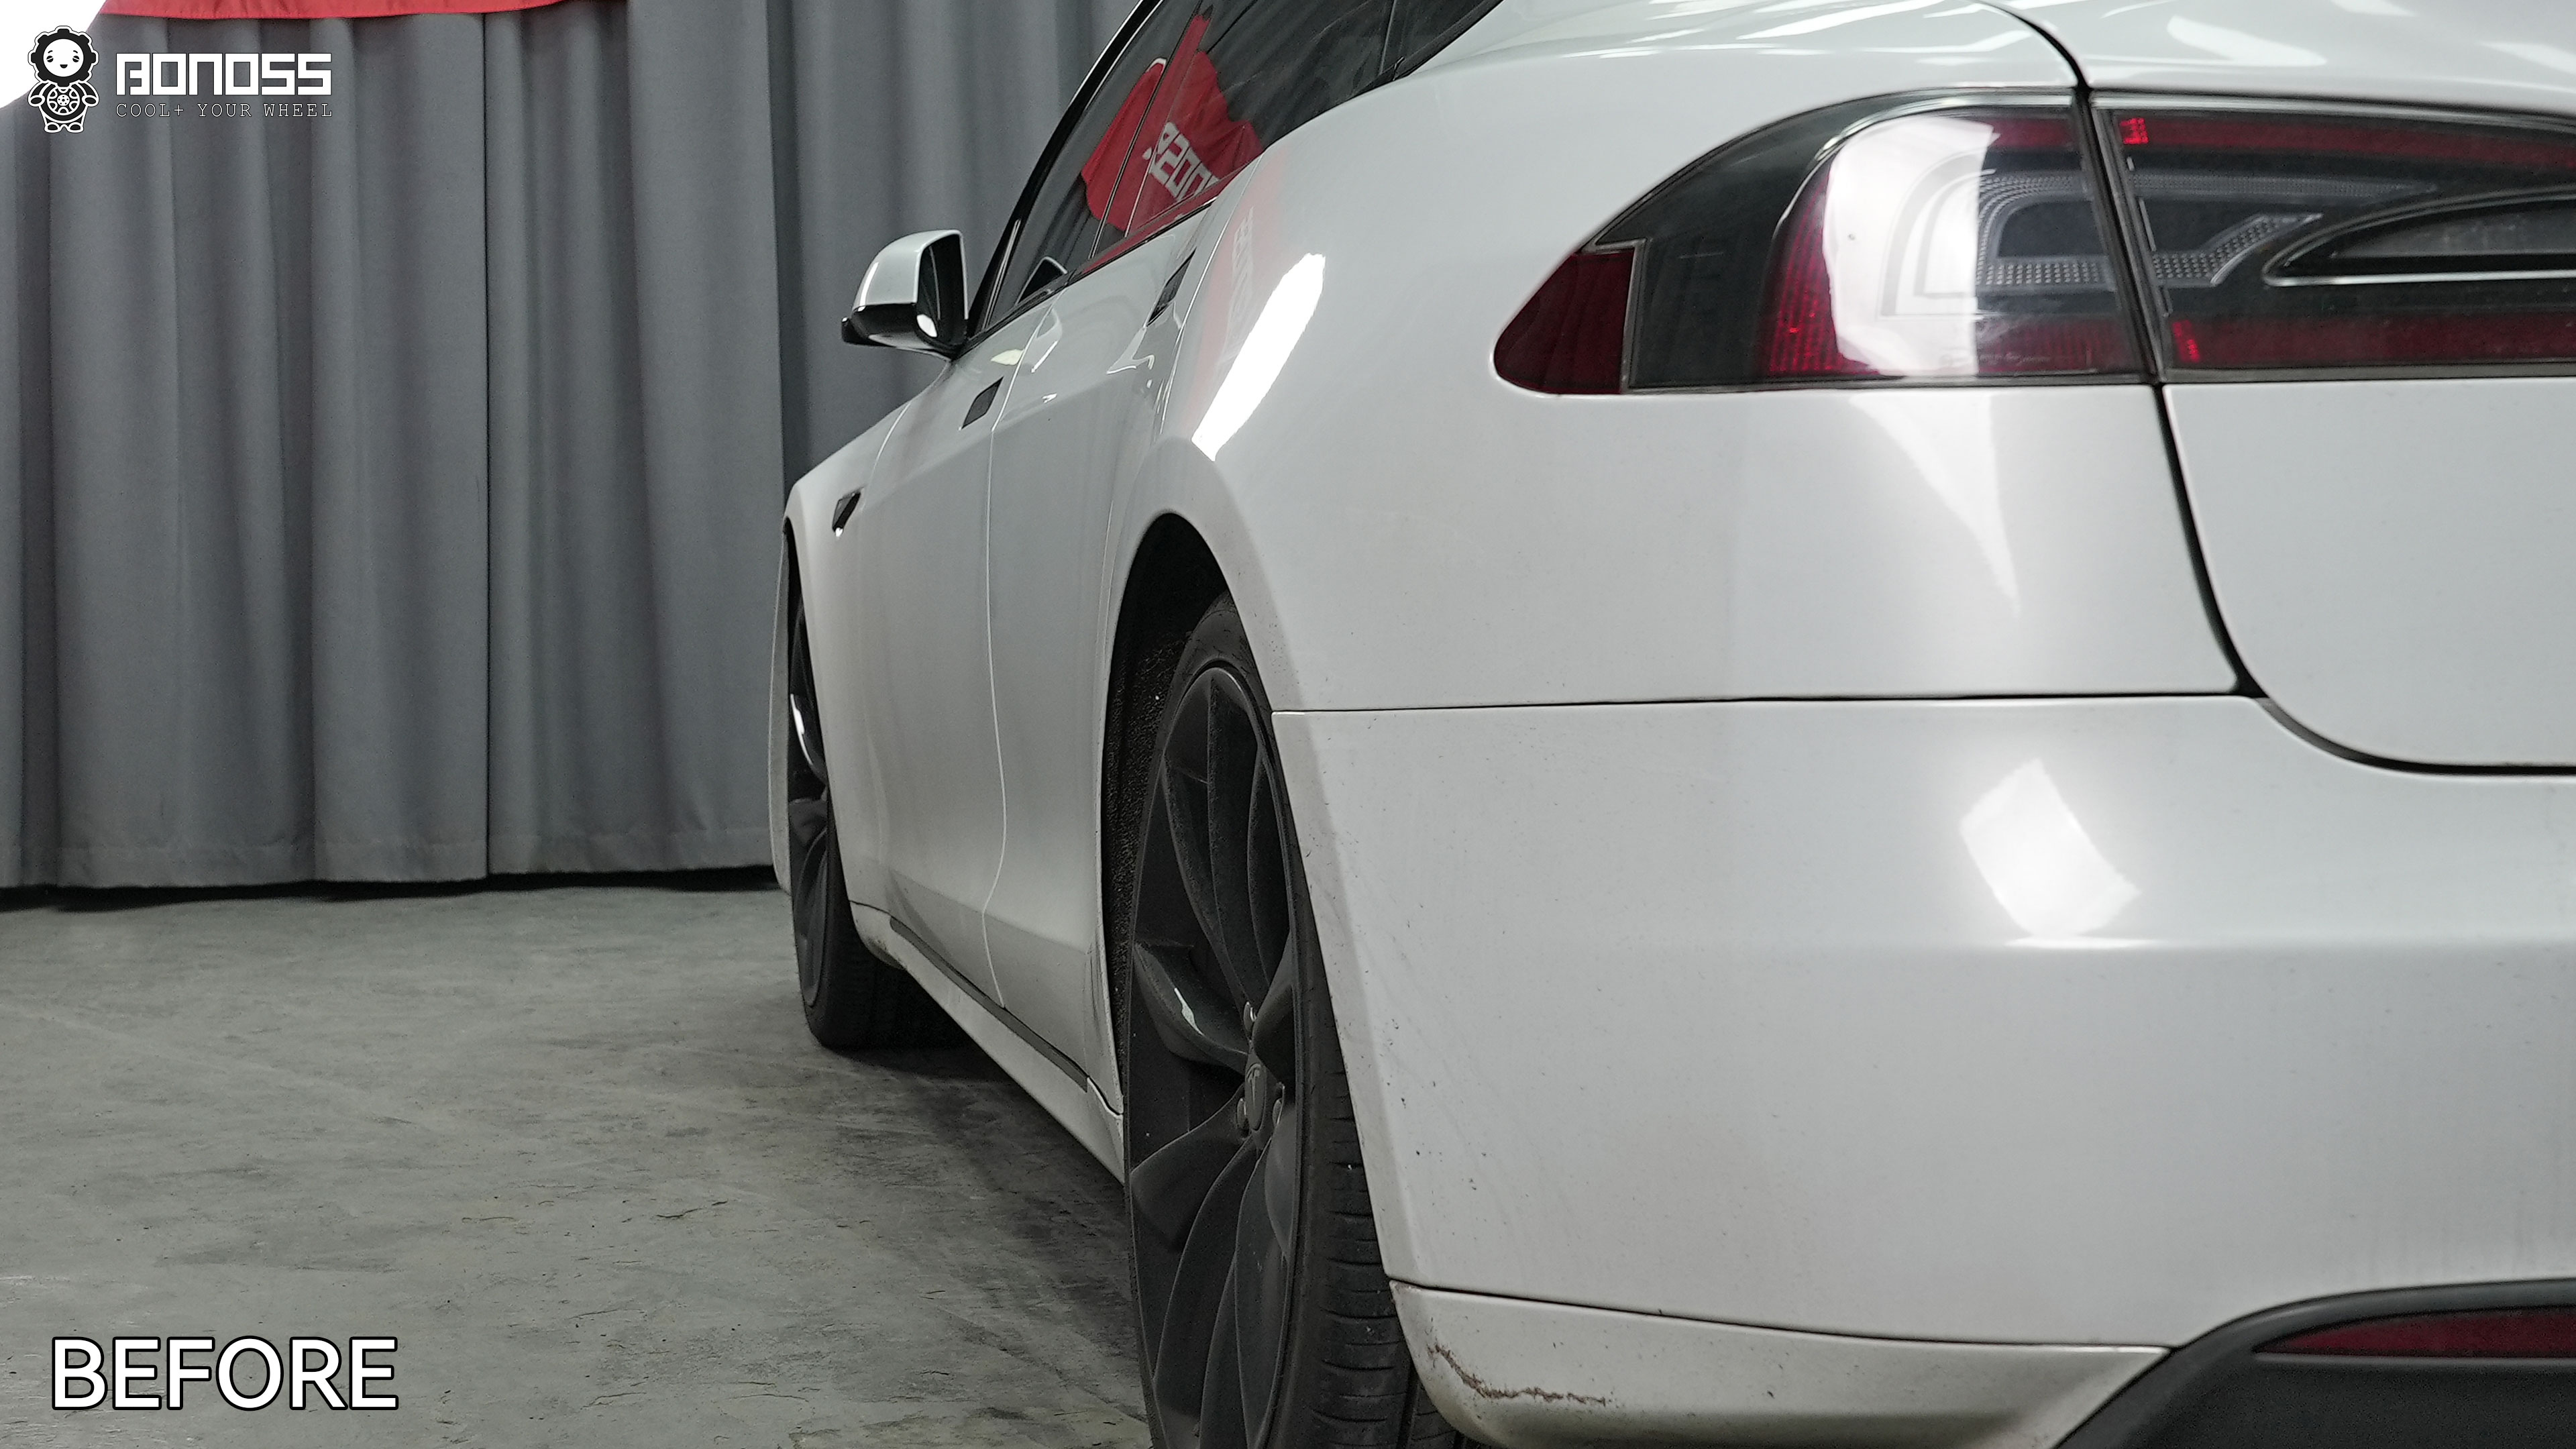
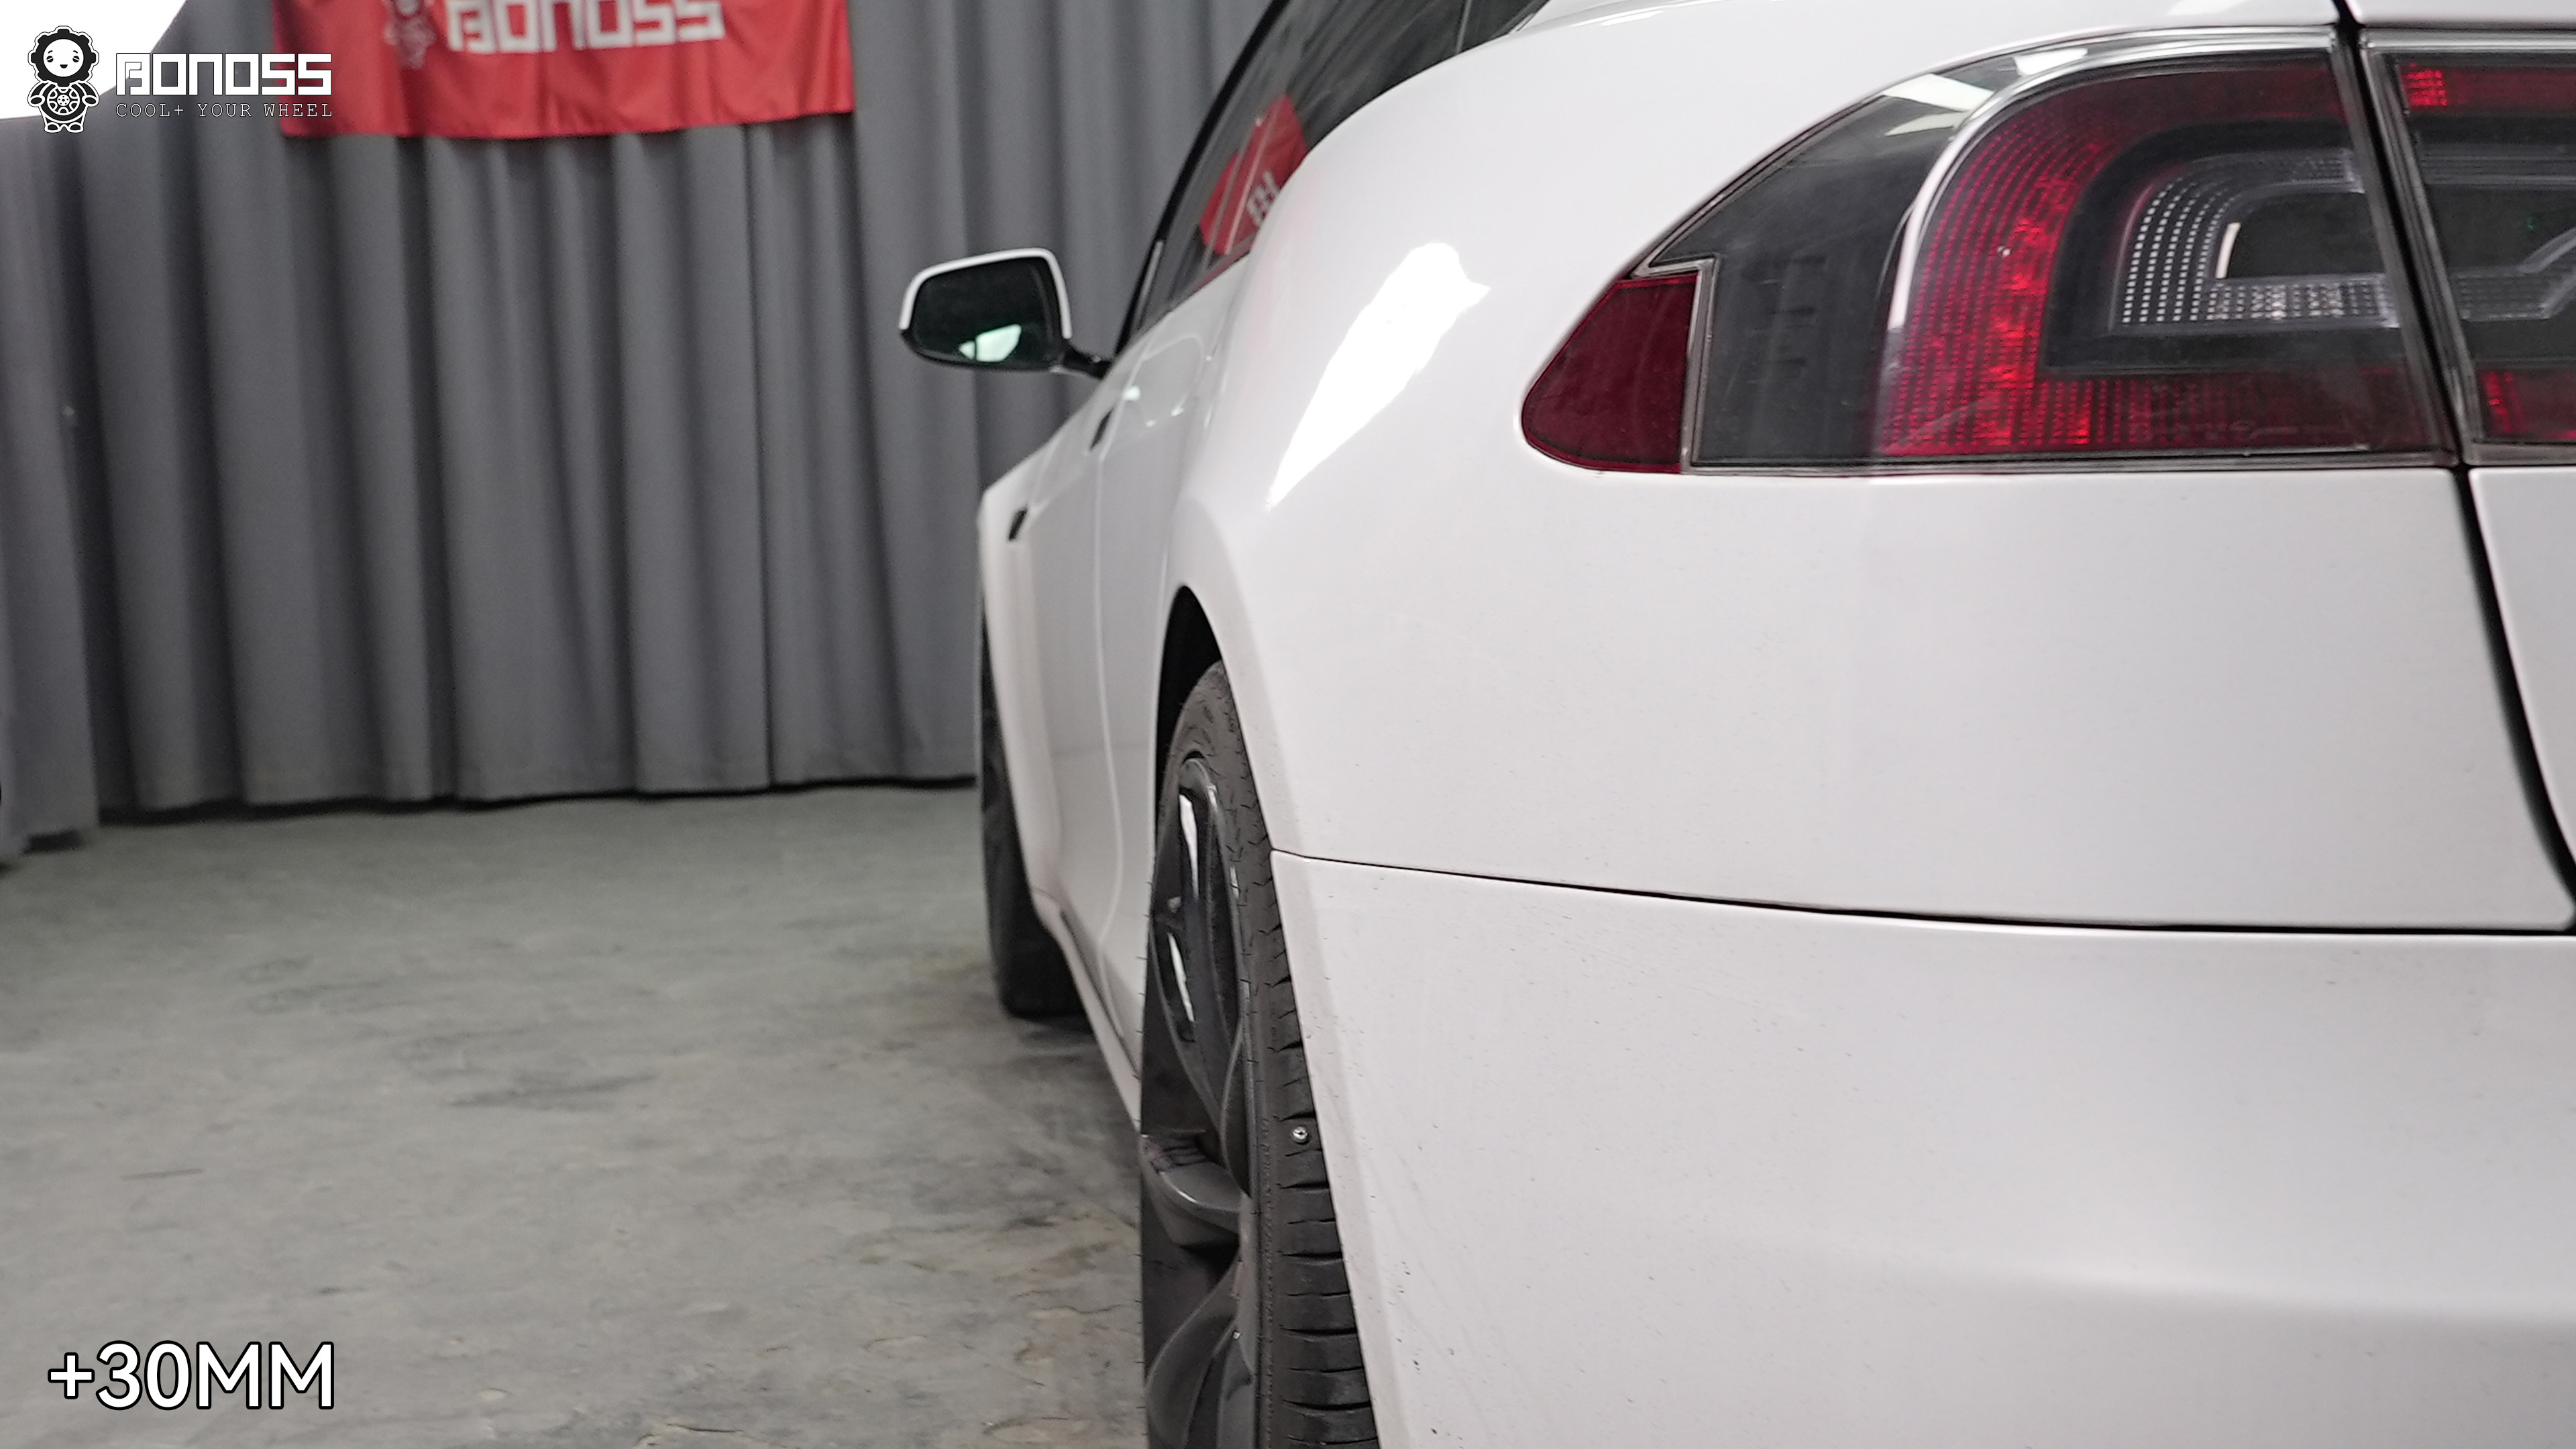
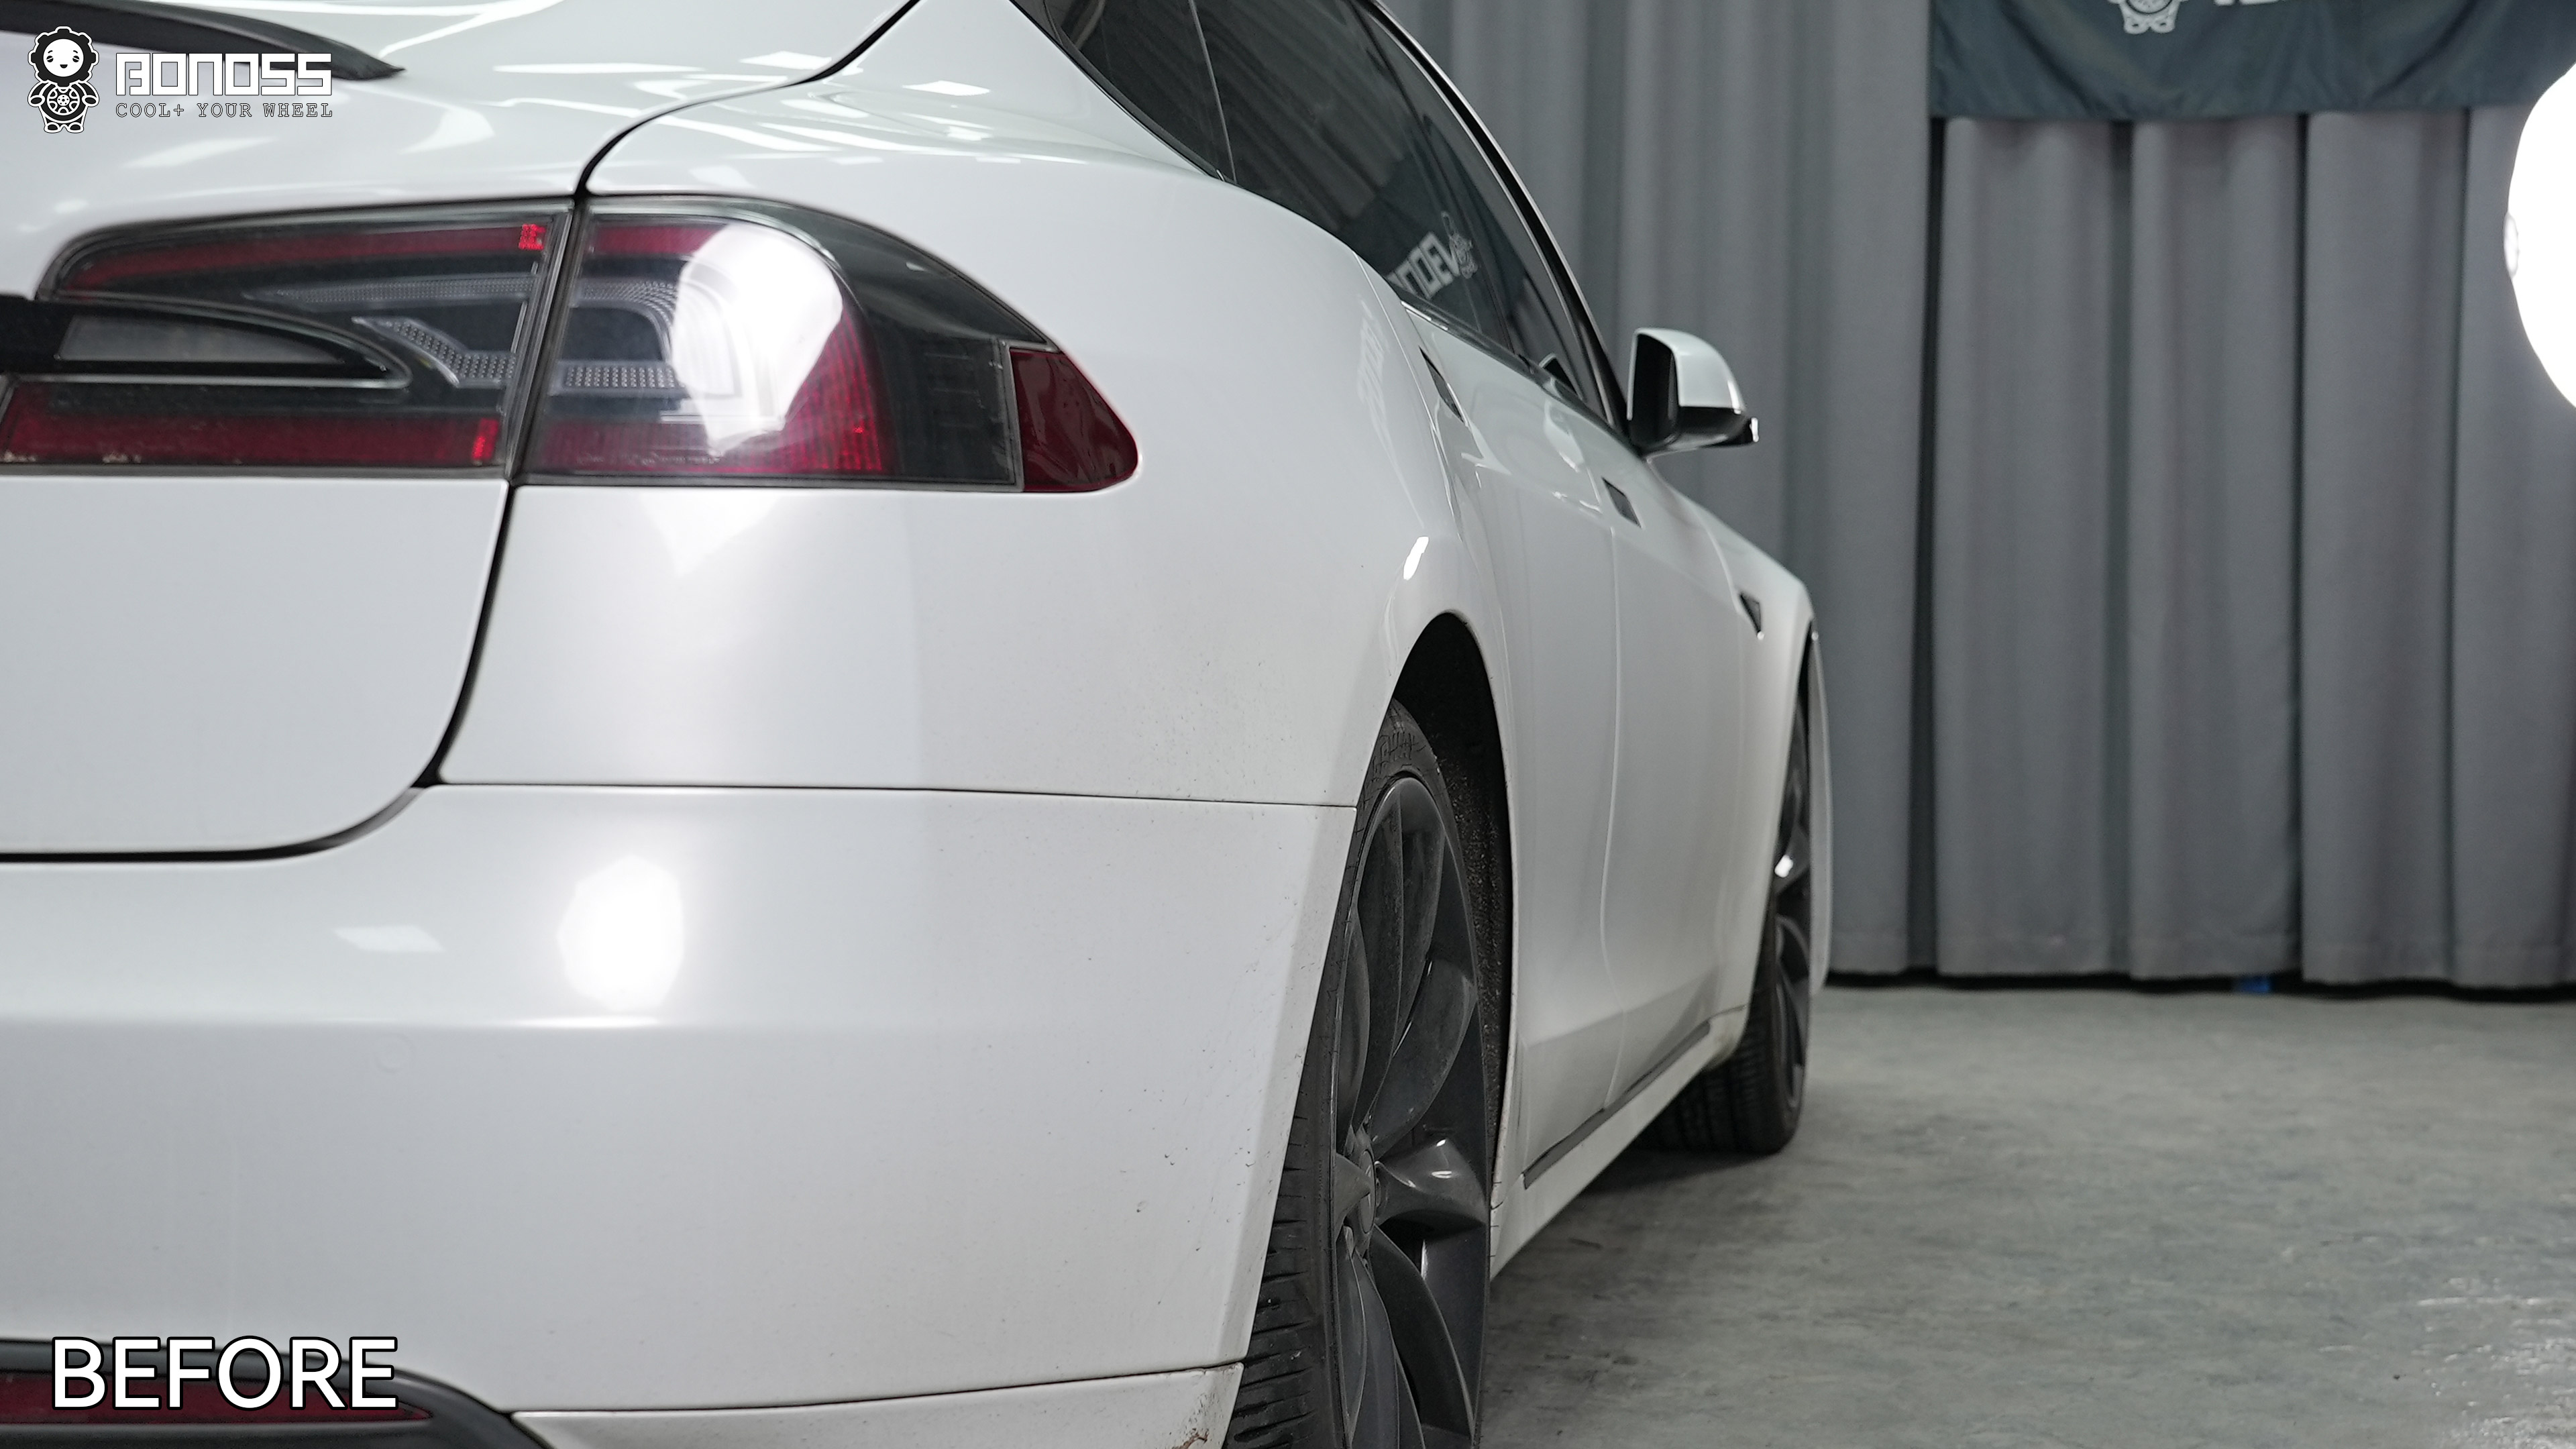
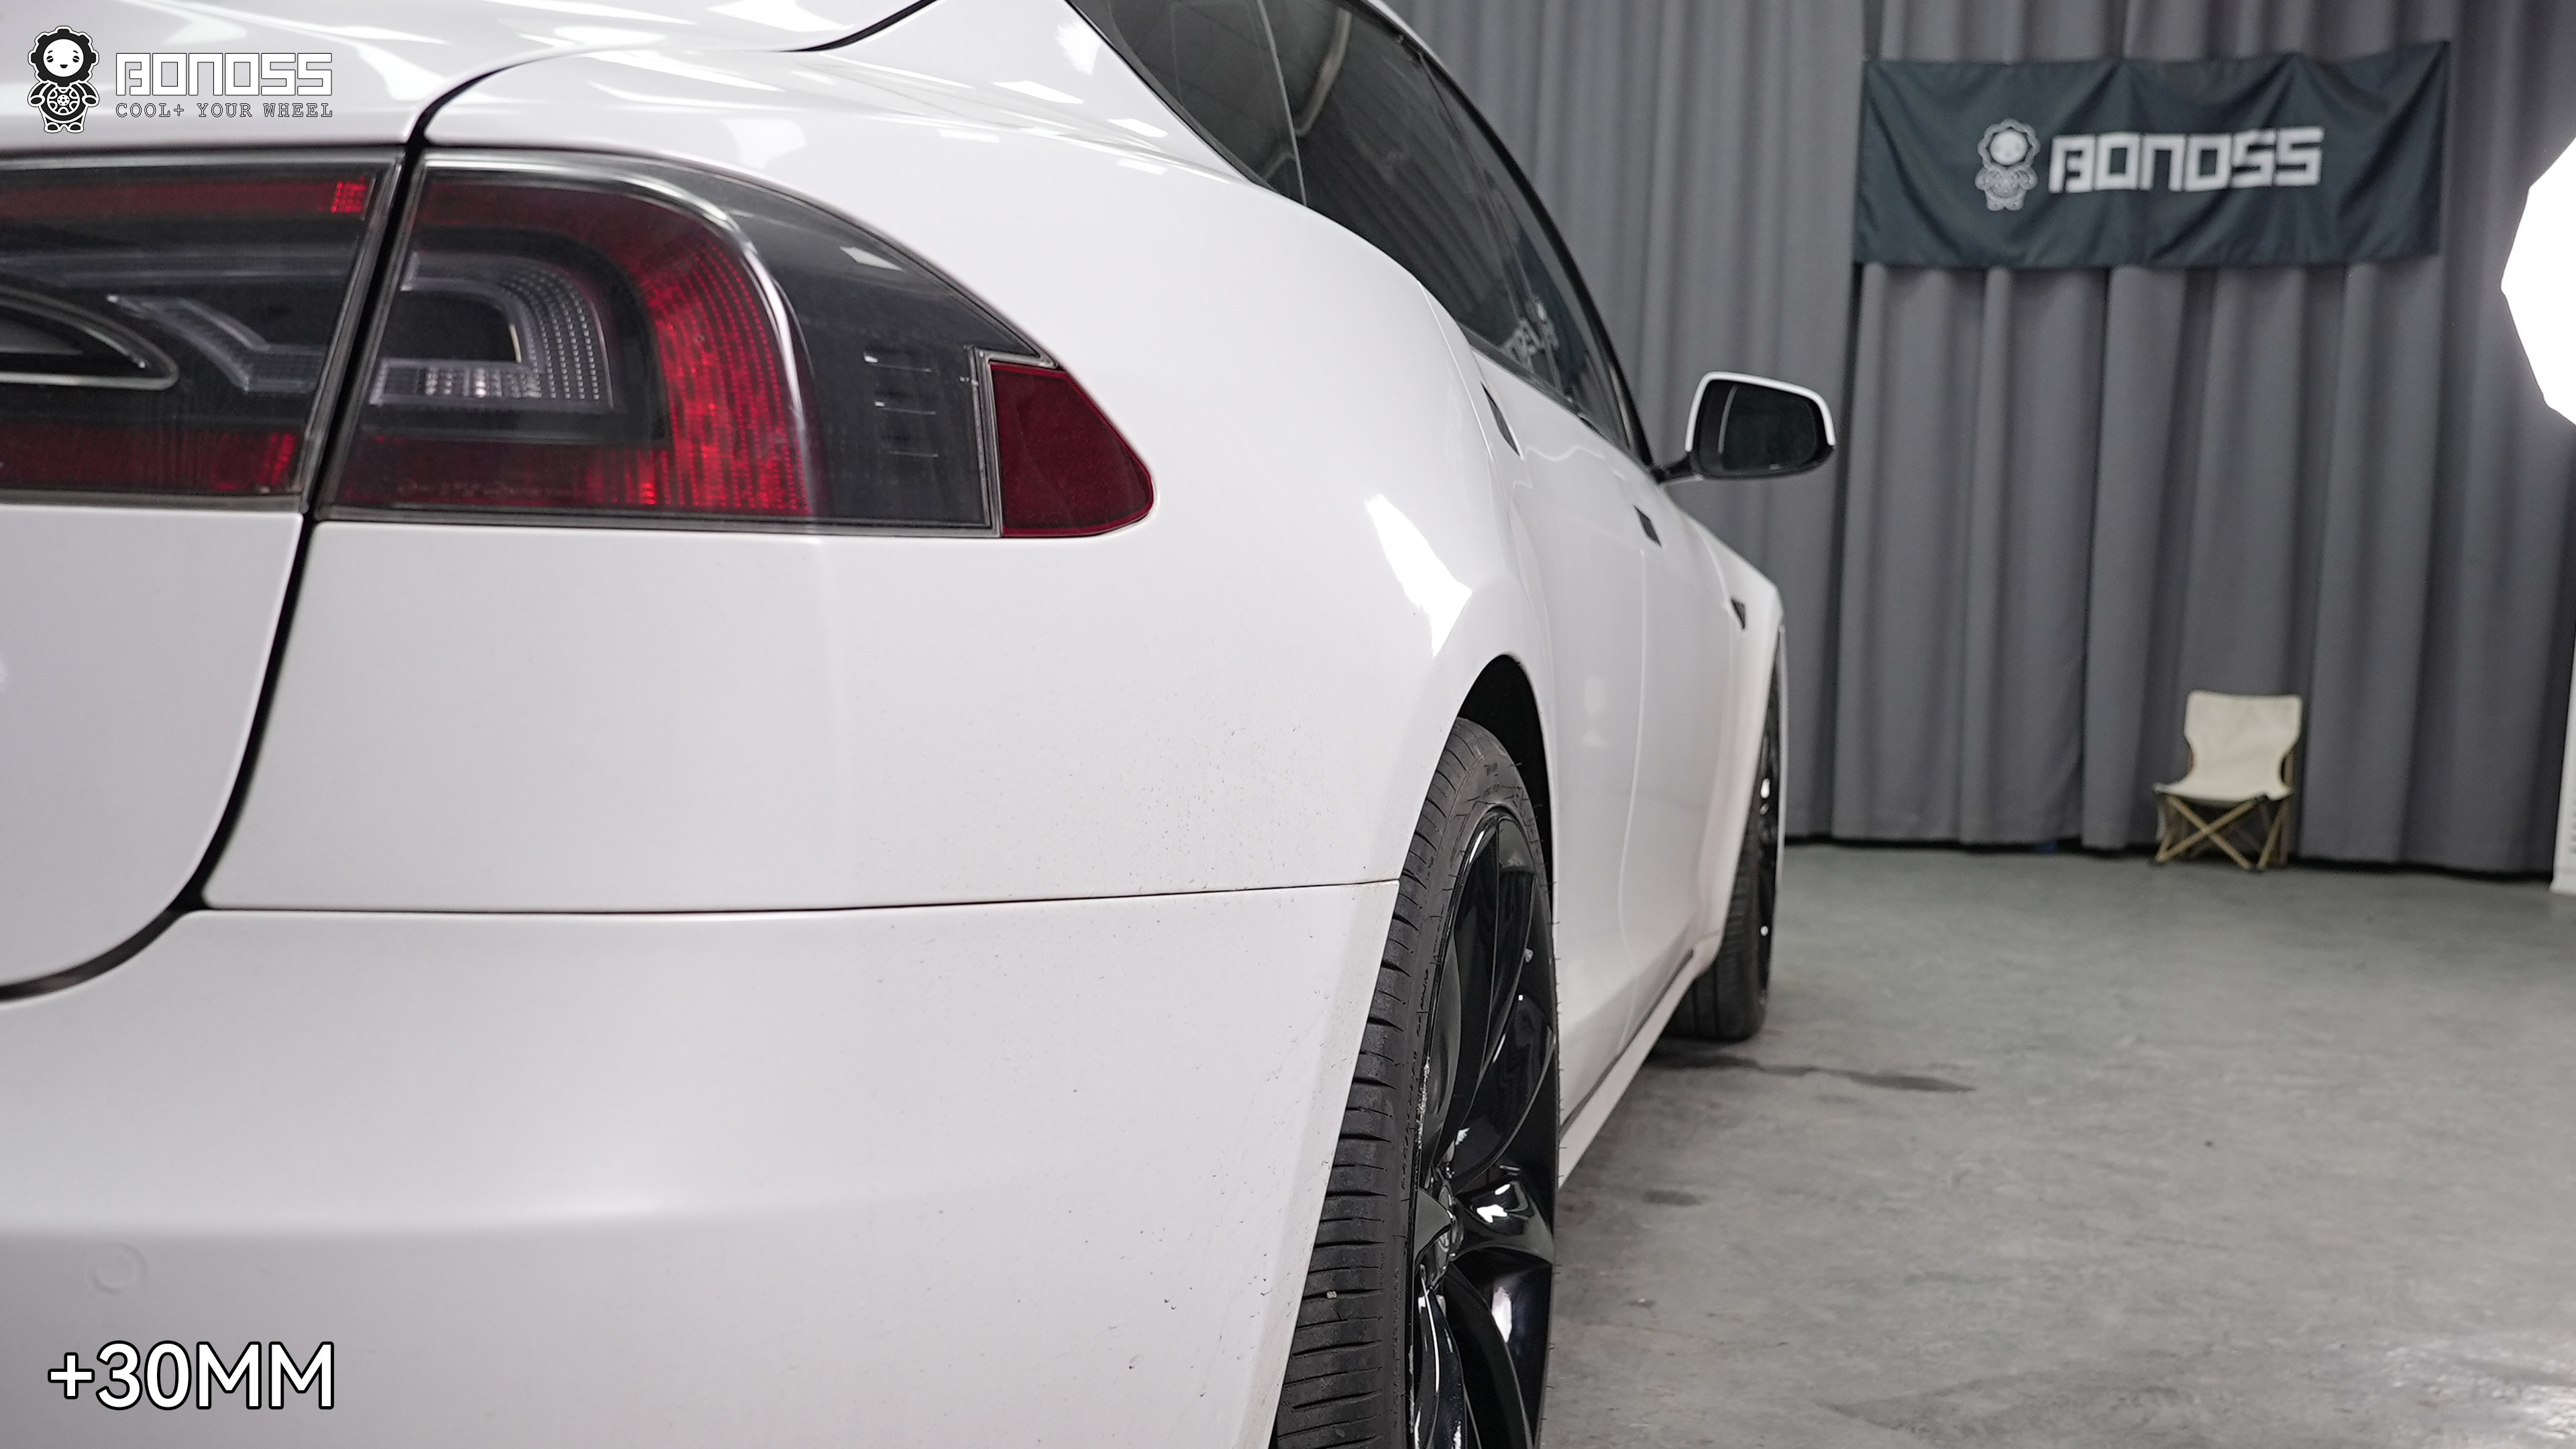
20mm vs 30mm Thickness Comparison
| Position | Spacer | Stock offset | Effective offset | Added track across axle | Purpose on this P85 |
|---|---|---|---|---|---|
| Front | 20mm | ET40 | ET20 | 40mm | Reduce the measured front inset |
| Rear | 30mm | ET40 | ET10 | 60mm | Bring the rear closer to the fender line |
There was no separate instrumented brake-caliper-clearance test because the original wheels already cleared the stock brakes. Moving the wheels outward did not create an inner caliper interference issue in this installation. The meaningful clearance questions here were fender clearance, hub seating, and stud-to-pocket clearance.
Rubbing, Vibration, and the 23,846-Mile Follow-Up
Daniel’s feedback after installation was immediate: “Quality, price, and service all good. Spacers fit perfectly. Went 20mm front and 30mm rear to get the perfect flush stance. Great experience overall—will buy from BONOSS again.”
The longer report carries more weight. At 23,846 miles, he said: “23,846 miles in and still nothing to report. No shake through the wheel, no scrubbing, no odd sounds. The spacers still work well—nothing cracked.”
That covers the issues an owner would actually notice in use: vibration through the steering wheel, contact that produces scrubbing, new noises, and visible spacer condition. It is an owner report, not a laboratory endurance certification.
The result also connects back to the preparation. Hub-centric dimensions support location, clean flanges support even seating, and the two torque procedures secure the two joints. None of those steps deserves sole credit; skipping any one of them would weaken the whole installation.
Cost Breakdown
| Item | Cost |
|---|---|
| Two 20mm forged 6061-T6 spacers | $131.99 |
| Two 30mm forged 6061-T6 spacers | $151.99 |
| Installation labor | $25.00 |
| Total | $308.98 |
The four spacers accounted for $283.98, or about 91.9% of the recorded total. Labor made up the remaining 8.1%. Because no suspension, wheels, or tires were replaced, $308.98 was the entire documented modification cost rather than one line in a larger build.
Prices can change. It is a snapshot of Daniel’s project, not a universal installed-price quote.
The Same Plan for Another Stock P85
A similar project should begin with measurements, not a shopping cart. For this exact car, the complete list was two 20mm spacers for the front, two 30mm spacers for the rear, the matching M14x1.5 fastening hardware, rust-removal supplies, abrasive cloth, and a torque wrench covering both required settings.
The 2014 Tesla Model S hubcentric wheel spacers used here retained the 5×120 pattern and 64.1mm nominal bore architecture. They also retained the factory wheels and their conical-seat nuts. Another vehicle should receive the same checks for PCD, thread, hub register, wheel bore, pocket depth, fender gap, and brake package before ordering.
BONOSS backs the product with a 10-year warranty and has more than 75 SGS and TÜV test reports across its certified product and fastener evidence. Those are useful verification details.
FAQ
What is the bolt pattern of a 2014 Tesla Model S?
This 2014 Model S P85 uses a 5x120mm bolt pattern, with a nominal 64.1mm hub bore and M14x1.5 wheel-hardware thread. Verify the actual vehicle before ordering because a matching model name alone does not confirm every fitment dimension.
What torque should I use for 2014 Model S wheel spacers?
Use 140 Nm (103.5 ft-lb) for the BONOSS nuts securing the spacer to the hub and 175 Nm (129 ft-lb) for the factory nuts securing the wheel to the spacer. The first value comes from BONOSS installation instructions, the second from the owner’s manual, and the two operations must remain separate.
Do I need to trim my studs for 20mm spacers on a Model S?
Daniel did not need trimming because his measured 18.26mm stud projection beyond the 20mm spacer fit inside the 20.58mm OEM wheel pockets. A calculated 23.26mm projection with 15mm spacers would exceed those pockets on this car, so measure both parts before choosing another thickness.
Is 20mm safe on the front of a 2014 Model S?
This measured 20mm front installation produced no owner-reported shake, scrubbing, odd sounds, or visible cracking over 23,846 miles. Safe results depend on compatible hub and wheel dimensions, adequate stud-to-pocket clearance, clean mounting faces, suitable fasteners, and correct torque rather than thickness alone.
Will 20mm spacers affect Tesla range?
Any range effect should be very small because moving the wheels outward modestly changes the car’s aerodynamic footprint. Daniel did not report a meaningful change, so the honest conclusion is negligible expected impact.
Do 2014 Model S and Model X share wheel spacers?
They can share hardware only when the exact PCD, center bore, thread specification, hub geometry, and clearance requirements match. The 5×120 spacers for Tesla and other EVs should never be treated as universally interchangeable across model years or vehicles without those checks.
Conclusion: A Flush P85 Without Replacing the Wheels
The success of these 2014 Tesla Model S 20mm spacers came from the measurements around them. The front 20mm and rear 30mm split achieved Daniel’s flush stance on OEM wheels, the pocket-depth arithmetic avoided unnecessary stud trimming, and the cleaned hub faces gave the spacers a proper seat. The 23,846-mile follow-up then supplied the part that installation photos cannot: evidence of uneventful daily use.
If you are comparing Tesla Model S 20mm spacers for sale or a Model S 20mm spacer pair, start with your own fender gap, hub, studs, and wheel pockets. Then confirm the matching 30mm rear requirement rather than assuming equal thickness at both ends. The 5×120 hub-centric wheel spacers with M14x1.5 studs product page is the next stop for the BONOSS forged active cooling wheel spacers and current fitment details. Bring your measurements, confirm the exact application, and treat the installation torque as two separate procedures.

About Daisy Harris
Daisy Harris has worked for 6 years at BONOSS as an automotive technician, installing and testing wheel spacers, wheel nuts, and wheel bolts. She has personally installed and verified more than 200 wheel-spacer setups across sport sedans, SUVs, and EVs. Her installation guides and reviews are built on real installs, measured clearances, and long-term wear notes — not on spec sheets.